

I remember the exact moment my heart sank. I was sliding a custom-built cherry vanity into place against a gorgeous, rugged ledge-stone wall. In my head, I’d envisioned a seamless transition. In reality? There was a gap so wide I could have parked my truck in it. I was young, arrogant, and I thought I could eye-ball the fit with some thick trim. I ended up wasting three hours and two tubes of expensive color-matched caulk trying to hide my shame. It looked terrible. That’s when an old timer on the job site handed me a compass and a pencil and said, ‘Kid, stop trying to fill the hole and start shaping the wood.’ That was my introduction to the scribing move, and it changed my career forever. Today, I’m going to show you how to avoid that amateur look and get a fit so tight your neighbors will think the stone grew around the cabinet.
Stop Fighting Your Uneven Stone Walls
Natural stone is gorgeous, but it is a nightmare for anyone attempting vanity installation for beginners. You bring a perfectly square box to a wall that has three different planes of depth, and suddenly, your expensive custom work looks like a mistake. We have all been there. You push the cabinet tight at the top, and there is a yawning chasm at the bottom because of a stray piece of granite or slate. Learning this technique is the difference between a job that looks DIY and one that looks like it belongs in a magazine. We aren’t just putting a box in a room; we are integrating it into the architecture. Whether you are working on built-ins against stone fireplaces or a simple bathroom upgrade, the wall is never your friend. If you have ever tried to just ‘make it work’ without a plan, you know exactly how frustrating those out-of-square alcoves can be.
Is this technique too difficult for a weekend warrior?
You might be worried that taking a saw to your finished cabinet is a recipe for disaster. I get it. The fear of a jagged cut or a ruined face frame is real. But here is the secret: it is actually more forgiving than you think. By following proven scribing secrets, you create a custom-fit edge that actually hides small imperfections. According to the Natural Stone Institute, natural stone surfaces can have significant depth variations that make standard trim impossible to use effectively. If you want the professional results found in our expert guide to flawless vanity installation, you have to embrace the scribe. Have you ever tried to hide a massive gap with caulk only to have it look like a messy art project? I want to help you move past that and achieve the precision your home deserves. Let’s look at why this works and how we start the process.
Get Your Cabinet Perfectly Plumb Before You Trace
Before you even think about picking up a pencil, you have to accept a hard truth: the cabinet stays still while the wall does all the dancing. You need to pull your vanity away from the stone just enough so that the widest gap is slightly smaller than the width of your scribe material. I usually aim for about an inch of ‘breathing room’ for the scribe. If you don’t get the cabinet level and plumb now, the whole project is doomed from the start. I remember a job in a rustic mountain cabin where I was in a rush and skipped the level, just pushing the cabinet ‘close enough’ to the eye. When I finally cut the scribe, the vanity was tilted three degrees. It looked like the leaning tower of Pisa. I had to throw the side panel away and start over. It was a $200 mistake that cost me a full day of progress. Always use your shims to ensure the box is exactly where it needs to be in 3D space, mirroring the advice in our step-by-step guide to vanity installation for beginners.
Why Shims Are Your Best Friends
Think of shims as the foundation of your fit. Without them, your cabinet will rock, and a rocking cabinet means a wandering scribe line. You want the unit braced so tightly it won’t budge when you apply pressure with the compass. This stability is the secret to tackling out-of-square alcoves without losing your mind.
Draw a Surgical Map of the Stone Face
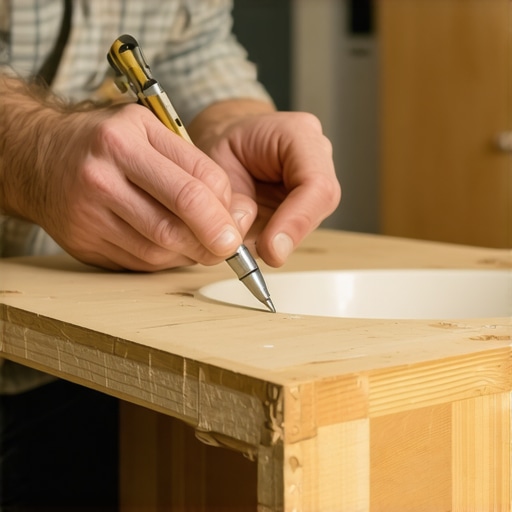
Now, set your compass. This tool is the heart of the operation. Open the compass to the distance between the wall and the edge of your cabinet face frame. If the gap varies—which it will—find the widest point and set your span there. Place the metal point on the stone and the pencil on the wood. As you drag the compass down, it behaves like a record player needle following the groove of the stone. It transfers every bump, dip, and crag onto your wood. I once worked on a project with stacked slate where every piece stuck out at a different depth. I tried to scribe it with a standard pencil held against my finger, and it was a disaster. The pencil lead snapped on a sharp edge, and the line was useless. Now, I only use a locking compass to ensure the width stays consistent throughout the entire vertical run.
The Difference a Sharp Point Makes
When you are following the texture of natural stone, your pencil needs to be sharp enough to catch the tiny recesses. This isn’t just about making a mark; it’s about the scribing secret for perfect built-ins that separates pros from amateurs. If your line is blurry or thick, your cut will be inaccurate, and you’ll be back to using caulk to hide the gaps.
Avoid the Jagged Edge With a Back-Bevel Cut
When it comes time to cut, put the jigsaw down for a second and think about the angle. To achieve the magazine-quality finish seen in our expert guide to flawless vanity installation, you should use a back-bevel technique. This means you tilt your saw or sander at a 5 or 10-degree angle, cutting more wood away from the back of the frame than the front. This way, only the very front ‘show’ edge of the wood touches the stone. Think of it like a knife edge meeting the wall. This is one of the most effective vanity installation hacks that save time and money because it makes the final fitting much faster. You only have to worry about that thin front edge clearing the stone’s peaks, rather than fighting the full thickness of the cabinet side. For particularly rugged stone, use a belt sander for the final 1/16th of an inch to sneak up on that perfect, seamless fit.
Why a Zero-Gap Fit Can Actually Kill Your Cabinet
Common wisdom says the goal of a perfect scribe is to have no space at all between the wood and the stone. I am going to tell you something that sounds crazy: if you make it *too* tight, you are setting yourself up for failure. Wood is an organic material that breathes. According to the Architectural Woodwork Institute (AWI), wood cabinets can expand and contract significantly based on seasonal changes in relative humidity. If you jam a cabinet face frame into a rigid, unyielding stone wall with zero room for movement, something has to give. Usually, it is the cabinet joints that crack or the door hinges that suddenly stop aligning. It is better to have a microscopic ‘hairline’ gap that allows for expansion than a pressurized fit that leads to structural stress. This is one of those expert guide to flawless vanity installation nuances that takes years to learn.
Can you install a heavy vanity over radiant floor heating without a disaster?
This is a question I get from homeowners who are doing high-end remodels. Most people assume you just screw it to the wall and call it a day. But if you have a massive double-vanity with a 3cm quartz top, you cannot rely on the wall alone, especially if you have heated floors underneath where you cannot drill. You need to know the secret to mounting vanities over radiant floor heat to avoid puncturing a water line or shorting out an electric mat. I once saw a guy drill into a floor loop; the geyser of hot water ruined $10,000 worth of custom walnut. The ‘Oops’ factor here is real. If the wall is stone, you often lack the structural backing to hold that weight, so you must use a hidden sub-frame or a steel plate strategy to distribute the load across multiple studs rather than just the ones directly behind the box.
The Moisture Trap Most People Ignore
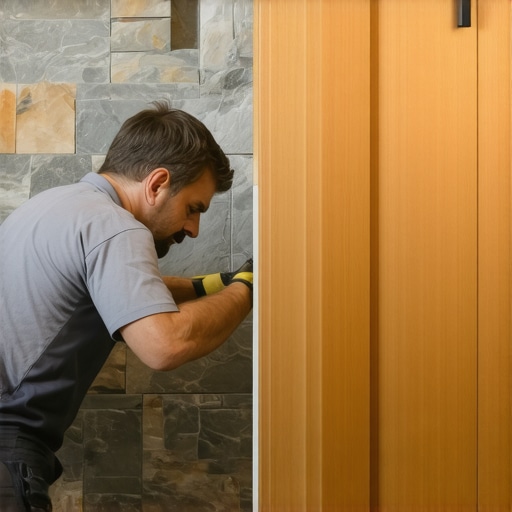
Another common mistake is ignoring the micro-climate behind the cabinet. When you put wood against a cold outer wall made of stone or masonry, you create a perfect recipe for condensation. Without a moisture barrier, that beautiful scribe job will eventually lead to the wood rotting from the inside out. You should always use a moisture barrier trick for vanities against cold walls to ensure longevity. This is especially critical if you want to stop cabinet doors from warping in humid bathrooms. Don’t let your hard work be undone by a lack of airflow or a temperature differential you didn’t see coming. Have you ever fallen into this trap where a ‘perfect’ fit ended up causing problems six months later? Let me know in the comments. We can all learn from those frustrating ‘learning opportunities’ that happen when we think we have mastered the craft.
Don’t Let Your Built-Ins Pull Away From the Ceiling
Finally, let us talk about the vertical dimension. If you are doing floor-to-ceiling units, most amateurs scribe the sides but forget that the ceiling is also sagging or crowning. If you don’t account for the weight of the unit settling over time, you will end up wondering why your built-in cabinets are pulling away from the ceiling. Use a floating crown molding or a shadow gap to mask this inevitable movement. It is these small vanity installation hacks that save time and money in the long run because they prevent call-backs. Real expertise is not just about making it look good on day one; it is about making sure it still looks good on year ten.
Upgrade Your Toolkit Before You Touch the Wood
If you are still using the cheap metal compass from your 8th-grade geometry class, throw it away. I personally swear by the FastCap AccuScribe Pro because its flat base stays parallel to the cabinet face frame, preventing the tip-over errors that ruin a line. This is crucial when you are executing an expert guide to flawless vanity installation. I have seen guys try to tape a pencil to a block of wood, but when you are dealing with the jagged texture of natural stone, you need a locking mechanism that won’t budge under pressure. This tool allows you to maintain a consistent offset even when navigating deep crevices in a ledge-stone wall.
Why the Belt Sander Is My Secret Scribing Weapon
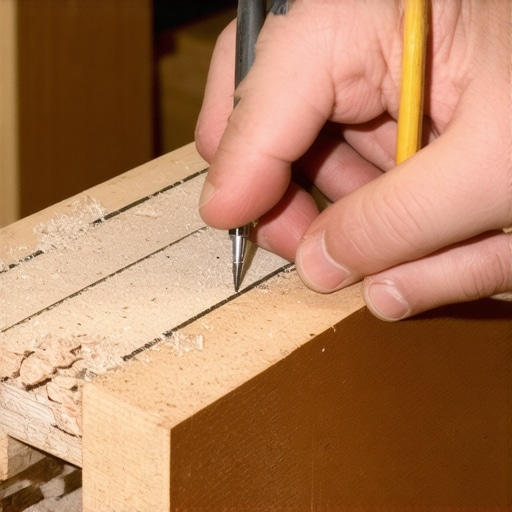
Once the line is drawn, I rarely reach for my jigsaw first. Instead, I use a 4×24 belt sander with 60-grit paper to aggressively back-bevel the wood. By removing the bulk of the material from the rear, you create a thin ‘lip’ that can be fine-tuned with a hand plane or a sanding block. This approach is one of those vanity installation hacks that save time and money because it reduces the risk of tear-out on the finished face. According to the Journal of Light Construction, a back-bevel of at least 15 degrees is ideal for fitting cabinetry to irregular masonry to allow for minor onsite adjustments without the need for a full re-scribe. This technique ensures that only the front edge of your innovative storage solutions to transform your bathroom makes contact with the stone, creating that seamless ‘grown-in’ look.
How do I keep my scribe lines looking sharp as the house settles?
No matter how tight your fit is today, houses move. To maintain your high-end installation, you need to apply a tiny, almost invisible bead of high-quality flexible sealant—not standard bathroom caulk—where the wood meets the stone. This prevents moisture from seeping behind the cabinet, which is vital to stop cabinet doors from warping in humid bathrooms. I check these joints once a year; if the house settles and a gap appears, a quick touch-up with a color-matched wax fill-stick keeps it looking like day one. This proactive maintenance is what keeps built-in storage ideas to declutter and enhance your home looking premium for decades.
High-Tech Templates Are Changing the Scribing Game
Looking ahead, we are seeing a major shift toward digital templating. Hand-scribing is a master skill, but LiDAR-equipped tablets are starting to allow installers to create perfect 3D digital maps of stone walls before the cabinet even leaves the shop. Soon, your custom cabinetry will arrive pre-CNC-cut to fit your specific wall’s ‘DNA.’ For now, though, the manual scribe remains king. My challenge to you: on your next project, try the back-bevel sander technique instead of the jigsaw. You will be shocked at how much more control you have over the final fit. If you need help with the basics, check our step-by-step guide to vanity installation for beginners or contact us for expert advice.
What I Learned the Hard Way About Stone-Wall Built-ins
Over two decades of fitting custom cabinets, I have had my fair share of “oops” moments that taught me more than any textbook ever could. First, scribing is actually about the illusion of perfection. You aren’t trying to mirror every microscopic pore of the stone; you are creating a visual bridge that tricks the eye into seeing a seamless union. Second, the back-bevel is your best friend. By removing more material from the rear, you give yourself the physical room to adjust the fit without the wood binding against the stone’s peaks. Finally, always respect the wood’s movement. A “perfect” zero-gap fit in winter can become a structural nightmare in a humid summer. This is why our expert guide to flawless vanity installation emphasizes the need for breathing room and precision.
My Go-To Gear for a Flawless Fit
If you want to move beyond basic DIY, you need tools that offer professional precision. I never go to a job site without my locking compass; it is the only way to ensure your offset stays consistent across a long vertical run. For the actual shaping, a belt sander with 60-grit paper is far more effective than a jigsaw for fine-tuning that back-bevel edge without causing tear-out. I also recommend keeping a flexible high-grade sealant on hand for the final touch. Unlike standard cheap caulk, these move with the house, ensuring your effortless storage solutions for a tidy stylish home look professional for decades. I trust these tools because they have saved my reputation on more than one “impossible” wall.
Take the Leap and Start Scribing
It is easy to get intimidated by a jagged stone wall, but remember that every master was once a beginner who was afraid to ruin a piece of wood. The “scribing move” is a rite of passage that elevates your work from “bought at a store” to “hand-crafted for this specific home.” Whether you are installing innovative storage solutions to transform your bathroom or a simple utility cabinet, the effort you put into the fit is what people will notice. Don’t be afraid to take your time, check your plumb twice, and sneak up on that line with your sander. You have the skills and the vanity installation hacks that save time and money to make it happen. Have you ever encountered a wall so crooked it made you want to quit the project? Let me know in the comments below how you handled it!