

I still remember the distinct, acrid scent of hot circuit boards wafting from my brand-new walnut media console back in 2018. I’d spent nearly a month sanding, staining, and obsessing over the grain, only to realize I’d essentially built a high-end oven for my PlayStation and home theater receiver. Within two hours of a movie marathon, the cabinet doors were warm to the touch, and the fans inside my gear sounded like a jet engine taking off. It was a classic rookie mistake, and it almost cost me thousands in fried hardware.
How I Stopped Baking My Electronics in Secret
That burnt plastic realization was my wake-up call that airflow is just as important as aesthetics. Most people think you have to choose between a sleek, seamless look and keeping your gear cool, but that is simply not true. My Stealth Venting Move is all about creating a hidden chimney effect without those hideous plastic grilles you see in cheap office furniture. By using a combination of recessed toe kicks and hidden top-edge gaps, you can keep your components at optimal temperatures without anyone ever seeing a hole. This is about as crucial as the hidden wall plate strategy for floating media shelves when it comes to long-term durability. If you don’t get the air moving, you’re not just risking a system crash; you’re inviting a fire hazard. In fact, the National Fire Protection Association notes that electrical distribution and lighting equipment are leading causes of home fires, often exacerbated by confined heat.
Is cutting holes in my custom cabinets actually worth the risk?
I get the hesitation. You’ve invested in creative built-ins for seamless storage and home aesthetics, and the last thing you want to do is take a jigsaw to the back panel. But let me tell you from experience: a dead receiver is way uglier than a hidden vent. Early in my career, I tried to cheat by just leaving the back off the cabinet, but without a dedicated intake and exhaust path, the hot air just stayed trapped in the top corners. It didn’t work. Today, we are going to solve that once and for all. Have you ever felt that wave of heat when you open your media cabinet doors? Let me know if you’ve seen your gear throttle because of it. We are going to dive into the specific cuts and placements that keep things cool and invisible. Just like the toe kick ventilation fix for under-cabinet heaters, this move is a total game changer for the longevity of your home tech.To get the air moving, you need to think about your cabinet as a living, breathing engine. Heat rises naturally, so our job is to facilitate that movement without making the furniture look like a server rack. This process starts from the bottom up. I remember a project where I built a beautiful oak entertainment center and, in my rush to finish, I forgot that the floor-level intake is the most critical part. I ended up having to crawl inside with a palm router to retroactively fix it—it was messy, cramped, and I nearly ruined the finish.
Build a Natural Chimney Inside Your Media Console
The goal is to create a constant loop of air. Cold air enters at the floor, warms up as it passes over your gaming console or receiver, and exits out the top. If you miss either end of this equation, you’re just circulating hot air in a circle until your hardware throttles. This is a common pitfall when people look for creative built-ins for seamless storage and home aesthetics; they focus on the doors and forget the lungs of the unit.
How to Pull Cool Air from the Floor
The ‘Intake’ happens at the toe kick—the recessed area where the cabinet meets the floor. Instead of a solid piece of wood, I use a 1/2-inch gap or a series of 1/4-inch slots hidden behind the overhang. This allows the system to drink in the coolest air in the room. If you are working with maximizing space and innovative built-in solutions for small rooms, every millimeter of this intake path matters. You can even use a black mesh screen behind the slots to keep spiders and dust bunnies from moving in.
Creating the Invisible Top-Shelf Escape Hatch
Once that cool air is in, it needs a clear exit strategy. The biggest mistake is thinking a hole in the middle of the back panel is enough. It is not. Heat gets trapped in the ‘dead zone’ between the top shelf and the cabinet ceiling. To fix this, I set my back panels 1 inch short of the top. This creates a full-width gap that is completely invisible from the front but acts like a massive exhaust vent. It is a similar logic to built-in storage ideas to declutter and enhance your home where you prioritize functionality without sacrificing the look. If your gaps look sloppy during the cut, you might need to learn how to fix uneven gaps in custom built-in doors to ensure the rest of the unit stays perfectly aligned.
The Proper Way to Space Your Hot Electronics
Finally, you have to play Tetris with your gear. Don’t stack a hot gaming console directly on top of a heavy-duty amplifier. I usually leave at least two inches of ‘breathing room’ between components. Think of it like a highway: if you block the lanes, the traffic (heat) stops moving. In that walnut console I mentioned earlier, I actually added internal shelf dividers that were 2 inches narrower than the cabinet depth. This allowed air to bypass the shelves and move vertically through the entire unit. It is these small, internal adjustments that make the difference between a system that lasts a decade and one that fries in six months.Everyone tells you to just slap a couple of USB fans in the back and call it a day. I used to be that guy. But here is the contrarian truth: active cooling is often a Band-Aid for a fundamentally broken design. If your cabinet does not have a natural thermal path, fans often just create turbulent pockets of hot air that swirl around like a convection oven. I have seen high-end receivers fry because a fan was pushing air against the natural rising heat instead of with it. Relying solely on power-hungry fans is a lazy way to handle creative built-ins for seamless storage and home aesthetics.
The Dust-Proofing Trap That Kills Hardware
The biggest ‘oops’ factor I see with advanced DIYers is the obsession with sealing. I see people seal every single crack with silicone or weatherstripping to keep their components pristine and dust-free. They think they are protecting the gear, but they are actually creating a stagnant, humid microclimate. This is a far cry from the breathable approach used in expert guide to flawless vanity installation tricks and tips. According to data from the Uptime Institute, for every 18°F (10°C) increase above 70°F, the long-term reliability of electronic components is cut in half. By over-sealing those gaps, you are not saving them from dust; you are sentencing them to a slow, heat-induced death. Have you ever fallen into this trap of over-sealing your cabinets? Let me know in the comments below.
Why is your gear still throttling even with an exhaust fan?
Usually, the culprit is a lack of intake. A fan cannot pull air out of a vacuum. If you do not have that floor-level intake or a properly sized toe kick gap, the fan is just straining its motor and creating noise without actually moving air. I have found that vanity installation hacks that save time and money often apply here too—sometimes the simplest structural bypass is better than a complex electronic fix. If you notice your fan is working overtime but the cabinet is still a sauna, check your intake path. You might need to learn how to fix uneven gaps in custom built-in doors to ensure you can widen a hidden ventilation slot without ruining the visual symmetry of your project. Master the passive flow first, and your gear will thank you for years to come.If you want to be a pro, you need to stop guessing. I never finish a build without pulling out my infrared thermometer gun—specifically the Etekcity Lasergrip. It is a $20 tool that prevents $2,000 mistakes. I use it to map the “hot spots” on the surface of the equipment and the temperature of the air exiting the top gap. If the exhaust air is more than 15 degrees hotter than the intake, I know my chimney effect is failing. This level of precision is what separates a weekend hobbyist from someone providing expert guide to flawless vanity installation tricks and tips.
The Gear You Need to Verify Your Airflow
Beyond the thermometer, a simple incense stick or a small smoke pen is my secret weapon for visualizing the actual movement of air. If the smoke does not get sucked into the toe kick and puffed out the top gap within seconds, the path is blocked. This is not just for media; I use these same airflow principles when implementing 5 smart bathroom vanity wiring hacks for a flush cabinet finish to ensure that hidden transformers for LED strips do not overheat behind the mirror. 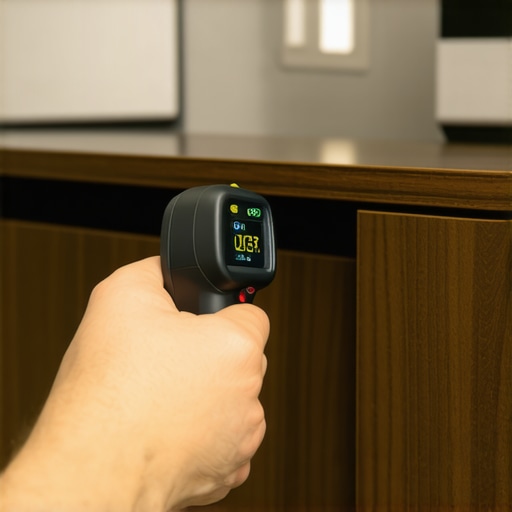
How do I maintain these hidden ventilation paths over time?
The biggest enemy of passive cooling is the dust bunny. Every six months, you need to take a canister of compressed air to those toe kick slots and the top exhaust gap. If you have used a mesh screen, vacuum it out. I have seen beautiful creative built-ins for seamless storage and home aesthetics lose their cooling efficiency in just a year because the intake was choked with pet hair. It is also vital to check the door hinges; wood shifts with the seasons, and if your door sags, it might block the very gap you spent hours cutting. If you notice things looking slightly off-kilter, you should definitely brush up on how to fix uneven gaps in custom built-in doors to keep that airflow path wide open.
Smart furniture is closer than you think
Looking ahead, I predict we are going to see a massive shift toward “active-passive hybrid” systems. We are already seeing hardware manufacturers like Sony provide specific technical documentation—their official PS5 safety guide explicitly mandates at least 10cm of clearance from any wall surface for rear exhaust—but future cabinets will likely have integrated sensors that trigger silent, ultra-low-RPM fans only when the ambient internal temp hits a specific threshold. We are moving away from dumb boxes and toward furniture that actually communicates with the tech it holds. For your next project, I challenge you to skip the ugly plastic grilles and try the 1-inch “short-back” exhaust method I described earlier. Test it with a smoke pen. Seeing that air move for the first time is a weirdly satisfying feeling that proves your craftsmanship is not just skin deep.
What No One Tells You About Heat and Wood Movement
After years of building high-end units, I discovered that heat isn’t just an enemy of your PlayStation; it is an enemy of the wood itself. Localized heat from a high-powered receiver can dry out the interior of a cabinet unevenly, causing internal panels to warp or crack while the exterior stays perfectly fine. To prevent this, your airflow needs to be consistent, not just powerful. Much like the moisture barrier fix for vanities on cold basement floors, protecting your materials from environmental stress is key to longevity. Additionally, remember that cables are physical blockages. If your wire management is a bird’s nest, it won’t matter how many vents you have. Apply the same precision you would use for 5 smart bathroom vanity wiring hacks for a flush cabinet finish to keep your cable runs tight and out of the way of your air path.
The Precise Tools I Use to Verify Every Build
I don’t trust my gut when it comes to thermal management; I trust data. Here are the three items in my kit that ensure every unit I build is performing at its peak. First, the Etekcity Lasergrip 774 is essential for finding the exact hot spots on your equipment. Second, a simple smoke pen or even a stick of incense is the only way to truly visualize the “chimney effect” we’ve built. If that smoke isn’t moving steadily upward, you need to adjust your gaps. Finally, for projects that require active cooling, I only recommend the AC Infinity AIRPLATE series. They are the gold standard for silence and reliability, much like the hardware mentioned in the expert guide to flawless vanity installation tricks and tips. These tools turn a guessing game into a science.
Build for the Future of Your Home Tech
Your electronics will inevitably change, but your cabinetry should last a lifetime. By mastering the art of the invisible chimney, you are ensuring that your creative built-ins for seamless storage and home aesthetics remain as functional as they are beautiful. Don’t let the fear of a little extra math stop you from creating a professional-grade environment for your gear. Keep an eye on your structure as the seasons change; if you notice your doors aren’t sitting right, you may need to learn how to fix uneven gaps in custom built-in doors to keep those ventilation paths clear. Now go out there, make some sawdust, and keep those processors cool. What is the hottest piece of gear you are planning to hide in your next custom build? Let me know in the comments below!