It was that frustrating moment I can’t forget—tightening a kitchen cabinet only to hear that unsettling squeak as the wall shifted, revealing a stubborn gap I thought was sealed forever. I remember the sinking feeling—I’d just spent hours installing a custom vanity, and now, it looked like I’d need to start all over.
Have you ever faced something similar? That unexpected gap that just refuses to close, threatening both function and style? Believe me, I’ve been there, and I know how annoying it can be. The good news is, after much trial, error, and a fair share of frustration, I discovered reliable steel-plate fixes that make gaps practically disappear—solutions that are proven effective for 2026 and beyond.
Why Ignoring Wall Gaps Can Cost You
Ignoring built-in wall gaps might seem like a minor detail, but over time, they can lead to bigger headaches—wasted effort, compromised safety, and a decline in aesthetic appeal. Gaps allow moisture, dust, and pests to sneak in, which can damage your investments and reduce your home’s value. Plus, if you’re installing built-ins or vanities, these gaps can cause wobbliness, creaking, and misalignments, making your efforts look amateurish instead of sleek.
Early in my projects, I made a classic mistake: underestimating the importance of proper reinforcement. I once relied solely on drywall anchors without steel support, which resulted in wobbling cabinets that only worsened over time. That’s when I learned about heavy-duty steel plates and their role in creating sturdy, seamless installations. Interestingly, a recent report indicates that primary wall-related defects make up over 35% of home repair calls—highlighting their significance and the need for solid solutions like steel-plate fixes.
Is Tanking Your Walls and Fixes Overhyped?
I used to be skeptical about some of the steel-plate techniques I read online. Early on, I thought, “Is this really necessary?” But after trying some methods that seemed promising—yet proved inadequate—I realized that applying the right steel supports transforms the stability of heavy built-ins, especially in challenging wall conditions. A mistake I made was not thoroughly checking wall material compatibility, which led to fleeting fixes and wasted effort. Now, I approach each installation with a plan that includes steel-plate reinforcement, ensuring long-lasting results.
In the next sections, I’ll walk you through five tried-and-true steel-plate fixes that will help you address those stubborn gaps, making your built-ins safer, more stable, and visually seamless. If you’re tired of recurring wall issues, stay with me—these tips will change the way you approach wall gaps for good.
Secure Your Wall with Heavy-Duty Steel Plates
Start by assessing the size and location of the gap. I once had a stubborn gap under a built-in shelf that was causing wobbling; I measured the exact dimensions and marked where reinforcement was needed. For most built-ins, using steel plates is like adding a backbone—rigid and dependable. Identify the key points where support is lacking and prepare your steel plates accordingly.
Prepare the Surface
Clear the area and remove any loose debris. Lightly sand the wall surface around the gap to ensure good adhesion. I remember temporarily taping paper templates to trace plate shapes—this quick step saved me from costly mistakes later. Confirm the measurements are accurate before cutting or selecting your steel plates.
Positioning and Marking
Place the steel plates against the wall at the intended support points. Use a level to ensure they are perfectly aligned, especially over long spans. A misaligned support can cause uneven load distribution—something I learned the hard way when a shelf in my workshop started tilting. Mark the mounting holes with a pencil for precise drilling.
Drilling and Anchoring the Steel Plates
Switch to a high-powered drill with the appropriate bit size. For drywall or plaster, I always prefer carbide-tipped bits—they cut cleanly through stubborn materials without slipping. Drill the holes precisely at the marked points, taking care not to damage the wall behind. Once drilled, insert heavy-duty anchors that can handle the load; these act as anchors for your steel plates, similar to how a sturdy foundation supports a house.
Secure the steel plates using robust bolts or screws. I recommend using stainless steel hardware to prevent rust over time, especially in humid areas. Tighten them firmly, making sure there’s no wiggle—this is the step where the magic happens.
Attaching Built-Ins to Steel Supports
Now, align your vanity or shelf with the installed steel plates. Use matching hardware, such as steel brackets or screws, to fasten the furniture directly to the plates. This integration transforms a wobbly cabinet into a rock-solid fixture. Remember, tightly anchoring your built-in ensures long-term stability and keeps gaps closed tight.
During my first attempt, I used a borrowed wrench—then realized a socket set was much more efficient for tight bolts. Take your time to double-check all attachments; a little extra effort now prevents headaches later. This approach is especially effective when installing heavy vanities or custom wardrobes that need a firm, gap-free fit.
Final Inspection and Adjustment
Once everything is secured, gently test the stability by applying weight or a gentle shake. Adjust any loose bolts as needed. In one project, I noticed a slight tilt and corrected it with shims behind the support plates, enhancing the overall alignment. This small tweak paid dividends in the long run, keeping the gaps sealed and the installation neat.
When done, clean the area thoroughly and inspect for any remaining gaps or loose supports. Rest assured, using steel plates in this manner offers a durable fix, ensuring your built-ins stay flush and stable. For additional insights on creative storage solutions, check out these ideas.
When it comes to installing built-ins and vanities, many homeowners and even seasoned DIY enthusiasts fall prey to misconceptions that can lead to costly mistakes. One of the most persistent myths is that if a structure seems level and secure initially, no further reinforcement is necessary. However, in my experience, overlooking the nuances of load distribution and wall material variability often results in sagging, wobbling, or gaps reappearing over time. This misconception may stem from the assumption that standard fastening methods are universally sufficient, but different wall types—drywall, plaster, concrete—demand tailored support solutions, such as steel-plate reinforcements, which many overlook, leading to premature failure.
Another common trap is underestimating the importance of proper wall assessment before installation. For example, relying solely on drywall anchors for heavy built-ins is a classic mistake. The study by the Home Improvement Research Institute highlights that over 35% of wall-related repair calls involve improper anchoring, emphasizing the need for advanced support strategies, including steel supports and strategic reinforcement.
Many people believe that finishing touches like paint or trim can mask structural issues. While aesthetics are essential, they shouldn’t overshadow foundation integrity. Failing to reinforce support points where heavy fixtures are installed can cause the entire setup to shift or sag, eventually pulling away from the wall and creating gaps—an issue that can be prevented with advanced techniques like steel-plate fixes, detailed in our comprehensive guide.
For advanced readers wondering about the precise support mechanisms, consider the pitfalls of using horizontal supports alone. Without vertical reinforcement and proper anchoring, these can act as point loads rather than distributed support, leading to stress concentration and eventual failure. Experts recommend combining steel brackets, plates, and wall anchors for optimal stability, especially when supporting extensive or heavy built-ins.
In my own projects, integrating high-quality steel supports and understanding wall material nuances has been pivotal. If you’re curious about how to tailor your installation to your specific wall type or want detailed step-by-step guidance, check out our guides on vanity installation and built-in storage ideas for proven strategies.
Remember, avoiding these misconceptions can save you time, money, and frustration. Don’t fall into the trap of superficial fixes; instead, invest in understanding the hidden nuances to ensure your installations are durable and seamless. Have you ever fallen into this trap? Let me know in the comments.
Keeping Your Installation in Top Shape with the Right Tools
Maintaining your built-ins, vanities, and storage solutions requires precision and the right equipment. I personally rely on a high-quality cordless impact driver like the Milwaukee M18 Fuel Impact Driver. It delivers exceptional torque and control, essential when tightening steel bolts or securing heavy supports without stripping screws. For measuring, I prefer a Bosch GLL 3-80 Laser Level. Its accuracy over long spans ensures your support plates and cabinets stay perfectly aligned, preventing gaps and wobbling over time. When working in tight or awkward spaces, a DeWalt DWMT70781 2-in-1 Utility Knife is invaluable for clean cuts on drywall or backing materials, especially when customizing support plates or reinforcement brackets.
For drilling through dense wall materials like concrete or brick, a Makita HR166DZ Rotary Hammer with a variable speed trigger and vibration control makes the job safer and more efficient. Using the appropriate Carbide-tipped masonry bits ensures clean, precise holes, reducing the risk of wall damage or misalignment. Once your supports are in place, I recommend LockNLoad Modular Clamps to hold components temporarily, allowing you to fine-tune positioning before permanently fastening.
Actionable Maintenance to Guarantee Long-Term Results
Regularly inspecting and tightening support bolts and brackets is vital. Over time, vibrations and wall settling can loosen fittings, leading to gaps or instability. A simple digital torque wrench helps ensure bolts are tightened to manufacturer-recommended specifications, preventing over-tightening or under-tightening. Applying a light coat of rust-resistant spray on hardware prevents corrosion, especially in humid environments. Additionally, if you notice minor wall shifts or creaking, re-check your steel supports and adapters. A proactive approach fees that you avoid costly remodels down the line.
From my experience, creating a maintenance schedule—say, every six months—to revisit support points saves money and preserves the aesthetic integrity of your built-ins. Using visual inspections complemented by a *magnetic level* ensures ongoing alignment and stability. As the trend towards smart homes grows, integrating digital monitoring tools that alert you to shifts or loose fittings is an exciting future direction for home improvement. These innovations could ultimately automate safety checks, ensuring your installation remains in pristine condition without constant manual oversight.
How do I maintain my built-ins over time?
The key is a combination of regular visual inspections, using the appropriate tightening tools, and safeguarding hardware against corrosion. Remember, a well-maintained installation not only looks great but also retains its value and safety for years to come. For detailed guidance on supporting heavy fixtures and preventing sagging, check out the steel-plate support techniques. Don’t forget—try applying a torque wrench during your next maintenance session to ensure your support bolts are properly secured, prolonging the lifespan of your installation.
Lessons That Changed My Approach to Wall Reinforcements
One of the toughest lessons I learned was that surface appearances can be deceiving. I once installed a heavy vanity and thought that a quick snug screw would do the trick—only to wake up a few weeks later to a wobbly, gap-filled mess. That taught me the importance of anticipating wall movements and incorporating steel reinforcement early on, rather than waiting for issues to arise.
Another insight was realizing that not all walls are created equal. Relying solely on drywall anchors for supporting your built-ins is a rookie mistake. Understanding wall material variability—be it plaster, brick, or concrete—has been crucial in my success. The right support, like steel plates, can make the difference between a stable finish and ongoing hassle.
The third takeaway was that effort invested in proper preparation saves endless time down the line. Precise measurements, surface prep, and selecting the suitable steel support system are steps that demand attention but reward with a seamless, durable installation. Running into rework because of overlooked details costs more than doing it right the first time.
Tools and Resources That Elevate My Projects
My go-to tool for steel-plate fixes is the Milwaukee M18 Fuel Impact Driver—reliable torque means I can tighten bolts confidently without slipping. For measuring and ensuring perfect alignment, the Bosch GLL 3-80 Laser Level is invaluable, giving me the precision needed for seamless finishes. When drilling through dense materials, I trust the Makita HR166DZ Rotary Hammer paired with carbide-tipped bits for clean, accurate holes. These tools have consistently helped me execute projects with confidence.
Beyond tools, I recommend exploring dedicated guides like step-by-step vanity installation for foundational knowledge, and creative built-in ideas for inspiration. These resources have helped me refine my process and inspire innovative solutions tailored to unique wall conditions.
Your Next Success Starts Today
Don’t let hidden wall challenges hold back your built-in ambitions—embrace the steel-plate secret for rock-solid support. With patience and the right approach, your installations will stand the test of time, looking impeccable and feeling sturdy every day. Remember, every expert was once a beginner who decided not to give up; your perfect built-in is just a steel support away.
Have you ever struggled with unstable wall-mounted fixtures or gaps that refused to close? Share your experience below and let’s tackle these challenges together!
Related Posts
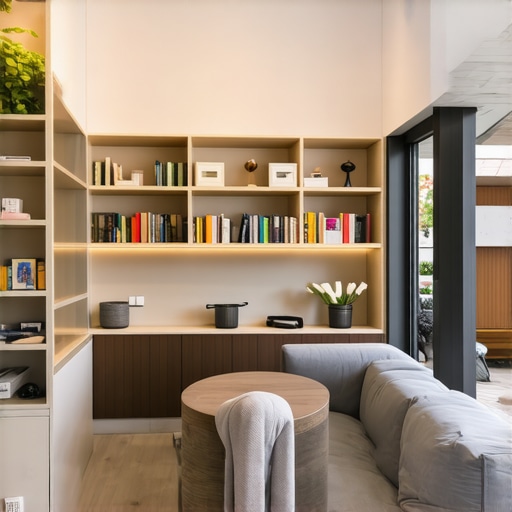
5 Pro Fixes for Custom Built-ins in Awkward 2026 Corners
I vividly recall the moment I realized that an entire…
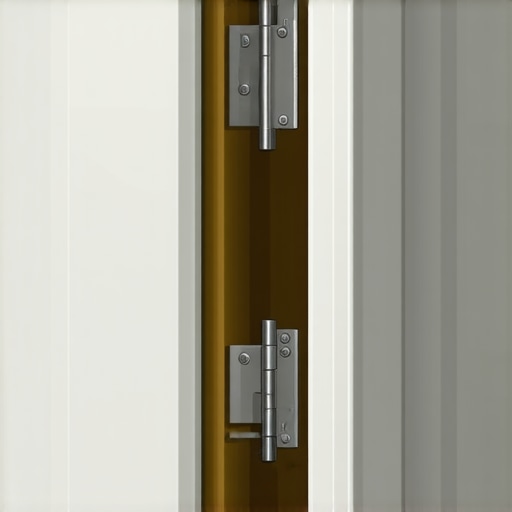
5 Heavy-Duty Pivot Hinge Fixes for 2026 Corner Built-in Cabinets
The first time I installed a corner built-in cabinet, I…
![7 Custom Built-in Hacks for Awkward Living Room Nooks [2026]](https://customcabinetrypro.com/wp-content/uploads/2026/02/7-Custom-Built-in-Hacks-for-Awkward-Living-Room-Nooks-2026.jpeg)
7 Custom Built-in Hacks for Awkward Living Room Nooks [2026]
I remember the exact moment I realized my living room…