Ever spent hours trying to find that misplaced lipstick or struggling to close a cabinet door because of clutter? I’ve been there. I remember the frustration of renovating my bathroom, only to realize that my vanity and storage choices made everything feel more chaotic rather than organized. It hit me hard during my first attempt at a home upgrade — I’d overlooked the importance of smart, seamless storage and the right vanity style. The result? A disorganized mess that took more time and money to fix than I’d like to admit.
Why Choosing the Right Vanity and Storage Matters
Let’s face it: your bathroom vanity isn’t just a piece of furniture. It’s the heart of your daily routine — the first thing you see in the morning and the last at night. But without thoughtful storage, it can quickly turn into a clutter trap. An efficient vanity and smart storage solutions can transform your space, making it more functional and visually appealing. I’ve learned that investing in quality built-ins and custom vanities isn’t just about style; it’s about creating a home that works for you, effortlessly and beautifully.
Is All the Hype Around Built-ins Worth It?
Early on, I made the mistake of thinking that any vanity would do. I didn’t realize how customizable built-in options could maximize space and streamline my daily routines. It wasn’t until I discovered the potential of dedicated storage solutions that I saw how much easier life could be. Built-ins can be tailored to fit your unique space, style, and needs — making your home feel more seamless and organized. Want to learn more? Check out this guide on creative built-ins.
If you’re like me and want your bathroom or bedroom to look polished without sacrificing practicality, you’re in the right place. Today, I’ll walk you through the key steps to choosing the best vanities and storage solutions that will elevate your home renovation project from chaos to calm. Ready to make your space truly work for you? Let’s dive in and discover how to select the perfect vanity style, install it seamlessly, and maximize every inch of your space with expert tips.
Select the Perfect Vanity Style
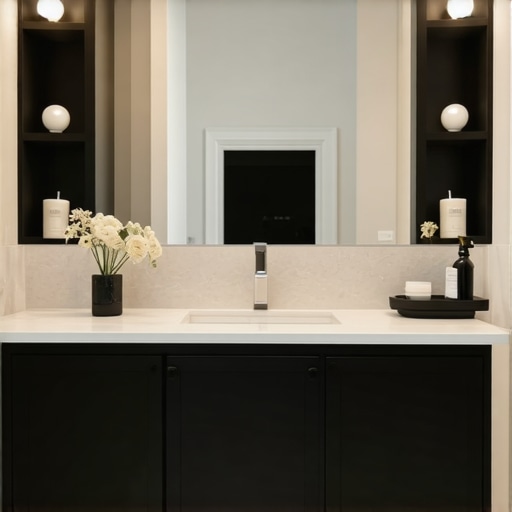
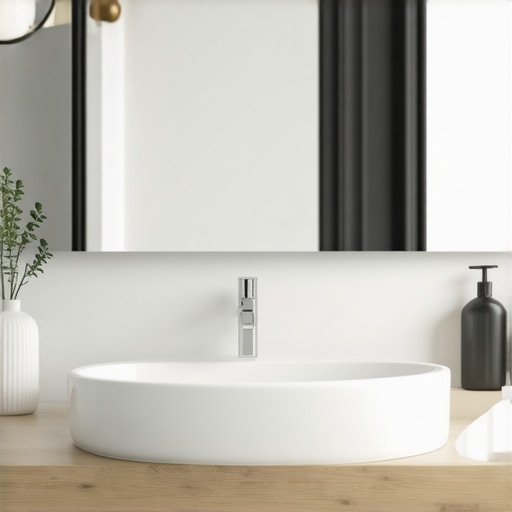
Start by evaluating your space and lifestyle. If you have a small bathroom, opt for a wall-mounted vanity to free up floor space. For a larger area, a double vanity can enhance functionality. I remember measuring my bathroom and sketching different options before settling on a sleek, modern wall-mounted unit that visually expanded the room. Consider the material and finish to match your decor, and always check the dimensions carefully to ensure it fits perfectly.
Measure and Prepare for Installation
Accurate measurements are crucial. Use a tape measure to record the width, depth, and height of your space, accounting for clearance and plumbing. I once rushed this step and ordered a vanity that was slightly too wide—it was a mess to return and delayed my project. To avoid this, double-check all measurements and create a detailed plan, including plumbing and electrical connections. Review the installation guide for beginners to familiarize yourself with the process.
Maximize Space with Custom Built-ins
Built-in storage can transform even the tiniest bathroom. Think of it as custom furniture that fits like a glove, eliminating wasted space. I added a custom recessed cabinet above my vanity, which seamlessly blended into the wall—no clutter, just sleek lines. Visit this resource on creative built-ins to explore options that suit your style. Incorporate pull-out drawers, hidden compartments, and adjustable shelves to keep everything organized and accessible.
Install with Precision and Care
Follow the installation steps meticulously. Use a level to ensure your vanity is perfectly aligned—an inch out of level can be noticeable and affect function. Secure the unit to the wall with appropriate anchors, especially if it’s a heavy built-in. During my first installation, I used too few anchors, and the vanity shifted. Afterward, I reinforced it with additional brackets, which made a huge difference. For detailed instructions, refer to the installation guide.
Choose Smart Storage Solutions
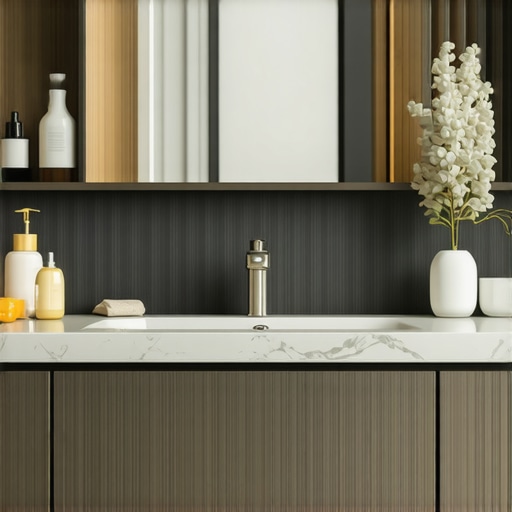
Optimize every inch with smart storage. Use pull-out trays, vertical dividers, and corner units to utilize awkward spaces. I installed a vertical organizer for hair tools and a hidden drawer for cleaning supplies—these small tweaks made my mornings smoother. For innovative ideas, check out tips for small bathroom storage. Think about incorporating open shelving for decorative items or baskets to hide clutter, balancing form and function effortlessly.
Stay Ahead with Trendy Designs
Keep your vanity stylish by staying updated on design trends. Think minimalistic, matte finishes, or natural wood textures. I chose a matte black finish that added a modern touch to my bathroom. To stay inspired, explore the latest vanity trends and select elements that complement your home aesthetic.
Many homeowners fall prey to misconceptions that can sabotage their bathroom renovation projects. Let’s dig deeper into some of the most common pitfalls and how to avoid them, ensuring your space is both stylish and functional.
Why Most People Overlook the Power of Custom Built-ins
Contrary to popular belief, not all built-ins are created equal. Many assume that standard cabinetry suffices, but the truth is that custom built-ins can dramatically enhance space utilization and aesthetic appeal. They are tailored to your unique layout, plumbing, and storage needs, which often results in better long-term value and efficiency. Check out this guide on creative built-ins for inspiration on maximizing your bathroom’s potential.
Misconception About Vanity Styles and Size
Another common myth is that bigger vanities always mean better storage. In reality, choosing a vanity that fits your space and lifestyle is more important than size. Oversized vanities can crowd the room and hinder movement, especially in small bathrooms. Instead, focus on smart design features like vertical storage, pull-out trays, and hidden compartments. For expert advice on selecting the right vanity, explore this comprehensive guide.
Installing Vanities Without Proper Planning
One of the biggest mistakes is rushing into installation without thorough measurements and planning. Skipping this step can lead to misaligned fixtures, plumbing issues, and costly corrections. Always double-check measurements and review the installation guide for beginners. Proper planning ensures a smooth process and a flawless finish that lasts.
Advanced Question: How Can I Incorporate Smart Storage Without Sacrificing Style?
Smart storage solutions are often thought to compromise aesthetics, but that’s a misconception. Today, innovative design allows for concealed drawers, pull-out organizers, and integrated shelving that blend seamlessly with your vanity. Incorporating these features can elevate your bathroom’s functionality without sacrificing style. Learn about the latest trends and design ideas at this trend report. Remember, the key is to choose storage options that align with your decor while maximizing utility.
Have you ever fallen into this trap? Let me know in the comments and share your experiences or questions. The right knowledge can transform your renovation journey into a rewarding project!
Once you’ve installed your perfect vanity and innovative storage solutions, the next crucial step is ensuring they stay functional and attractive over time. Regular maintenance, the right tools, and smart practices can extend the life of your investment and keep your space looking pristine. Here’s how I personally stay on top of my bathroom upgrades and what I recommend for long-term success.
Invest in Quality Cleaning Supplies and Tools
I swear by using microfiber cloths and pH-neutral cleaning sprays designed specifically for cabinetry and fixtures. Microfiber cloths are gentle yet effective at removing dust and grime without scratching surfaces. For my vanities, I prefer a soft sponge and a mild, non-abrasive cleaner to prevent damage. Regularly wiping down surfaces prevents buildup that can compromise the finish and helps keep everything looking new. When cleaning behind or inside storage compartments, I use a small handheld vacuum, which easily reaches tight corners—saving me time and effort during routine upkeep.
Implement Smart Maintenance Routines
To keep built-in storage solutions functioning smoothly, I schedule monthly checks. This includes tightening any loose screws, inspecting hinges on cabinet doors, and lubricating sliding mechanisms with a silicone-based spray. Doing so prevents squeaks and ensures drawers glide effortlessly. For plumbing, I keep a basic toolkit handy—wrenches, plumber’s tape, and sealants—to address minor leaks immediately, avoiding bigger issues down the line. Consistent maintenance not only preserves the integrity of the vanity but also prevents costly repairs.
Track Wear and Tear with Digital Tools
I’ve started using project management apps like Trello or Notion to log maintenance tasks, especially when dealing with multiple built-in units or custom vanities. Setting reminders for cleaning or inspections helps me stay proactive. Additionally, I monitor the condition of finishes and hardware, noting any scratches or signs of rust early. This digital tracking ensures I don’t overlook small issues that can escalate if ignored.
Plan for Future Upgrades and Scaling
Looking ahead, technology and design trends are heading toward smarter, more sustainable materials. I predict that future vanities will incorporate IoT sensors to monitor humidity levels, preventing mold and damage. To prepare, I choose modular storage options that can be easily upgraded or expanded as my needs evolve, like adjustable shelves or removable drawer dividers. Regularly reviewing my setup allows me to adapt and scale my storage without starting from scratch each time.
How do I maintain my built-in storage over time?
My secret is consistent cleaning, proactive inspections, and using high-quality lubricants for moving parts. I also keep an eye on the hardware and finishes, touching up scratches with touch-up kits and replacing worn-out hardware before it affects functionality. These small steps ensure my storage solutions remain seamless and durable for years to come. For more detailed tips on upkeep, check out this guide on effortless storage maintenance.
Don’t underestimate the power of routine upkeep—making it part of your regular home maintenance can save you time and money while keeping your bathroom looking its best. Try implementing one of these tips today and see how your space remains beautiful and functional for years to come!
The Hardest Lesson I Learned About vanities, storage solutions, installation, built-ins
One of my biggest realizations was that rushing the measurement process can turn a sleek upgrade into a frustrating ordeal. Precise measurements and double-checking every detail saved me from costly mistakes and rework. I also learned that custom built-ins are not just a luxury—they are a necessity for maximizing tiny spaces without sacrificing style. This taught me to prioritize tailored solutions over generic furniture whenever possible.
Where to Go from Here for Smarter Bathroom Storage
After my experience, I rely heavily on trusted resources like creative built-ins guide and step-by-step installation tips. These sources have helped me avoid common pitfalls and achieve professional results even as a DIY enthusiast. I also recommend exploring space-maximizing design tips to ensure your vanity meets your needs now and in the future.
Your Turn to Try Creating Your Dream Bathroom
Transforming your space with the right vanity and storage solutions is more than a renovation—it’s a chance to boost your home’s comfort and style. Don’t hesitate to start small, plan carefully, and leverage expert advice. Your ideal bathroom is within reach if you embrace smart choices and stay proactive. What’s the first step you plan to take toward your bathroom upgrade? Share your thoughts below and let’s encourage each other to create beautiful, functional spaces!
One Reply to “Best Vanities & Storage Solutions for Seamless Home Renovations”
Leave a Reply
Related Posts
Expert Vanities & Built-in Cabinets: Easy Installation Tips in Modern Homes
My Journey into Modern Home Renovation: Discovering Expert Vanity SolutionsWhen…
Effective Vanities & Storage Installation Tips for 2025
I remember the first time I tried to install a…
Smart Vanities & Built-in Storage: Ultimate Installation Tips 2025
I remember the day I tried to install my first…
This post resonates so much with my recent bathroom renovation experience. I underestimated how important proper measurements and custom storage could be for maximizing small spaces—something I learned the hard way when my initial vanity didn’t fit flush against the wall. Since then, I’ve seen how tailored built-ins and thoughtful organization can genuinely transform the look and functionality of a bathroom. I especially like the tip about vertical storage; in my case, using wall-mounted shelves and hidden compartments made my daily routines much smoother. One thing I’m curious about is how homeowners decide between different finishes for vanities—do you have tips on choosing durable materials that also keep the aesthetic clean and modern? It seems like the right choice of material really helps in maintaining a sleek appearance over time. Would love to hear everyone’s thoughts or personal tips on mixing style with practicality in bathroom vanities.