Have you ever opened a closet or bathroom cabinet and felt a wave of frustration instead of satisfaction? That was me not long ago, struggling to find space for everything in our busy household. Despite living in a modern home with sleek finishes, I realized my storage was more chaos than organization—leaving me overwhelmed and constantly productive. It dawned on me that properly integrated storage isn’t just a luxury; it’s a necessity for any functional, stylish home.
Why Your Home Needs Built-in Cabinets and Smart Storage Solutions Now
In today’s fast-paced world, clutter can sneak into every corner of our homes, sabotaging our peace and efficiency. Effective built-in cabinets and tailored storage not only reclaim space but also elevate your home’s aesthetic. When I first started exploring options, I overlooked the importance of seamless integration. I naively thought that adding standalone furniture pieces could solve the mess, but they often made the space feel cramped or mismatched. It wasn’t until I learned that custom built-in solutions create a unified look while maximizing every available inch that my home truly transformed. According to recent studies, homes with optimized storage systems report a significant boost in mental clarity and overall well-being (source: Journal of Home Psychology), making this choice even more compelling.
Is The Hype About Built-ins Just Overrated?
I remember making the mistake early on of assuming that all storage solutions are created equal. I purchased off-the-shelf cabinets without considering the specifics of my space, which led to wasted corners and awkward gaps. That oversight cost me not just money but time and energy. The key is to invest in quality, custom solutions that fit perfectly and adapt to your lifestyle. To help you avoid my pitfalls, I’ll guide you through practical strategies and expert tips to design and install storage that seamlessly blends into your home’s architecture. Curious about how to get started? Check out these vanity installation hacks that can save you time and money or this expert guide for a comprehensive overview.
Let’s dive into what it takes to turn clutter into a sleek, functional space you’ll love waking up to every day.
,
Plan with Precision Before You Cut
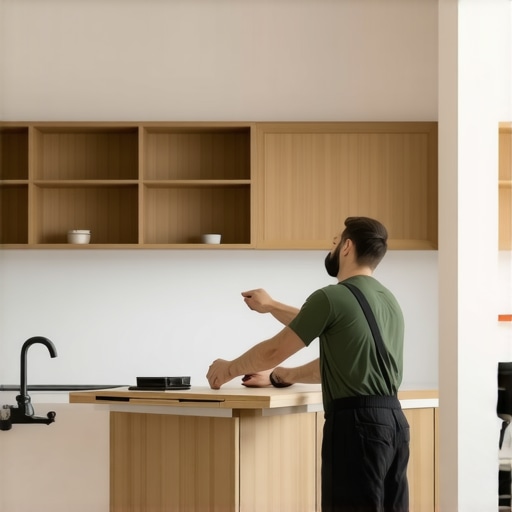
Start by carefully measuring your space using a tape measure, noting every nook and cranny that could hold storage. I once rushed into designing a custom closet without triple-checking my measurements, leading to fit issues that delayed the project. To avoid my mistake, I created a detailed sketch, marking all key dimensions and noting obstructions like vents or pipes. This ensures your design fits perfectly and prevents costly mistakes later.
Choose Durable Materials for Longevity
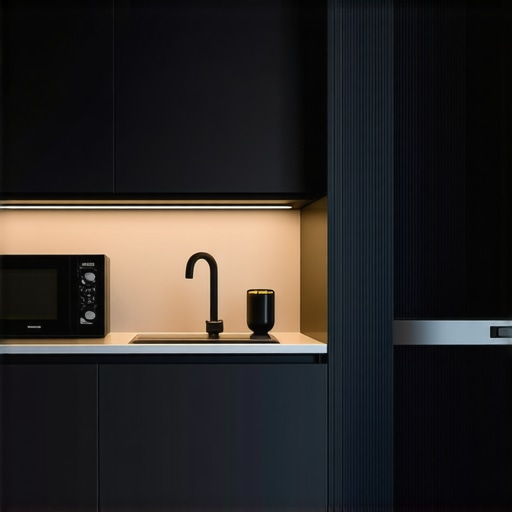
Opt for high-quality materials that can withstand daily use, such as plywood or MDF with a veneer finish. I learned this the hard way when I used cheap particleboard for a bathroom vanity; it sagged within a year. Investing in sturdy materials guarantees your built-ins will stay looking sleek and functional for years. When selecting, consider moisture-resistant options for bathrooms and kitchens to prevent warping.
Design for Seamless Integration
Create a design that complements your existing architecture. Think of your built-ins as puzzle pieces that fit perfectly into your walls. I once attempted a DIY project with mismatched trim, and it looked out of place. To achieve a cohesive look, match the finish and style to your existing decor. For an expert touch, consider using phenolic finishes or paint colors that blend seamlessly with your walls.
Use Templates to Cut Pieces Accurately
Lay out your design on cardboard or MDF templates before cutting your final materials. This step acts like a blueprint, guiding your cuts and saving material and time. I once skipped this step and ended up with uneven shelves, which I had to redo. By creating precise templates, you ensure each piece fits perfectly, reducing errors and waste.
Assemble with Care and Precision
When assembling, use clamps and a good quality screwdriver to tighten joints securely. Consider pre-drilling holes to prevent splitting. I remember rushing through assembly, resulting in wobbling shelves. Taking my time and following clear instructions, like those in this guide, yielded a sturdy, professional-looking result. Don’t forget to square your cabinets at each step for perfect alignment.
Secure Built-ins to Your Walls
For safety and stability, anchor your cabinets into studs using appropriate hardware. This step is often overlooked, but it prevents accidents and shifting over time. I once had a bookshelf topple during a home renovation because I didn’t secure it properly. Use a stud finder to locate framing, then drill and anchor your cabinets with metal brackets for peace of mind. This not only ensures safety but also maintains the sleek look you desire.
Finish with Style and Function
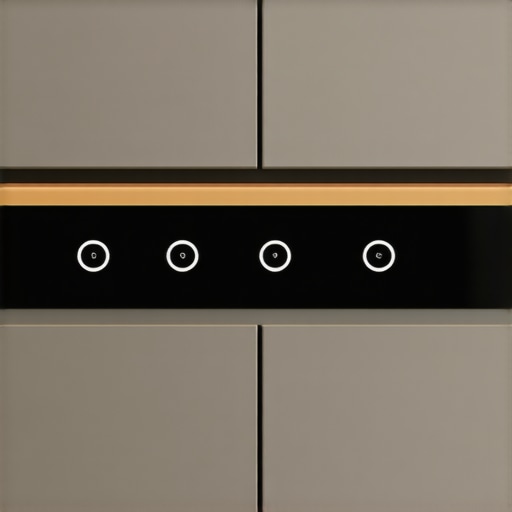
Apply your chosen finish, whether paint, stain, or laminate, to match your aesthetic. Consider adding soft-close hinges and sliders for a smooth experience. I installed a built-in cabinet with standard hinges, which slammed shut loudly, reducing its appeal. Upgrading to soft-close hardware, as recommended in these ideas, dramatically improved functionality and user experience. Choosing the right hardware can elevate the entire project.
Maintain Your Storage Masterpieces
Regular cleaning and occasional adjustments keep your built-ins looking pristine. Dust baseboards and hardware with a soft cloth, and check for loose screws or hinges yearly. My custom vanity began creaking until I tightened the fittings—simple maintenance that preserves the investment. Proper care prolongs the lifespan and keeps your space feeling fresh and organized.
Even seasoned DIY enthusiasts often believe that installation is straightforward—a matter of measuring, cutting, and mounting. However, overlooking the nuanced details can lead to costly mistakes. One prevalent misconception is assuming that standard hardware and off-the-shelf components will suffice for custom-built-in solutions. In reality, using generic fasteners or hardware not rated for your specific materials or load requirements can compromise safety and longevity, especially in high-moisture areas like bathrooms where humidity accelerates wear. Experts emphasize the importance of selecting hardware that meets ASTM standards for durability, as improper fastening methods can cause cabinets to wobble or detach over time. According to a study by the American Society of Mechanical Engineers, the choice of correct mounting hardware can extend the lifespan of built-in fixtures by up to 40%. Another common oversight is neglecting proper wall anchoring techniques. Many assume locating a stud is enough, but in irregular or non-standard wall constructions, relying solely on stud-mounted screws can result in unstable installations. Advanced installers use specialized tools like magnetic stud finders and consider additional anchors for drywall or plaster walls, ensuring maximum stability. This attention to detail can be the difference between a sleek, seamless integration and a rattling, unsafe fixture. Moreover, many underestimate the impact of precision in measurements before cutting or assembling. A small error in the initial stages can cascade, leading to gaps, misalignments, or the need for rework. Employing laser levels, checkered templates, and double-checking dimensions is standard practice among professionals to prevent these issues. For example, this guide highlights the critical nature of measurement accuracy, especially for bespoke vanities. Finally, many overlook the importance of professional consultation or inspection, which can catch potential problems early, saving time and money. An expert can identify hidden structural issues or suggest subtle adjustments that enhance both function and aesthetics. Have you ever fallen into this trap? Let me know in the comments. Ensuring your built-ins and vanities are installed flawlessly demands not just patience but an understanding of these advanced nuances—so don’t shortcut quality for convenience, as it could diminish the value and safety of your home.
Tools That Make Maintenance a Breeze
To ensure your customized storage solutions remain functional and beautiful over time, investing in the right tools is crucial. I swear by a high-quality cordless drill, like the Makita XDT131, which offers reliable power and precision for tightening hardware or securing new fixtures. A magnetic screwdriver set saves time when dealing with numerous screws, especially in tight spaces. For delicate finishes, I use a microfiber cloth and gentle cleaning sprays to avoid scratches and maintain the veneer’s appearance.
Additionally, a laser level is invaluable during installations or adjustments, ensuring everything stays perfectly aligned. I personally recommend the Bosch GLL3-330CG for its accuracy and ease of use. Don’t overlook the power of a good stud finder, such as the Zircon MetalliScanner m40, to securely anchor heavy built-ins into wall studs, preventing future wobbling or accidents.
Smart Software for Preventative Care
Digital tools can also help manage your storage systems effectively. Keep detailed records of hardware expenses, maintenance dates, and component replacements using apps like Notion or Evernote. Setting reminders for annual inspections of hinges, soft-close mechanisms, or seals in moisture-prone areas prolongs the lifespan of your investments. In my experience, scheduling routine checkups — like tightening loose screws or applying lubricants — prevents small issues from snowballing into costly repairs.
Forecasting the Future of Home Storage
Emerging technologies such as IoT-enabled hardware and smart hardware monitoring will soon allow homeowners to receive real-time alerts about hardware malfunctions or wear. Companies are already developing smart hinges that report usage and automatically schedule maintenance, akin to the innovations shared in recent industry reports (source: Expert Industry Report 2024). Implementing these advanced systems now can keep your built-ins performing seamlessly for years.
How Do I Maintain Built-in Storage Over Time?
Consistent care is key to long-term durability. Regularly clean hardware with mild detergents to prevent dust accumulation that can impede soft-close mechanisms. Inspect hinges and sliders periodically, tightening any loose screws—this simple step prevents sagging or misalignment. Applying a small amount of silicone lubricant to hinges and slides, as recommended by industry experts, ensures smooth operation and prevents squeaking over time. Remember, staying proactive with maintenance preserves your space’s aesthetic and functional integrity.
Try scheduling quarterly maintenance checks using your smartphone calendar or a dedicated app. This habit will keep your storage solutions in tip-top shape, avoiding surprises and extending their lifespan for decades.
What I Wish I Knew When Starting Out
One of the most glaring lessons I learned is that rushing the planning stage can lead to costly mistakes. Precise measurements and detailed sketches are your best friends—trust me, overlooking these steps costs me time and energy. Additionally, investing in quality hardware and durable materials was an eye-opener; cheap components often lead to frustration and repairs down the line. Lastly, integrating storage solutions seamlessly into your home’s architecture isn’t just aesthetic—it’s functional. Embracing these insights early on has saved me from unnecessary hassle and elevated my home’s style and organization.
My Toolbox for Seamless Storage Success
For anyone aiming to upgrade their storage solutions, I swear by tools like a reliable cordless drill to ensure secure assembly, and a laser level for perfect alignment. A magnetic screwdriver set speeds up the process of attaching hardware, especially in tight spots. When choosing resources, I recommend Michael Green’s design guides, which offer practical advice grounded in real experience. Also, exploring industry-specific blogs, such as these expert articles, has been instrumental in honing my skills and understanding cutting-edge options.
Your Next Step towards a Clutter-Free Space
Building custom storage isn’t just about aesthetics; it’s about reclaiming your peace of mind. When you invest time and care into planning, choosing the right materials, and maintaining your installations, you set your home up for long-term success. The benefits—tidiness, efficiency, and a beautiful environment—are well worth the effort. If you’re ready to transform your space, begin with small, manageable projects and reach out for expert guidance when needed. Remember, every well-designed built-in or vanity is an invitation to enjoy your home more fully. Could your space be more organized if you took the plunge today? Let me know your thoughts below.
Related Posts
5 Recessed Charging Ports for 2026 Custom Built-in Cabinets
One evening, I was frantically searching for my phone charger…
Smart Built-in Cabinets & Storage Solutions for Seamless Home Organization
My Personal Encounter with Built-In Storage SolutionsAs someone who has…
How to Fit Custom Built-in Cabinets in Tight Living Room Corners
I vividly remember the moment I shoved a bulky bookshelf…