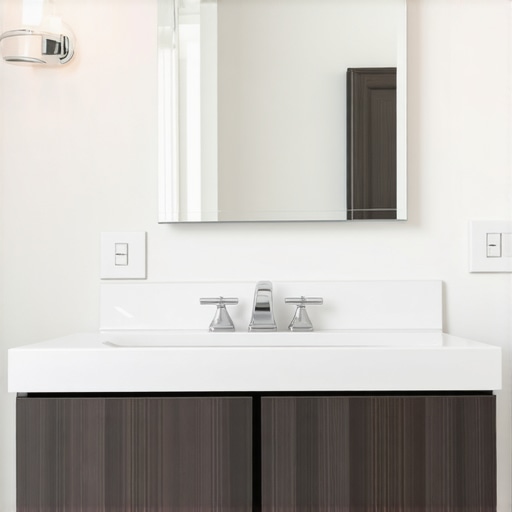
It was a morning like any other, but as I reached for my worn-out sponge and opened the bathroom cabinet, I was met with a disorganized mess—scraps of paper, stray hair accessories, half-empty bottles—things I kept promising myself I’d Organize, but never really did. That lightbulb moment hit me hard: installing the right built-in storage can make all the difference. Ever found yourself battling clutter every day, wishing there was a smarter way to keep your bathroom tidy without sacrificing style? Well, you’re in luck. Today, I’ll guide you through proven tricks to achieve seamless vanity installations that not only look fantastic but also work effortlessly.
Why Proper Vanity and Storage Installation Matters More Than Ever
In 2025, the emphasis on smart, functional design has skyrocketed. Our homes are more than just spaces for living; they’re personal retreats, workstations, and sanctuaries. Yet, so many of us struggle to keep these areas tidy, especially when it comes to bathrooms and bedrooms. An improperly installed vanity or storage system can turn a room into a cluttered chaos, defeating the purpose of sleek, modern aesthetics. According to a recent study, disorganization in the home can lead to increased stress levels and decreased productivity. So investing in quality, seamlessly integrated storage isn’t just about looks; it’s about creating an environment that nurtures well-being and efficiency. If you’ve ever faced the frustration of poorly fitting cabinetry or storage that’s difficult to access, you know exactly what I mean. Trust me, I’ve made my share of mistakes—like trying to DIY a complex built-in without proper measurements, only to have everything out of alignment—and it cost me precious time and effort. Since then, I’ve learned there’s a better way. Want to avoid those pitfalls? Check out [this expert guide](https://customcabinetrypro.com/step-by-step-guide-to-vanity-installation-for-beginners) to get started. Now, let’s dive into the practical steps to install your vanity with confidence, ensuring a flawless finish that lasts for years.
Plan Your Space Like a Pro
Before grabbing your tools, measure the area meticulously. Use a tape measure and level to sketch a detailed plan. I remember the first time I attempted this; my initial measurements were off, leading to misaligned cabinets. To avoid this, double-check every dimension and consider to leave additional space for hardware and movement. Think of this step as drafting a blueprint—you wouldn’t build a house without one. Accurate planning ensures your vanity fits perfectly, simplifying the actual installation process and preventing costly mistakes. For fresh ideas on optimizing space, check out this guide.
Prepare Your Tools and Materials
Gather essential tools: a drill, screwdriver, level, tape measure, stud finder, and clamps. Ensure your materials—cabinet boxes, hardware, and filler strips—are on hand. I once started installing a built-in without a stud finder, causing the cabinets to hang unsupported, which was frustrating. Using the right tools is as vital as following a recipe; it guarantees precision and safety. Remember, high-quality materials not only last longer but also improve the aesthetic. For tips on choosing the right vanity style, explore this resource.
Secure the Base and Frame
Start by anchoring the main frame to the wall studs—this is crucial for stability. Use a stud finder to locate the studs accurately; attaching into drywall alone won’t hold the weight. Once marked, drill pilot holes before fixing the frame with screws. I once skipped this step, and the entire vanity shifted, causing gaps and uneven surfaces. Think of this process as setting a foundation—you want a solid base before building upward. Temporarily support panels with clamps to ensure they stay in position. For detailed techniques, review this comprehensive guide.
Assemble and Level Cabinets
Assemble your cabinets on a flat surface, following manufacturer instructions precisely. Use clamps and a level to ensure all parts are square; this is vital for doors and drawers to function smoothly. I recall assembling a cabinet that was slightly crooked, causing misaligned doors—an easy fix but time-consuming. During assembly, double-check measurements and alignments frequently. Think of this as fitting puzzle pieces together—you want perfect joints before proceeding. Once assembled, move the units into position and secure them to the wall, ensuring they’re level and stable. For modern design ideas, visit this page.
Finish with Details and Accessories
Install hardware like handles, knobs, and pulls after securing the cabinets. Use a template for consistent placement; this small step enhances both function and style. Seal edges with caulk to prevent water infiltration—important for bathroom environments. I learned this the hard way when moisture seeped behind my vanity, leading to mold growth. Incorporate accessories such as organizers, baskets, and lighting to maximize functionality. Proper finishing touches tie the whole installation together, transforming a simple vanity into a seamless feature. For additional storage ideas, explore this resource.Many homeowners believe they just need a good plan and some basic tools to install built-in storage or vanities successfully, but this oversimplification overlooks crucial nuances. One prevalent misconception is that more storage always equals better organization. In reality, capacity without proper design can lead to cluttered spaces, making everyday use frustrating. For instance, vertical shelving or overly deep cabinets may maximize space but hinder accessibility, especially for items used frequently. Advanced users should consider ergonomics and workflow, ensuring that storage placement facilitates ease of access, which some overlook, leading to inefficient layouts. Moreover, a common mistake involves neglecting the importance of precise measurements—many underestimate the significance of verifying wall and floor angles before installation, resulting in skewed cabinets or gaps. Remember, even minor miscalculations compound over complex installations—never skip double-checking your dimensions. One advanced nuance often missed is the impact of thermal expansion on materials, especially in humid environments like bathrooms. Wood and MDF can warp or shrink seasonally, compromising the integrity of your build if not accounted for, as explained by industry experts in [this guide](https://customcabinetrypro.com/effortless-storage-solutions-for-a-tidy-stylish-home). The myth that DIY installation is always more cost-effective can be false; mistakes often lead to costly repairs or replacements down the line. Investing in professional consultation or detailed guides like [this resource](https://customcabinetrypro.com/storage-solutions-built-in-cabinets-ultimate-installation-tips-1027) helps prevent early pitfalls. When planning your built-ins, consider the hidden nuances of material choice, hardware compatibility, and structural reinforcement—these details ensure longevity and flawless operation. For example, overlooking the importance of sturdy anchoring into wall studs can lead to cabinets pulling loose over time, a common but avoidable mistake. Finally, many underestimate the importance of integrating electrical features—consider hidden wiring for lighting or charging stations during the initial planning. This step, if ignored, can complicate post-installation modifications, adding to costs and delays. Once you understand these advanced nuances, your project becomes less of a gamble and more of an investment in durability and style. Have you ever fallen into this trap? Let me know in the comments. If you’re looking to refine your approach, explore [expert guides](https://customcabinetrypro.com/expert-guide-to-vanities-built-in-cabinets-for-modern-spaces-in-2025) for in-depth strategies.Keeping your bathroom storage solutions in top shape requires more than just proper installation. Regular maintenance ensures longevity and continues to look polished over time. I personally rely on a few specialized tools and methods that streamline upkeep and help detect issues early. A high-quality cordless drill, for example, is indispensable for tightening loose screws or adjusting components—its portability and power make quick fixes hassle-free. I prefer models with adjustable torque settings; this prevents over-tightening and damaging delicate materials. Alongside, a digital moisture meter helps monitor humidity levels behind cabinets, crucial for preventing mold growth and wood warping in humid environments. I’ve found that consistent checks with such tools can reveal hidden issues before they escalate. For cleaning, microfiber cloths combined with waterless, non-abrasive cleaners preserve surfaces without scratching or staining—an essential for maintaining aesthetic appeal. When it comes to software, leveraging design planning tools like SketchUp or specialized CAD programs can assist in future scaling or remodeling projects. These programs enable precise measurements and 3D visualizations, making modifications straightforward and reducing costly errors. As the trend advances towards smart homes, integrating maintenance schedules into apps or smart home hubs is likely to become commonplace, providing automated alerts for check-ups or component replacements. Looking ahead, I believe that incorporating IoT-enabled sensors within built-in units might revolutionize how we monitor and maintain our storage systems, alerting us to issues like humidity spikes or hardware malfunctions in real-time. A practical tip: periodically tighten all visible screws and inspect seals around cabinets; it’s simple but vital for long-term durability. How do I maintain my built-in vanities over time? I create a maintenance checklist every six months, including cleaning, hardware tightening, and moisture checks, which keeps everything functioning smoothly. Ready to upgrade your maintenance routine? Try using a digital moisture meter combined with regular hardware inspections—I promise, it makes a tangible difference. To explore more about long-term storage solutions, check out this expert guide.
Unspoken Truths That Changed My Approach to Vanity Installation
One of the most eye-opening lessons I learned was the importance of patience over haste. Rushing through measurements or overlooking the small details often leads to misalignments or gaps that sap confidence and time. Taking the extra few minutes to double-check every measurement and level has saved me countless headaches. Additionally, I discovered that investing in high-quality, compatible hardware pays dividends in both aesthetics and durability, dispelling the myth that cheaper options are always better. Finally, embracing the idea that every space is unique and requires tailored solutions transformed my perspective—what works in one home might not suit another, and personalizing your design leads to truly seamless integration.
Tools and Resources That Elevated My Projects
Over the years, I’ve relied on a handful of trusted tools that make installation smoother. A digital stud finder, for example, minimizes the risk of anchoring cabinets into unsupported drywall—trust me, it’s a game-changer. My go-to resource for design inspiration and technical guidance is this guide, which balances aesthetic ideas with practical tips. For detailed installation procedures, this step-by-step tutorial simplifies complex steps into manageable actions. Lastly, exploring industry trends through this report has kept my projects fresh and aligned with modern aesthetics.
Forge Your Path: Little Steps Lead to Big Change
Your journey into flawless vanity and storage solutions can start today. Remember, every small improvement—careful measurement, quality hardware, personalized touches—builds toward a space that is as functional as it is beautiful. Don’t wait for perfection; take that first step with confidence. Implement ideas from trusted resources, and trust your instincts—they’re more powerful than you think. Your perfect built-in vanity isn’t just a dream; it’s within reach if you’re willing to learn, adapt, and persist. So, what is one small change you’ll make today to bring more order and beauty into your space? Let me know below, and let’s start turning your vision into reality.
Related Posts
5 Costly Bathroom Vanity Installation Errors to Fix in 2026
I still remember the moment my bathroom vanity slipped unexpectedly…
5 Hidden Bracing Fixes for 2026 Kitchen Corner Vanities
It was a morning like any other—until I opened my…
![5 Small Bathroom Vanity Plumbing Fixes That Save Space [2026]](https://customcabinetrypro.com/wp-content/uploads/2026/02/5-Small-Bathroom-Vanity-Plumbing-Fixes-That-Save-Space-2026.jpeg)
5 Small Bathroom Vanity Plumbing Fixes That Save Space [2026]
I've been there—standing in my cramped bathroom, trying to squeeze…