I remember the exact moment I realized I had bitten off more than I could chew with my first built-in cabinet project. It was a weekend, I was elbow-deep in measuring, cutting, and cursing at a stubborn piece of plywood, when I finally looked around and thought, “This looks more like a Frankenstein’s monster than a sleek storage solution.” That lightbulb moment taught me something crucial: proper planning and expert guidance can save you from a lot of headaches—and actually make your space look professionally installed.
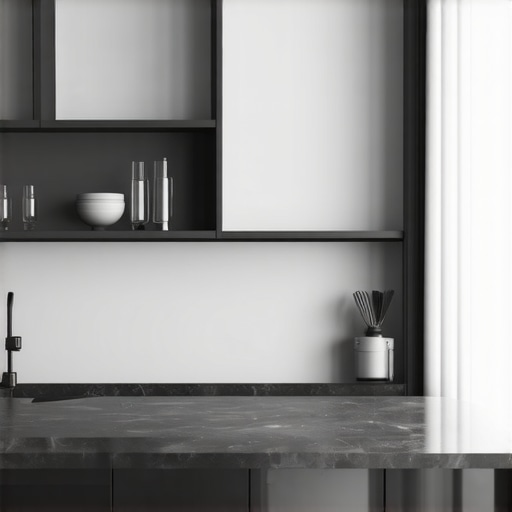
Getting Started with Built-in Cabinets and Storage Solutions
When I first started exploring built-in cabinets, I was overwhelmed by the variety of options and the amount of DIY advice out there. But I quickly learned that understanding the basics is key. Whether you’re aiming to maximize space in a small bathroom or create a stunning focal point in your living room, the right approach can make all the difference. Today, I’ll walk you through the essential steps to ensure your installation is smooth, efficient, and results in a clutter-free, beautiful home. If you’ve faced the frustration of imperfect DIY projects, you’re not alone. Many homeowners underestimate the complexity, but with a little insider knowledge, you can avoid common pitfalls. For a comprehensive look at how to maximize your space with custom designs, check out this article on maximizing space with custom vanities.
Is Installing Built-in Cabinets Worth the Effort and Cost?
This was a question I grappled with early on. I made the mistake of thinking DIY was always the best way, but I learned that rushing into installations without proper planning leads to costly mistakes. The truth is, if you’re not confident in your carpentry skills, trying to install built-ins without expert advice can backfire. But don’t worry—there are plenty of resources and tips that can help. For example, understanding the latest step-by-step vanity installation guides can boost your confidence and ensure a professional look.
Measure Your Space Accurately
Before you cut a single piece of wood, take precise measurements of your intended area. Use a tape measure to record the height, width, and depth, and note any irregularities like uneven walls or floors. During one project, I overlooked a slight wall tilt, which caused my cabinet to sit unevenly. To avoid this, always measure multiple points and record the smallest and largest dimensions.
Create a Detailed Plan and Blueprint
Sketch your design or use digital planning tools. Include all shelves, compartments, and hardware placements. Think of this phase as drawing a map before a journey — it guides your entire project. I once tried to eyeball my dimensions, but after creating a detailed blueprint, I realized I needed more space for larger items, saving me from a costly redo.
Gather the Necessary Tools and Materials
Prepare everything beforehand: saws, drills, screws, brackets, and the wood or pre-made panels. Having all tools at hand keeps your workflow smooth. I remember once rushing to the hardware store mid-project, which doubled my time. To streamline, check out this comprehensive guide for a complete list of tools and tips.
Build the Frame and Structure First
Construct the main frame on a flat surface or directly in place, depending on your design. Use clamps and a level to ensure everything is square. Think of this step as laying the foundation of a house — if it’s crooked, everything else will be off. I once used a spirit level to verify my frame, which prevented future door misalignments.
Secure the Frame to Walls
Use heavy-duty brackets and wall anchors to attach your cabinet to the wall securely. Double-check measurements before drilling. Imagine trying to hang a heavy mirror — if not anchored properly, it can fall and break. I learned this the hard way when my first attempt resulted in a wobbly cabinet that needed reinforcement.
Install Shelves, Doors, and Hardware
Attach shelves using shelf pins or brackets, and hang doors with hinges. Adjust for smooth operation. It’s like fine-tuning a musical instrument — small adjustments make a big difference. Once, I misaligned a door hinge, but a simple tweak with a screwdriver fixed it instantly.
Finish and Seal Your Cabinets
Apply paint, stain, or sealant for protection and aesthetics. Use high-quality brushes or rollers for a smooth finish. Think of this as adding the final coat of polish on a masterpiece. I once rushed this step, and the uneven paint made my project look unprofessional. Proper finishing elevates your work significantly.
Consult Expert Resources When Needed
If you encounter unforeseen challenges, don’t hesitate to seek guidance. Resources like effortless storage solutions or professional tips can save you time and money. Remember, even seasoned DIYers hit snags — the key is knowing where to find reliable advice.
Many homeowners approach built-in cabinets with a set of assumptions that can lead to costly mistakes or subpar results. Let’s dig deeper into these misconceptions and explore the hidden nuances that can make or break your project. First, a prevalent myth is that DIY installation is always cheaper and easier. While this might seem true at first glance, the reality is that without proper expertise, you risk mismeasuring, misaligning, or damaging your walls and cabinetry, which can end up costing more in repairs and rework. Instead, many professionals recommend understanding the intricacies involved, like wall irregularities or load-bearing considerations, to ensure a seamless fit and long-lasting durability. For example, when securing cabinets to uneven walls, using specialized shims and anchors becomes essential—something most DIYers overlook. This is where expert guidance can save you from the ‘oops’ factor, especially with complex installations involving corner cabinets or multi-level shelving.
Another common misconception is that standard measurements suffice. However, the devil is in the details. Small discrepancies—like wall tilt or floor unevenness—can cause doors to swing open awkwardly or shelves to be uneven. Advanced homeowners and professionals often use laser levels and digitized blueprints to account for these subtleties, ensuring a perfect fit. This nuance is crucial in high-end projects where precision elevates the aesthetic and functionality. For a comprehensive approach, check out this step-by-step installation guide.
One trap I often see is the assumption that once built, cabinets don’t need adjustment. But, in reality, small tweaks are a part of the process—hinge adjustments, leveling, and securing hardware. Skipping these steps can make doors creak or drawers stick, ruining the sleek look you aim for. It’s worth noting that advanced installation techniques, like using spacer blocks or jig guides, can streamline these adjustments for a professional finish.
Have you ever fallen into this trap? Let me know in the comments. Remember, understanding these hidden nuances and dispelling myths can elevate your project from amateur to expert level. For more insights on maximizing your space with custom designs and avoiding common pitfalls, explore this article on maximizing space with custom vanities. Proper planning, precision, and expert advice are your best allies in creating built-in cabinets that stand the test of time and style.
Investing in built-in cabinets is a smart way to maximize your space and elevate your home’s style, but the key to long-term satisfaction lies in proper maintenance and using the right tools. Over time, even the most well-crafted cabinets need a little TLC to keep them functioning smoothly and looking pristine. In this article, I’ll share the specific tools I personally recommend and tips for maintaining your built-in storage solutions so they serve you well for years to come.
How do I keep my built-in cabinets working smoothly over time?
First, regular cleaning is essential. Use a soft, lint-free cloth to dust the surfaces weekly, and for deeper cleaning, a mild soap solution works wonders without damaging the finish. Avoid harsh chemicals that can degrade paint or stain. For hinges and sliders, I recommend applying a light lubricant like silicone spray every six months. This prevents squeaks and ensures doors and drawers open smoothly. Remember, a well-lubricated hinge can significantly extend the lifespan of your cabinetry hardware.
Next, check for loose screws or hardware periodically. A simple Phillips-head screwdriver is all you need to tighten any loose hinges or handles. I keep a small multi-tool kit handy—specifically one that includes a Phillips, flat-head, and a pair of pliers—so I can handle any quick repairs without rummaging through a toolbox.
Why I swear by my Dremel rotary tool for fine adjustments
The Dremel rotary tool is my go-to for minor tweaks, especially when aligning doors or trimming small pieces of wood. Its precision and versatility make it invaluable, especially for touch-ups that can make a big difference in the overall look. I use it to smooth out rough edges or to make subtle adjustments to hinges and hardware positions, saving me a trip to the hardware store. For durability and control, I prefer the Dremel 3000 model, which has served me well over multiple projects.
Long-term results come from proactive maintenance
To keep your built-ins looking new, consider applying a fresh coat of protective sealant or paint every few years. Choose a high-quality, water-based polyurethane for durability and easy cleanup. Additionally, inspecting the structure for any signs of warping or damage allows you to address issues early—preventing costly repairs later. Creating a maintenance schedule, like quarterly inspections, ensures your cabinets stay in top shape without surprises.
Looking ahead, I predict that smart, sensor-based maintenance tools will become more affordable and accessible. Imagine using a small Bluetooth sensor attached to hinges that alerts you when lubrication is needed or hardware is loosening. This technology could revolutionize how homeowners care for built-in storage, making upkeep even easier and more effective.
Try this tip for a professional finish
One advanced tip I recommend is using painter’s tape along the edges of your cabinet doors before painting or sealing. This creates clean lines and prevents drips, giving your project a polished, professional look. It’s a small step that makes a huge difference and is worth trying on your next touch-up or renovation.
Maintaining your built-in cabinets doesn’t have to be complicated. With the right tools and a proactive approach, you can enjoy beautifully functional storage for years to come. For more ideas on how to keep your space organized and stylish, check out maximizing your space with custom vanities.
Lessons From My Biggest Built-in Cabinet Mistakes
- Overconfidence Can Be Costly: I once skipped detailed measurements, which led to uneven shelves and frustration. Now, I ALWAYS measure multiple times before cutting.
- Walls Are Not Always Plumb: Assumptions about wall straightness can ruin your project. Using a laser level has saved me from crooked installations.
- Don’t Underestimate Hardware Needs: Small details like hinge placement or shims matter. Investing in quality hardware and taking your time makes a noticeable difference in the final look.
- Patience Is Key: Rushing through finishing steps like sealing or painting diminishes the professional feel. Taking my time with finishing transforms the entire project.
- Seek Expert Guidance: When I hit roadblocks, consulting detailed guides or professionals saved me from costly rework. Never hesitate to reach out for advice.
Tools and Resources That Changed My Approach
- Laser Levels: Precise measurements are non-negotiable. I trust the step-by-step guides for expert tips on leveling and alignment.
- Quality Hardware: From hinges to brackets, durable components ensure longevity. I prefer brands recommended by seasoned carpenters.
- Digital Blueprints: SketchUp or other software helps me visualize before cutting. It’s a game-changer for complex designs.
- Community Forums: Sharing experiences on trusted sites has helped me learn tricks I wouldn’t find in manuals. The DIY community is invaluable.
Ignite Your Built-in Cabinets Journey Today
Creating built-in cabinets can elevate your home’s style and functionality, but the true magic lies in your willingness to learn and adapt. By embracing the lessons learned and leveraging trusted resources, you can transform your space with confidence. Remember, every successful project starts with the decision to begin—so don’t wait to turn your vision into reality. For additional inspiration and guidance, explore built-in storage ideas and take the first step toward your perfect home upgrade. What’s your biggest challenge when installing built-in cabinets? Share your experience below!
Related Posts

Expert Installation Tips for Custom Built-in Cabinets & Storage in 2025
My Journey into Custom Built-in Cabinets: A Personal PerspectiveWhen I…

5 Unexpected Locations for Custom Built-ins in 2026
Ever found yourself desperately scrubbing the last inch of clutter…
Built-ins & Storage Solutions: Expert Installation Tips for 2025
I vividly remember the frustration of trying to squeeze one…