

Ever had that sinking feeling when your hefty safe cabinet threatens to tip over just as you’re reaching for your favorite bottle or important valuables? I remember the first time I installed a massive safe and watched it wobble ominously on my tile floor. It’s a jarring experience—kind of like realizing your furniture isn’t as sturdy as it seems—especially when you’re dealing with something as valuable and heavy as a safe cabinet. That moment of doubt prompted me to dive deep into the world of proper anchoring techniques, and let me tell you—it’s worth every minute of research.
Why Properly Anchoring Heavy Cabinets Matters More Than You Think
Heavy safe cabinets aren’t just bulky—they’re potentially dangerous if not secured correctly. An unsecured or improperly anchored cabinet can tip over, causing injury or damage, especially in earthquake-prone areas. Plus, when your valuables are stored inside, the last thing you want is for them to come crashing down during a mishap. The good news? With a few straightforward steps, you can ensure these giants stay put, safeguarding your home and loved ones alike.
Concerned About Wasting Time or Making Things Worse? Here’s the Truth
I once made the mistake of ignoring instructions and relying on flimsy wall anchors. That error was a costly lesson—literally—because when the cabinet shifted, it damaged the wall and compromised the security of my valuables. Early on, I learned that using the right type of anchors and understanding your subfloor’s structure is essential. As experts note, choosing the appropriate anchoring method can prevent accidents and ensure longevity (source: Transformation Ideas for Storage).
So, are you tired of worrying about your hefty cabinets wobbling or, worse, falling over? Ready to learn how to anchor them properly to subfloors, whether concrete, plywood, or other materials? You’re in the right place! In the next sections, we’ll explore the practical methods and tools to make your installations safe and secure, giving you peace of mind.
.
Start with a solid assessment of your cabinet and floor
Before attaching anything, examine the weight distribution, hinges, and the flooring underneath. If installing on tile, check if the surface is level and sturdy enough to support anchoring. For example, I once tried to anchor a safe on warped plywood, which caused wobbling despite the anchors, highlighting the importance of a clean, flat surface.
Choose the right type of anchors for your flooring material
Concrete floors require heavy-duty expansion anchors
For concrete subfloors, I recommend using wedge anchors. I installed mine following a step-by-step guide from expert installation tips, ensuring a firm grip that prevents any movement during seismic activity or everyday use. Avoid flimsy plastic anchors—they won’t cut it for heavy cabinets.
Plywood or wooden subfloors benefit from lag bolts and wood screws
If your cabinet sits on a plywood deck, use lag bolts with washers. I learned this the hard way when my first attempt with standard screws led to minimal hold, causing me to redo the job properly. Pre-drill holes to prevent splitting and ensure a snug fit.
Mark drilling points precisely
Measure carefully—mark the positions where the anchors will go, aligning with the cabinet’s mounting points. Use a stud finder or consider steel brackets if attaching to wall studs for added stability. I once marked wrong and had to patch the wall, wasting time but learning to double-check measurements.
Drill and install anchors securely
Use a hammer drill for concrete or the appropriate drill bit for wood. Insert the anchors flush with the surface; for concrete anchors, tap them in with a hammer, then tighten the bolts. During my installation, I used a level to keep the cabinet aligned, which made attachment smoother and resulted in a professional finish.
Attach the cabinet firmly to anchors or brackets
Secure the safe to the anchors or steel brackets—tighten bolts with a wrench, ensuring no wobble remains. For extra security, consider cross-bracing or anchoring to multiple points, especially on larger units. I once added an L-bracket for extra support, which prevented leaning over time.
Verify stability and make adjustments
After installation, gently test the cabinet’s sturdiness by pushing slightly from different angles. If it wobbles, tighten bolts further or add additional brackets. Remember, the goal is to make it like it’s part of the wall—completely stable. I always recheck after a week to ensure nothing has loosened.
Following these steps guarantees your safe cabinet stays put, protecting your valuables and family. Don’t skip these crucial precautions—taking a bit of extra time now can save you from costly accidents later. For more detailed techniques and specialized tools, visit our contact page for expert advice.
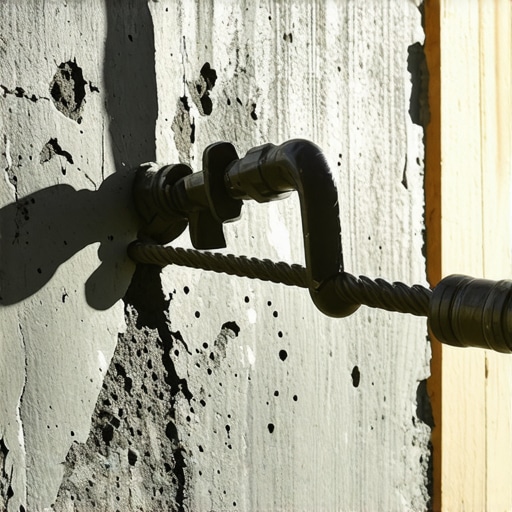 Many homeowners assume that installing built-in storage and vanities is straightforward, but in reality, there are nuanced pitfalls that can trip up even experienced DIYers. One widespread misconception is that simply attaching cabinets to walls or floors guarantees stability; however, without considering the load distribution and structural reinforcements, your storage may wobble or, worse, detach over time. For example, relying solely on drywall anchors for heavy vanities often leads to catastrophic failures—steel brackets or specialized fasteners are crucial, especially when supporting substantial weight, as highlighted by experts in personalized cabinetry (source).
Keeping Your Storage Solutions in Top Shape
Maintaining your built-in storage and vanities requires the right tools and a proactive approach. I personally rely on a combination of specialized tools and software to ensure that my installations remain secure and functional over time.
Brush Up Your Toolkit with Power Drills and Proper Bits
A high-quality corded or cordless drill is essential. I use a Makita XFD07Z because its variable speed settings and ergonomic design make precision work easier. Pair it with drill bits tailored for your material—carbide-tipped bits for concrete, for instance—and you’ll save yourself time and frustration during periodic inspections or adjustments.
Invest in a Digital Torque Wrench for Tightening Bolts
Over-tightening can damage materials, while under-tightening risks loosening over time. I trust my Bosch Digital Torque Wrench because it provides precise measurements, helping me maintain manufacturer-recommended torque levels. This attention to detail extends the lifespan of hardware and prevents future issues that could compromise your setup.
Use Leveling Software for Perfect Alignment
For larger projects, I utilize smartphone apps like Bubble Level or Spirit Level Pro. These tools help verify that vanities and cabinets are perfectly aligned, which is critical for both aesthetics and function, especially in long-term scenarios where even slight misalignments can cause wear or damage.
Schedule Regular Inspections to Catch Issues Early
Set reminders to inspect your installations every six months. Checking for loose fasteners or signs of wear can prevent costly repairs down the line. I recommend keeping a checklist and documenting your findings with photos to track changes over time.
Future Trends: Smart Tools and IoT Integration
Looking ahead, I predict a rise in smart tools equipped with Bluetooth connectivity and integrated diagnostic features. These innovations could alert you to loosened bolts or shifting components before problems become severe, streamlining maintenance and increasing safety.
How do I maintain my built-ins and vanities over time?
Beyond tools, it’s crucial to use proper cleaning agents and avoid excessive moisture or weight that could strain your installations. Regular maintenance combined with the right equipment ensures your storage solutions serve you well for years to come. Want to see how advanced tools can elevate your next project? Try incorporating a digital torque wrench or leveling app to achieve flawless, enduring results—these small upgrades can make a big difference.
If you’re ready to deepen your skills, visit our contact page for personalized advice or to discuss specific tools tailored to your unique setup. Remember, investing in the right tools today paves the way for hassle-free storage solutions tomorrow.
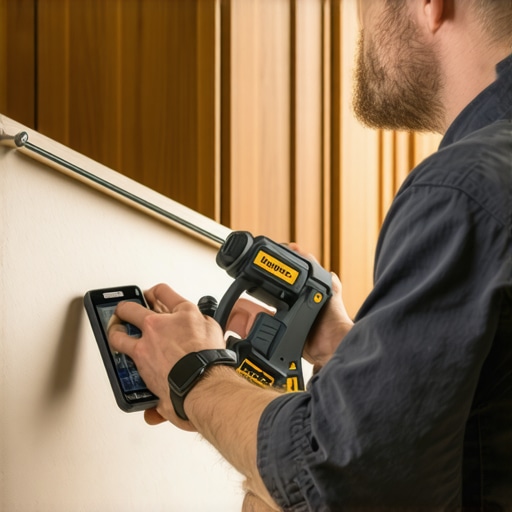
Image prompt: A professional handyman using a digital torque wrench and a smartphone level app during cabinet installation, emphasizing precision tools for long-term maintenance.
Lessons That Took Me by Surprise About Secure Storage Solutions
One revelation was that heavy cabinets demand more than just screwing into drywall; structural reinforcement makes all the difference. I once thought using basic wall anchors sufficed, but a wobble during a seismic tremor proved me wrong, leading me to explore steel brackets and internal supports deeply. Another unexpected lesson was how often I overlooked the importance of precise measurement—an inch off can cause wobbling or misalignment, making future adjustments more cumbersome. Lastly, I learned that regular inspections and maintenance are vital, as even the sturdiest installations can loosen over time, especially in climates with humidity fluctuations.
Tools and Resources That Elevated My Installation Game
- Digital Torque Wrench: I rely on my Bosch digital torque wrench for perfect tightenings, preventing over-tightening that can damage materials. This tool ensures I follow manufacturer specs and prolongs the durability of hardware.
- Smart Level Apps: Smartphone apps like Bubble Level help me verify alignment instantly, saving time and preventing subtle misalignments that can cause wobble or aesthetic issues. They’re especially handy when working on large or irregular surfaces.
- Expert Guides and Forums: Trusted resources like the installation guides provide detailed steps and troubleshooting tips, saving me from costly mistakes and giving me confidence to tackle complex projects.
- Heavy-duty Anchors and Hardware: I prefer wedge anchors and steel T-brackets for their reliability, especially when anchoring to concrete or uneven floors. These tools and fasteners have consistently delivered peace of mind in my DIY projects.
Embrace the Challenge and Build Confidence
Taking on the installation of heavy storage solutions and vanities can be intimidating, but remember: every successful project boosts your skills and confidence. With the right tools, a cautious approach, and continuous learning, you’ll turn what once seemed daunting into a rewarding experience. Don’t let fear hold you back—every sturdy installation is a step toward a safer, more organized home. Curious about advanced techniques or specific tools for your project? Visit our contact page to connect with experts who can guide you through every step. How has a proper installation made a difference in your space? Share your story below.