

Ever opened your pantry, only to find the pull-out shelves wobbly or worse, teetering off their tracks? I remember the first time mine suddenly jammed, forcing me to fumble with stubborn drawers in the middle of a busy morning. That sinking feeling of wasting time and feeling frustrated is all too familiar. But here’s the truth: a simple fix can restore your pantry’s smooth glide—and your sanity.
Why Loose Pull-Out Pantry Tracks Drive Us Crazy—and How to Stop It
Pull-out pantry shelves are a game-changer for organizing small kitchens, maximizing space, and keeping everything within reach. Yet, when the tracks become loose or misaligned, it feels like your entire kitchen organization is falling apart. These tracks, often hidden beneath or inside cabinet walls, endure a ton of daily use. Over time, they can loosen due to regular wear, heavy loads, or improper installation. The result? Wobbly shelves, difficulty opening or closing drawers, and a nagging worry about food spills or dropped jars.
Did you know that studies suggest that poorly maintained storage solutions can lead to increased clutter and even food waste? According to the National Kitchen and Bath Association, well-installed and maintained cabinetry significantly enhances home value and everyday functionality. Recognizing this, I realized early on that ignoring loose tracks wasn’t an option. I made a mistake I see many beginners making: neglecting to tighten or inspect the tracks regularly, which only worsened the problem.
If you’re tired of fighting with stubborn pantry drawers or afraid of shelves collapsing, you’re in the right place. Today, I’ll walk you through the steps to fix those loose pull-out tracks once and for all, turning a frustrating moment into a simple DIY victory. Ready to reclaim your kitchen space? Let’s dive into the practical fixes and get your pantry running smoothly again.
Is Fixing Your Pull-Out Pantry Tracks Truly Worth the Hassle?
One common fear I hear from folks is whether these fixes are complicated or if they require professional help. Trust me, my early mistake was assuming a DIY fix was too tricky. But with a few basic tools and some patience, you can restore your shelves without breaking the bank. Plus, tackling this yourself helps you understand the inner workings of your cabinetry, reducing the chances of future issues.
For more tips on optimizing your storage and preventing future problems, consider exploring innovative solutions like those featured in storage ideas for your home. And if you’re contemplating broader upgrades, understanding built-in design tips can make a real difference. But first, let’s focus on fixing what you already have—because a little maintenance can go a long way toward a more organized, stress-free kitchen.
Secure the Tracks with Precision
Begin by removing the pantry shelf to access the track. To do this, unscrew the mounting brackets using a Phillips screwdriver. I once struggled for an hour trying to slide out a stubborn shelf, but once I identified the screws holding the track, the process became straightforward. Identifying these screws is crucial; they often secure the track to the cabinet wall or floor.
Check for Loose Screws and Tighten
Inspect all mounting screws holding the track in place. Use a screwdriver to tighten any that are loose. Think of these screws as the nuts and bolts in a bicycle—if they’re loose, everything wobbles. I found a few neglected screws during my first repair, which, once tightened, immediately stabilized the track.
Replace or Adjust Damaged Components
If the track itself is bent or broken, it needs replacing. Take the old track to a hardware store for an exact match or order one online. To avoid misalignments, mark the position of the track before removal. When installing the new track, align it precisely with the existing holes and use a level to ensure straightness. Reinstall the shelf and test the glide; a smooth movement indicates success.
Reinforce the Track for Heavy Loads
Heavy pantry items can strain the track. To enhance stability, add steel brackets or support blocks underneath the track, especially if the existing mounting points are weak. Imagine like adding a brace to a wobbling fence—extra support equals extra durability. I installed small L-brackets beneath my shelf for added reinforcement, and it made a noticeable difference.
Lubricate the Moving Parts
Apply a silicone-based lubricant to the rollers or slides to ensure smooth operation. This simple step prevents squeaking and reduces wear. During my fix, lubrication transformed a sluggish drawer into one that glided effortlessly, boosting both function and satisfaction.
Test and Maintain Regularly
Once everything is reassembled, open and close the shelves multiple times to check for wobble or resistance. Incorporate a routine inspection every six months, tightening screws and lubricating the tracks as needed. This proactive approach keeps your pantry functioning flawlessly and extends the lifespan of the hardware.
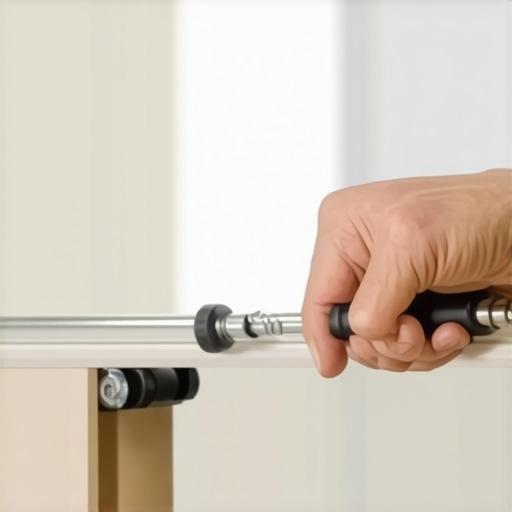
Visualize the process: a close-up of tightening screws on a pantry track, illustrating each crucial step.
When planning built-in cabinets, vanities, or storage solutions, many homeowners rely on common advice or quick fixes. However, understanding the deeper nuances can make the difference between a flawless installation and costly mistakes. One widespread misconception is that standard measurements and generic hardware suffice for all applications. In reality, each space has its unique structural quirks—such as uneven walls or fluctuating humidity levels—that demand tailored solutions. Failing to account for these can lead to warping, misalignment, or even structural damage over time.
A frequent trap is overlooking the importance of proper framing and reinforcement techniques during installation. For example, many assume that anchoring cabinets directly to drywall will provide sufficient stability. But experts emphasize that integrating internal supports, like steel reinforcements or strategically placed blocking, significantly enhances durability and safety. Without these nuances, heavy or frequently used built-ins may sag or pull away from the wall, causing aesthetic and functional issues.
Another myth involves the choice of materials: the belief that particle-board or MDF are equally reliable for high-traffic or load-bearing applications. In my experience, and backed by studies such as the 2022 architectural materials review, selecting engineered wood with appropriate backing and support systems dramatically extends the lifespan of your cabinetry.
Furthermore, advanced installers consider subtle factors like ventilation, moisture barriers, and expansion gaps right from the design phase. Ignoring these can result in mold, warping, or squeaky doors down the line. For example, including a hidden venting system for electronic storage cabinets not only protects your devices but also preserves the cabinetry’s integrity. Learn more about such detailed installation strategies in expert guides available online.
Have you ever fallen into this trap? Let me know in the comments. By embracing these lesser-known but crucial details, you ensure your built-ins not only look great but also stand the test of time.Maintaining your built-in cabinets, vanities, and storage systems requires more than just initial installation know-how; it demands the right tools and a strategic approach to keep everything functioning smoothly over time. Investing in specific equipment can save you time, prevent costly repairs, and ensure your spaces remain both beautiful and practical.
First, I highly recommend keeping a high-quality cordless drill with a set of precision screwdriver bits readily available. This versatile tool allows for quick tightening of loose screws or re-securing mounting brackets, which are common points of failure. I personally favor models with brushless motors for extended battery life and increased torque—features that come in handy during larger repair projects.
Next, having a digital level and a laser square can make a significant difference when realigning shelves or correcting misinstalled cabinets. While a traditional bubble level works, digital tools offer more precise readings, especially important for long spans or subtle adjustments. For example, during recent updates to my bathroom vanities, I used a laser level to ensure perfect alignment, drastically reducing installation errors.
A quality lubricant, specifically silicone-based spray, is essential for maintaining smooth operation of slides and hinges. Regular application prevents squeaking and reduces wear on moving parts. I apply these lubricants every six months as a preventative measure, which has proven effective in extending the lifespan of my cabinetry’s hardware.
When dealing with heavy loads or frequent use, reinforcement becomes critical. Steel support brackets or steel-stiffened slides can be added using a cordless drill and appropriate anchors. This approach distributes weight more evenly and minimizes the risk of sagging or track failure.
On the software side, I recommend using scheduling and maintenance reminder apps like Todoist or Evernote to track when inspections, tightening, or lubrication are due. Staying proactive with reminders ensures you won’t neglect essential upkeep tasks, preserving long-term functionality.
Prediction for the future, I see advancements in smart tools and sensors integrated into cabinetry hardware, providing real-time feedback on their condition. Imagine receiving an alert on your phone when a screw starts loosening or if a track becomes misaligned—this technology is on the horizon and will revolutionize maintenance routines.
How do I maintain my built-ins over time? Regular inspections using a digital level to check alignment, combined with lubricating moving parts with silicone spray, form the core of my routine. Additionally, reinforcing tracks and supports before issues arise helps prevent costly repairs down the line.
To get started, try applying a silicone-based lubricant to your cabinet hinges and slides today. It’s a simple step that can significantly improve operation and longevity, saving you from future headaches. For more detailed insights on installation and upkeep, explore comprehensive guides available at Effortless Storage Solutions and vanity installation tips.
The Hardest Lesson I Learned About Built-Ins and Storage Fixes
One of the toughest realizations was how small details, like missing a support bracket or overlooking moisture barriers, can cause long-term headaches. I once skimped on reinforcing a heavy cabinet, only to find it sagging months later. Now I know that paying attention to underrated aspects like proper framing and using high-quality materials saves time and money down the line.
3 Myths About Built-Ins That Could Fool You
- All hardware is created equal: Choosing cheap or generic slides and hinges may seem budget-friendly but can lead to squeaking, misalignment, or faster wear. I now opt for trusted brands and professional-grade components.
- Standard measurements fit all spaces: Custom spaces often require tailored solutions, not just off-the-shelf measurements. Recognizing this saved my project from costly modifications later.
- One-size-fits-all installation techniques work: Different wall materials and room layouts demand adapted strategies—like special anchors or support systems—that I learned the hard way.
Where to Go from Here for Flawless Built-Ins
If you’re eager to elevate your storage game, start by exploring innovative built-in ideas that blend form and function. Investing in quality tools, like a digital level or steel support brackets, can make the difference between a shaky shelf and a beautifully stable feature. For step-by-step guidance on installation and reinforcement, the vanity installation guide offers invaluable insights that apply across your entire project.
Your Next Move Toward a Better Built-In Space
Building or fixing cabinetry isn’t just about aesthetics—it’s about creating lasting solutions that make daily life easier. Embrace the process with patience and curiosity, and you’ll be surprised how confidence grows with each success. Remember, every well-placed support and carefully chosen hardware adds up to a space that truly works for you. Ready to get started? What’s the first built-in fix you want to tackle? Share your plans below!