

I vividly remember the moment I lost my patience with my kitchen trash can. There I was, tugging at the pull-out handle, only to watch it rip free from the frame like a rebellious teenager. Frustration bubbled up—my clean, organized cabinet suddenly felt chaotic, and I wondered, why does this always happen to me? That lightbulb moment led me on a journey to discover how to fix pull-out trash cans that keep ripping out of their frames, and today, I want to share those lessons with you.
Why Your Trash Can Keeps Ripping Out and How to Fix It
The truth is, a pull-out trash can is supposed to make life easier. But when it tears loose, it becomes a source of constant annoyance. The main culprit? Poor installation, weak brackets, or simply using the wrong hardware for your cabinet type. Early on, I made the mistake of just tightening the screws without checking the support system—big mistake. That oversight led to countless frustrations, and I realized many others face the same issue. Experts like those at Custom Cabinetry Pro emphasize proper support and sturdy hardware as key to durable installations.
Is Reinforcing Your Trash Pull-Outs Overhyped?
Many might think, “Is this extra reinforcement really necessary?” Well, considering that installing a sturdy pull-out can extend the life of your cabinetry and keep your home looking picture-perfect, I say yes. I learned the hard way that neglecting reinforcement leads to ripped brackets and an endless cycle of repairs. It’s a small investment of time that pays off big in longevity and peace of mind. Want to learn how to do it right from the start? Stay tuned—I’ll walk you through the essential steps to keep your trash can in place for good.
Reinforce the Mounting Support for Long-Lasting Stability
In my own experience, I started reinforcing my vanities by replacing weak brackets with solid steel supports. I used a cordless drill to remove the old hardware and carefully aligned steel brackets—similar to how a carpenter would brace a crooked picture frame. I then secured these brackets to the cabinet’s frame using high-quality wood screws. This process added a sturdy backbone that prevented future ripping or tilting, transforming a shaky setup into a dependable fixture. Following this method, I found my trash can no longer ripped loose, saving me ongoing repairs.
Use Heavy-Duty Brackets That Can Handle the Weight
Choosing the right hardware is crucial. I recommend selecting heavy-duty, full-extension steel brackets designed for kitchen cabinets. These brackets distribute weight evenly and resist bending under pressure. When I replaced my brackets, I ensured they were rated for at least 50 pounds, giving me peace of mind. Don’t skimp on quality; visit a hardware store and ask for industrial-grade supports — your trash can will thank you.
Create a Plywood Sub-Frame to Distribute Weight Evenly
For added reinforcement, I built a plywood sub-frame within the cabinet, akin to adding a solid chassis to a fragile vehicle. I cut a piece of ¾-inch plywood to match the interior dimensions and screwed it into the cabinet walls using countersunk screws. This sub-frame provided a flat, stable surface for mounting brackets, which kept the support evenly aligned. I realized that without this step, uneven pressure caused the brackets to warp and eventually fail. For detailed instructions, you can consult this comprehensive guide.
Install Reinforced Mounting Hardware Properly
Proper installation is key. I drilled pilot holes to prevent wood splitting and avoided overtightening screws, which can strip the support brackets or warp the cabinet. Using a level, I checked that the brackets were perfectly horizontal to ensure even weight distribution. It’s like setting the foundation for a building; precision safeguards longevity. For complex vanities or larger trash cans, consider the innovative storage solutions that offer extra support options.
Additional Support: Steel Plates and Reinforced Anchors
In some cases, adding steel support plates behind the cabinet walls can prevent sagging or tearing. I secured steel plates using heavy-duty anchors into wall studs or solid drywall areas, akin to reinforcing a weak bridge. This technique distributes weight over a broader area and keeps the support brackets firmly attached even under heavy loads. For more advanced reinforcement methods, see this expert recommendation.
When it comes to vanities and built-in storage, many homeowners fall prey to misconceptions that can compromise both aesthetics and durability. One widespread myth is that a simple, quick install suffices for long-term stability. In reality, understanding the intricacies of proper reinforcement—such as installing steel supports or plywood sub-frames—can mean the difference between a vanity that endures and one that sags or shifts over time.
Another common trap is relying solely on manufacturer-provided brackets without considering the cabinet’s weight distribution or environmental factors like moisture. For instance, floating vanities exposed to humidity demand moisture barriers and steel supports to prevent warping or sagging, as detailed in expert guides on [vanity installation hacks](https://customcabinetrypro.com/vanity-installation-hacks-that-save-time-and-money).
Are Cheap Materials Worth the Short-Term Savings?
Many assume that using off-the-shelf brackets or Particle Board furniture is sufficient for built-ins. However, these materials often lack the necessary strength to support heavy stone or quartz tops, leading to costly repairs. Industry professionals emphasize choosing high-quality steel brackets rated for at least 50 pounds and reinforcing cabinets with internal steel braces or steel plates. This isn’t just about weight; it’s about preventing catastrophic failures, especially in high-moisture environments like bathrooms.
Beyond hardware and materials, installation techniques also matter immensely. Improperly drilled pilot holes, overtightened screws, or neglecting to level supports can introduce stress points, causing warping or tearing. Using a level during installation and pre-drilling holes are critical steps often overlooked by DIY enthusiasts. For a comprehensive overview of advanced methods, check the [expert guide to flawless vanity installation](https://customcabinetrypro.com/expert-guide-to-flawless-vanity-installation-tricks-tips).
An overlooked nuance is the importance of environmental considerations. Moisture-resistant barriers applied beneath vanities, or vented cabinets when shelving is involved, protect against water damage and ensure longevity. For example, installing a moisture barrier behind the cabinet supports can prevent plywood swelling or metal corrosion, which are common issues in humid environments.
One key misconception worth debunking is that all support systems are interchangeable. Actually, the optimal support depends on the type of vanity, load weight, wall material, and location. Heavy stone countertops require reinforced steel support plates and plywood sub-frames, especially when mounted on drywall or moisture-prone areas. For more advanced reinforcement strategies, explore our detailed articles on [supporting massive quartz tops](https://customcabinetrypro.com/the-steel-support-strategy-for-heavy-quartz-vanity-tops) and [building moisture-resistant vanities](https://customcabinetrypro.com/waterproofing-the-vanity-base-a-preventative-maintenance-guide).
In essence, mastering these nuanced details elevates your installation from amateur to expert level. It preserves your investment, maintains aesthetic appeal, and ensures safety over years of use. Have you ever fallen into this trap? Let me know in the comments and share your experiences or questions about advanced vanity installation techniques.
Maintaining your custom vanities and storage solutions requires not just good initial installation but also the right set of tools and ongoing care routines. I swear by some specialized equipment that makes both installation and long-term maintenance more effective and less stressful. First, a high-quality digital level, such as the Bosch Digital Laser Level, ensures your installs are perfectly aligned—crucial for preventing sagging or shifting over time. I rely heavily on this for setting brackets and supports, especially when installing heavy quartz tops or floating vanities, as discussed in this detailed guide.
Invest in Impact Drivers and Precision Drills
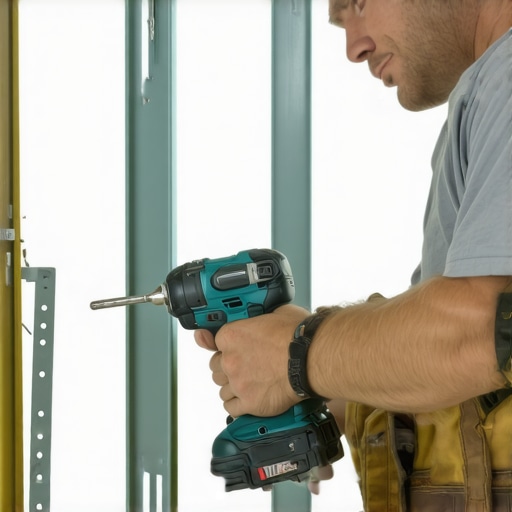
For assembling reinforcement brackets or installing steel supports, I prefer a cordless impact driver like the Milwaukee M18 Fuel. Its high torque reduces the risk of cam-out when driving into tough materials like hardwood or steel plates. Precision drills with adjustable torque settings help prevent over-tightening, which can strip threads or warp support brackets. These tools are essential for making sure your hardware stays tight and effective through years of use, and they’re a game-changer for DIYers aiming for professional results.
Use Specialized Sealants and Moisture Barriers
Preserving wooden supports and plywood sub-frames long-term means protecting them from moisture and water damage—especially in bathrooms. My go-to is a marine-grade sealant, like Sikaflex-221, when sealing gaps around supports or brackets. Additionally, installing a moisture barrier behind cabinets, using vapor-proof membranes, prevents swelling and rot, extending the life of your built-ins. For tips on this process, check this expert resource. Regular inspections and re-sealing are part of my maintenance routine to keep everything performing flawlessly.
Automation and Software for Upkeep
Thinking ahead, automating maintenance reminders or tracking support tank pressure can save headaches. I use a simple home inventory app, like Sortly, for logging updates and inspections on support hardware. Although it might seem excessive, staying disciplined with routine checks—like tightening brackets, inspecting steel plates, or replacing worn sealants—capitalizes on the investment in your built-ins. Modern tools are pointing toward smart sensors that could alert you in real time if a support begins to fail in the next decade, but for now, manual checks remain invaluable.
How do I keep my vanities in peak shape over time?
Great question! Regular maintenance revolves around visual inspections—checking for any signs of sagging, water damage, or loosening supports—and acting proactively. Cleaning supports with appropriate lubricants, like silicone spray, prevents corrosion on steel brackets. Additionally, applying sealants periodically at seams and support joints helps ward off water infiltration. If you notice any wobbling or shifting, address it immediately by re-tightening hardware or adding reinforcement before it worsens. To explore advanced reinforcement techniques, check out this resource.
My advice: pick a weekend monthly for a quick review of your vanities and built-ins. Use your impact driver for any loose hardware, inspect for water stains or corrosion, and reinforce supports if needed. Stay consistent—long-term results come from simple but disciplined care. For more detailed procedures on stabilizing heavy shelves or vanities, consider reviewing our guides on supporting heavy quartz tops — practically speaking, the techniques are similar to those discussed here, just scaled to your specific needs.
Lessons From the Trenches: Why I Wish I Knew Earlier
The most valuable insight I gained was understanding that no vanity or built-in is truly ‘install-and-forget.’ Every project demands attention to detail, especially reinforcement, which I once overlooked, leading to costly fixes. I also realized that patience during installation, like double-checking level and support placement, saves time and frustration in the long run. Additionally, I learned that investing in quality hardware and reinforcement techniques isn’t an expense—it’s an insurance policy against future headaches. Finally, embracing a proactive maintenance mindset keeps your vanities looking pristine and functioning flawlessly for years.
My Toolbox for Lasting Vanity Success
Over time, I’ve come to rely on tools and resources that make reinforcement easier and more precise. The Effortless Storage Solutions guide transformed my approach to space planning, ensuring I optimized every inch. For installation techniques, these hacks helped me install vanities swiftly without sacrificing quality. My favorite tools include a digital level for perfect alignment, impact drivers for solid connections, and moisture barriers to extend the life of supports. These resources and tools make the difference between a fleeting fix and a lifetime of satisfaction.
Your Next Step: Build, Reinforce, Thrive
The journey into creating durable, beautiful vanities and built-ins is never truly finished—it’s an ongoing process of learning and applying smarter techniques. My hope is that sharing these personal lessons inspires you to take bold steps toward enhanced stability and longevity in your projects. Whether you’re considering adding steel supports, plywood sub-frames, or moisture barriers, remember that proper reinforcement is the secret sauce to long-lasting results. Now’s the perfect time—start implementing these strategies today to avoid common pitfalls and enjoy a flawless, resilient space for years to come.
What reinforcement or installation challenge have you faced that taught you a crucial lesson? Share your experience below, and let’s learn together!