

There is a very specific sound that a pull-out trash can makes right before it fails—a soft, splintering crunch that tells you the particle board has finally given up the ghost. I remember standing in my kitchen, staring at a bin full of dinner scraps that was now resting diagonally because the rear mounting screws had completely ripped out of the frame. It’s infuriating, isn’t it? You pay for these effortless storage solutions, only to have them fall apart under the weight of a few milk jugs. I used to think the answer was just ‘more glue’ or ‘bigger screws,’ but my early attempts only made the holes larger and the mess worse. Today, I’m going to show you why those quick fixes fail and how to actually anchor that frame so it never budges again.
Stop Re-tightening Screws That Won’t Hold
If you’ve found yourself wondering why your integrated waste bin is sagging, you aren’t alone. The biggest mistake I made when I first started DIYing my kitchen was assuming the cabinet floor was as strong as the frame. Most modern cabinets are made of compressed fibers that just can’t handle the constant leverage of a fully loaded bin. When I tried to ‘fix’ mine the first time, I just drove longer screws straight through the bottom of the cabinet. Not only did it not hold, but I also nearly ruined the toe kick underneath. It’s the same frustration people face when plastic wall anchors fail for heavy shelving; you’re using the wrong hardware for a high-stress job. We need to talk about distribution of weight, not just screw length. [image_placeholder_1]
Is my cabinet floor just too far gone to save?
It’s a valid fear. When the wood looks like Swiss cheese, it feels like the only option is a total cabinet replacement. However, even if your base looks like it’s been through a blender, we can reinforce it. Think of it like why particle board shelves sag—the material itself is the weakness, not necessarily your installation technique. According to the USDA Forest Products Laboratory, the lateral load capacity of screws in composite materials like MDF or particle board is significantly lower than in solid timber, which is why those repetitive pulling motions eventually win the war. We’re going to bypass that weakness entirely. Have you ever had a ‘permanent’ fix rip out after just a week? Drop a comment and tell me what you tried—I bet I’ve made the same mistake. Now, let’s look at the structural bridge we need to build to save your kitchen.
Build a Structural Sub-Base Instead of Patching Holes
When the floor of your cabinet turns into sawdust, you have to stop thinking about the surface and start thinking about the sub-structure. I once tried to save a sagging bin by just slathering the bottom in construction adhesive and hoping for the best. Within two days, the heat from the dishwasher nearby softened the glue, and the whole assembly slid forward like a slow-motion car crash. It was a sticky, failed mess that took hours to scrape off. The lesson was clear: chemical bonds can’t replace physical structure in high-traffic kitchens. To do this right, we need to create a new foundation that doesn’t rely on the integrity of the damaged particle board.
Use a Plywood Bridge to Distribute the Load
The secret isn’t a better screw; it’s more surface area. You need to cut a piece of 1/2-inch or 3/4-inch birch plywood to fit the entire floor of the cabinet. This acts exactly like the heavy-duty plywood gusset we use for wide shelving—it takes the point-load of those four mounting screws and spreads it across the entire footprint of the cabinet. Before you drop it in, vacuum out all the loose debris and wood splinters so the new wood sits perfectly flush. If your cabinet is slightly out of square, don’t force it; shave the edges of the plywood until it slides in without binding.
Anchor Directly into the Subfloor for Maximum Grip
If you really want to stop that annoying “rocking” motion, you need to go deeper than the cabinet itself. Just like when we’re figuring out how to anchor heavy safe cabinets to subfloors, your goal is to bypass the flimsy cabinet material entirely. Use 3-inch structural screws to go through your new plywood, through the old cabinet floor, and directly into the subfloor or the floor joists. This turns your trash bin frame into a part of the house’s skeleton rather than a loosely attached accessory. Use a pilot bit first to ensure you don’t split the new plywood or the underlying wood. 
Switch to Machine Bolts to Prevent Future Stripping
If you have access to the underside—perhaps in a crawlspace or if you are working with a kitchen island—the floor bolt hack for stable island cabinetry is a total game changer. Instead of wood screws that can eventually pull out under vibration, you use through-bolts with large fender washers. This is the same logic I apply when I’m teaching people how to fix loose pull-out pantry tracks for good. The washers prevent the bolt head from ever sinking into the wood, ensuring the tension stays constant even after thousands of cycles of slamming the bin shut.
Add Lateral Cleats to Stop the Side-to-Side Sway
Finally, don’t just rely on the floor mounts. If your bin is extra wide, it’s going to wobble laterally, which eventually loosens the floor screws. I like to add small 1×2 cleats to the side walls of the cabinet that sit just above the metal frame of the pull-out. This prevents the frame from twisting when you pull it from an awkward angle while holding a heavy plate. It’s a similar concept to why particle board shelves sag—unsupported spans will always fail under pressure. These side cleats act as guide rails that keep the energy moving in a straight line, protecting the floor anchors from unnecessary stress.Most homeowners—and even some contractors—think that the secret to a rock-solid installation is simply more fasteners. I’ve seen cabinets that look like they’ve been hit by birdshot because someone kept driving screws into a failing joint. In my experience, more screws won’t save a failing cabinet; they actually compromise the structural integrity of the material by creating more fracture points. This is particularly true with modern composite materials. According to the National Kitchen & Bath Association (NKBA), the dynamic load on pull-out hardware can exceed static weight by 300% during a sharp ‘jerk’ motion—which is why standard wood screws eventually fail, no matter how many you use. Instead of adding volume, we need to focus on mechanical leverage and proper bracing. Have you ever fallen into the trap of over-screwing a loose joint only to have it strip out completely? Let me know in the comments.
Stop the rot before it starts on cold walls
One of the most common ‘oops’ factors I see involves ignoring the physics of temperature. When you’re installing built-in storage against a cold exterior wall, you are essentially creating a micro-climate. Without airflow, condensation builds up behind the cabinet, leading to mold and wood rot that softens your anchors from the inside out. I always follow the moisture barrier rule for cabinets on cold outer walls to ensure the structural wood stays dry. If you skip this, it doesn’t matter how heavy-duty your hardware is; the wall itself will eventually turn to mush and let go of the cabinet.
How do I know if my floating vanity needs a steel support rail?
This is a question I get from people who want that sleek, modern look but are terrified of the unit ripping off the wall. If you are dealing with a heavy stone top, you cannot rely on standard wood blocking alone. You need to look into the internal support move for heavy stone vanities, which often involves steel plates or L-brackets that transfer the weight directly to the studs. These vanity installation hacks are the difference between a bathroom that looks great for a month and one that lasts a decade. 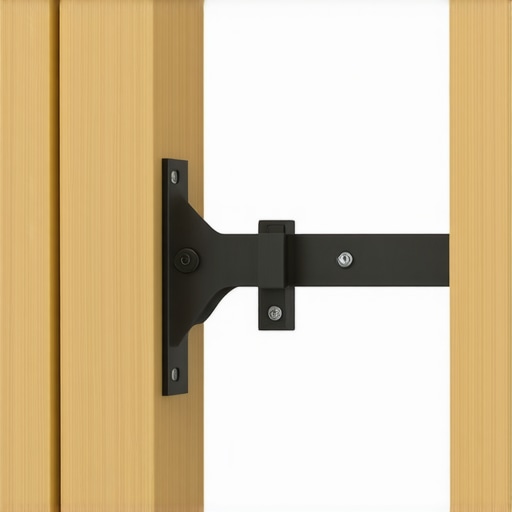
Support the weight of stone without the sag
If you’re upgrading to quartz or marble, you have to account for the ‘creep’ factor—the way wood slowly bows over time under a constant load. I’ve seen beautiful sleek built-in vanities develop a hairline gap at the backsplash because the front edge of the cabinet didn’t have enough vertical support. To prevent this, I incorporate hidden steel stiffeners or 3/4-inch plywood vertical dividers every 24 inches. This prevents the ‘smile’ effect where the middle of your cabinet dips under the weight. It’s a similar logic to why your drawer slides bind; if the box isn’t perfectly square and supported, everything else starts to drift. By focusing on these hidden nuances, you ensure your high-end finishes stay exactly where you put them.Installing a heavy-duty pull-out or a floating vanity is only half the battle; the real test of a DIYer’s skill is how that project looks five years down the road. I’ve learned the hard way that using the right fasteners is non-negotiable. I personally won’t touch a vanity project without a set of GRK Cabinet screws. They feature a built-in washer head that prevents the screw from pulling through the back rail—a common death sentence for heavy units. When you are following a step-by-step guide to vanity installation, the hardware you choose often matters more than the finish on the doors. Generic wood screws have a tapered head that acts like a wedge, eventually splitting the very wood you’re trying to secure. Structural screws, on the other hand, distribute that pressure, ensuring your creative storage solutions for vanities don’t end up on the floor.
Get a Level That Doesn’t Lie to You
If you’re still using that $5 plastic level from the bargain bin, you’re setting yourself up for a cabinet that eventually binds. According to the Architectural Woodwork Institute (AWI) Edition 2 Quality Standards, for a ‘Premium Grade’ installation, cabinets must be level within 1/8 inch over any 10-foot run. You simply cannot achieve that precision with low-grade tools. I use a 48-inch Stabila box level because it’s calibrated to a degree that makes even the slightest subfloor dip visible. This is vital when you are implementing innovative storage solutions to transform your bathroom, where even a fraction of a degree off-level can cause a stone countertop to crack over time. 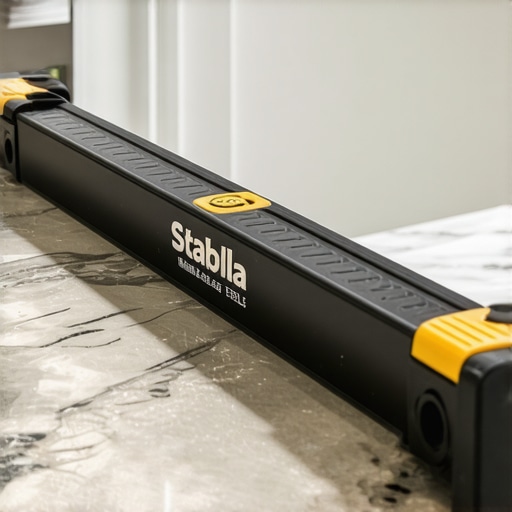
How do I keep my custom built-ins from shifting over time?
Maintenance isn’t just about wiping down the dust; it’s about checking the tension on your hardware. Every six months, I make a habit of opening my heavy drawers and checking the slide screws. Over time, the vibration of slamming drawers can back screws out of particle board. If you notice a change in the ‘click’ of your hardware, it’s often a sign of why your soft close hinges are snapping—usually due to an alignment shift that puts uneven pressure on the hydraulic piston. A quick quarter-turn with a screwdriver can prevent a $50 hardware replacement.
The Future of Invisible Bracing and Smart Hardware
Looking ahead, I predict we are moving toward a world where ‘smart’ hardware will alert your phone when a drawer slide is out of alignment or when moisture levels behind a cabinet exceed safe limits. We’re already seeing carbon-fiber reinforced resins replacing traditional plywood for high-moisture areas. For now, the best thing you can do is over-engineer your supports. My challenge to you: before you drill your next hole, swap out your generic fasteners for structural cabinet screws. That one small change in your toolkit will do more for your home’s longevity than any amount of wood glue ever could.
The Gravity Lessons That Changed My Approach to Cabinetry
After years of repairing ‘failed’ kitchen projects, I’ve realized that most issues stem from a lack of respect for leverage. Here is what I’ve learned: Over-torquing is the silent killer of particle board. Once the screw head is flush, stop; pushing it further just turns the structural fibers into useless sawdust. I also learned that pre-drilling is non-negotiable. Even with self-tapping screws, a pilot hole ensures the wood fibers are sliced rather than wedged apart, which prevents the ‘mushrooming’ effect that makes your hardware sit crooked. Finally, the ‘Shake Test’ is my gold standard. If you can move the frame with your bare hands before the bin is even loaded, it will never survive a week of real-world use. It needs to feel like a part of the house.
The Toolkit I Trust for Rock-Solid Installations
You don’t need a massive workshop, but you do need the right hardware. For starters, GRK Cabinet Screws are my holy grail. Their wide washer-heads are essential when designing creative built-ins for seamless storage because they won’t pull through the back rail. Next, invest in a Stabila Level. Accuracy is the only way to maximize your space with custom vanities without the drawers binding. Lastly, I always keep 1/2-inch Birch Plywood on hand. It’s the perfect material for building those sub-bases I mentioned, offering far more structural integrity than the stock MDF found in most big-box cabinets. [image_placeholder_E]
Your Path to a Kitchen That Doesn’t Sag
Taking the time to over-engineer your kitchen storage might feel like overkill in the moment, but it’s the difference between a house that feels ‘solid’ and one that feels like it’s falling apart. You now have the structural blueprint to move beyond temporary patches and glue. By focusing on weight distribution and using high-quality fasteners, you ensure your effortless storage solutions remain exactly that—effortless. Don’t be afraid to pull that sagging bin out and start fresh; your future self will thank you for the stability. Whether you are applying these tips to a kitchen or looking for smart storage solutions to optimize small bathroom spaces, the principles of anchoring remain the same. Have you ever had a mounting screw rip out at the worst possible time? Let me know what happened in the comments!