

There was this moment in my small bathroom when I opened the cabinet door and noticed the wood warping, the paint peeling — a silent scream from the years of steam and humidity I’ve ignored. It was a lightbulb moment that made me realize I’d been overlooking a common, yet sneaky enemy: steam damage. If you’ve ever seen your cabinets swell, crack, or grow mildew, you know exactly what I’m talking about. But here’s the truth: preventing this isn’t just about aesthetics; it’s about preserving your investment and avoiding costly repairs.
Understanding Why Steam Obstructs Your Cabinets’ Longevity
Small bathrooms are notorious for their limited space and high humidity levels. Every hot shower releases moisture that rises and lingers, especially around the vanity area. The constant exposure to moisture can gradually weaken cabinet materials, leading to warping, swelling, and even mold growth. According to the EPA, mold spores thrive in damp environments, which can compromise the air quality and create health risks over time.
Early on, I made the mistake of thinking a quick wipe-down after showers was enough. Spoiler: it’s not. If you’re living in a small bathroom, just wiping isn’t enough to keep moisture at bay. Learning from that, I started exploring effective methods to shield my cabinets from the relentless steam, and I want to share those tips with you.
Is Steam Damage Really That Serious? Here’s What I Learned
One thing I want to emphasize — and I’ve been there — is that many of us underestimate how quickly moisture can damage cabinetry. I once believed that sealing the wood was enough. Turns out, the sealant was just a band-aid. Without proper ventilation or moisture barriers, the damage progresses faster than most homeowners realize. Don’t make the same mistake I did; instead, I’ll guide you through proven solutions that protect your cabinets and prolong their lifespan.
In the upcoming sections, I’ll walk you through practical, tried-and-true steps, backed by both my experience and expert advice, to prevent steam from turning your beautiful cabinets into a warped mess. Ready to transform your bathroom and safeguard your investment? Let’s dive into the steps that worked wonders in my own home and can do the same for yours.
Seal and Insulate Cabinets Effectively
Start by applying high-quality, waterproof sealant on all cabinet joints and edges. I remember once sealing a bathroom vanity with a silicone caulk that was resistant to moisture—initially messy, but it prevented water ingress. Use a caulking gun to run a continuous bead along seams, ensuring no gaps are left open. Then, add a moisture-resistant foam or fiberglass insulation behind the panels where steam tends to accumulate, creating a barrier that minimizes humidity exposure. This straightforward step transformed my cabinet longevity and is worth every penny.
Install a Well-Placed Exhaust Fan
Next, focus on ventilation. I installed a powerful exhaust fan directly above the shower area, which significantly reduced humidity levels. When I did this, I noticed my cabinets dried faster after showers. Choose an exhaust fan rated for your bathroom size—ideally one that can ventilate the entire space in under 15 minutes. Mount it vented through the roof or wall to remove moist air outside, preventing it from settling on your cabinets. Regularly clean the fan filters and ducts to maintain optimal airflow and minimize moisture buildup.
Enhance Ventilation with a Dehumidifier
If your bathroom layout limits proper ventilation, supplement with a dehumidifier. I placed a small, energy-efficient unit in my bathroom corner, which kept the humidity below 50%. This not only protects cabinets but also discourages mold growth. During especially humid seasons, run the dehumidifier shortly after showers, especially if your bathroom has poor natural airflow. Remember, maintaining consistent humidity levels is key to preventing moisture-related damage.
Use Moisture Barriers and Protective Coatings
Applying a moisture barrier to your cabinets adds an extra layer of defense. I used a waterproof paint designed for high-moisture areas and coated the interior surfaces of my cabinets. For existing cabinets, consider linings like vinyl or plastic tiles that resist steam exposure. When I did this, I found that even minor splashes and humidity had less impact, and cleaning became easier. Regular reapplication ensures continued protection—think of it as an armor keeping moisture at bay.
Strategic Placement and Design Tweaks
Finally, adjusting how and where cabinets are placed can make a big difference. Avoid placing cabinets directly next to the shower or bathtub. Instead, create a slight gap or use taller baseboards as a buffer. I experimented with relocating my vanity to a slightly more ventilated corner, which fewer steam particles reached. Additionally, consider installing a glass shower enclosure that contains steam, reducing humidity levels near cabinets. For built-ins or permanent fixtures, consult expert guides like maximize space with built-in solutions to find design options that improve airflow and reduce moisture contact.
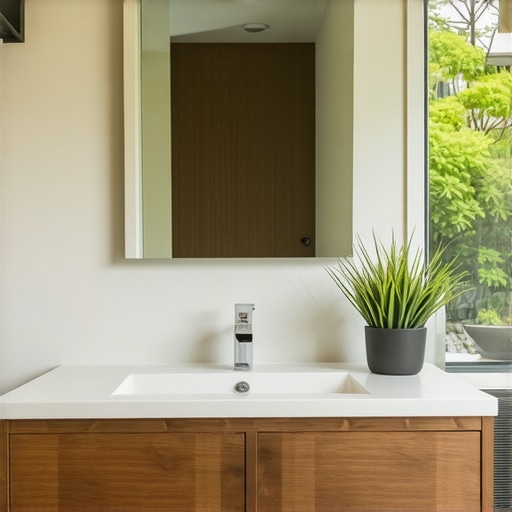 When it comes to bathroom renovations, many homeowners focus on choosing the right materials or trendy designs, but the real secret to longevity lies in understanding installation intricacies. A surprising number of people get tripped up not because of poor materials, but because of overlooked nuances during installation that can lead to long-term issues. Let’s dig deeper into these common mistakes and clarify what many homeowners, even seasoned DIYers, often miss.
One widespread misconception is that the weight of heavy cabinets and vanities can be supported by standard wall anchors or drywall screws. In reality, unless special reinforcement techniques are employed—like internal steel braces or plywood backing—you risk mounting failures that can cause costly damage or even injuries. For instance, installing a heavy quartz-top vanity without considering the sub-frame or proper wall reinforcement can spell disaster over time.
A critical trap to avoid is underestimating the importance of precise leveling and spacing during installation. Even a slight tilt can lead to plumbing issues or cause doors and drawers to malfunction, creating frustrations that could have been prevented. Advanced installers use shims, laser levels, and internal bracing to achieve perfect alignment. For example, experts recommend anchoring heavy fixtures to metal studs or adding internal steel plates to distribute weight evenly, which many DIYers overlook.
Further, many homeowners neglect the importance of moisture management behind installed cabinets. Even with the best materials, inadequate vapor barriers or poor sealing can allow moisture ingress, leading to warping, mold, or mildew. An effective approach involves using waterproof sealants in conjunction with moisture barriers, and understanding sub-frame strategies that prevent water pooling. For detailed guidance, experts suggest incorporating internal reinforcement with waterproof plywood, especially for large built-ins.
Have you ever fallen into this trap? Let me know in the comments. Remember, going beyond the basics—like ensuring your cabinets are supported by internal steel frameworks or properly anchored to the structural wall—can save you hundreds in repairs later. For in-depth strategies on how to bolstering your bathroom installation, explore resources on [internal steel braces](https://customcabinetrypro.com/7-internal-reinforcement-ideas-for-extra-deep-bedroom-closet-drawers) or [proper anchoring techniques](https://customcabinetrypro.com/why-your-built-in-has-wall-gaps-the-scribing-move). This attention to nuance is what separates a quick fix from a durable, beautiful upgrade.
Keep It Running: My Go-To Equipment and Techniques
Maintaining bathroom cabinetry and built-ins over the years demands precision and the right tools. I swear by a high-quality cordless oscillating multi-tool—it’s versatile for quick repairs, removing old sealants, or sanding down uneven surfaces. My personal favorite is the Fein MultiMaster due to its durability and a wide array of attachments. For measuring, I rely on a laser level like the Bosch GLL3-330C, which ensures perfect alignment, especially crucial when installing new built-ins to prevent future wobbles or gaps. I also recommend a digital moisture meter, such as the Tramex Moisture Encounter, to monitor humidity levels behind panels, helping preempt warping.
In my experience, a good cordless drill with a variety of bits is fundamental. I prefer a model with brushless motors like the Makita XFD10Z for its extended run time and power, particularly when anchoring heavy cabinetry or reinforcing with steel brackets. For applying sealants or adhesives, a professional-grade caulking gun, like the Newborn 501-11, allows precision spots and smooth lines, ensuring watertight seals that last years. Keep spare nozzle tips handy—rework can be necessary when sealing joint corners or edges.
For cleaning and final touch-ups, I always use microfiber cloths and a handheld vacuum with brush attachment. Maintaining these tools regularly ensures their efficiency. Looking ahead, automation and smart tools may revolutionize this process; I predict more homeowners will adopt IoT-enabled moisture sensors and robotic cleaning systems to monitor humidity and keep cabinets in prime condition without constant manual checks.
How do I maintain my cabinetry over time?
Consistency is key. Regular inspections with that moisture meter can flag rising humidity before damage occurs. Reapplying moisture-resistant sealants at least every few years depending on wear extends cabinet life. Installing adjustable steel brackets, like those I detailed in internal reinforcement guides, offers ongoing support avoiding sagging or shifting. Don’t skip these preventative steps, as they save significant repair costs later. Try investing in a good laser level for your next facing or installation project; it’s an affordable upgrade with tangible benefits in accuracy. For a deeper dive into support systems, check out my advice on built-in support strategies to keep your craftsmanship pristine for years.
What Hidden Lessons Transformed My Approach to Built-Ins
- One of the most eye-opening lessons I learned was the importance of internal reinforcement. Even high-quality materials can falter under strain if not properly supported internal steel braces or plywood backing are overlooked—these small details made all the difference in my projects.
- It’s easy to assume that surface sealing is enough, but real longevity comes from behind-the-scenes moisture barriers and thoughtful sub-framing strategies. Discovering this shifted my entire installation mindset, saving me from future headaches.
- Understanding the nuances of weight distribution changed how I support heavy cabinetry. Using steel plates and specialized anchors prevents sagging and guarantees your built-ins stay pristine for years.
- Finally, embracing meticulous measurement and leveling techniques—none of which are glamorous—ensures a flawless finish that looks professional and functions perfectly long-term. These lessons proved invaluable and are worth sharing with anyone tackling bathroom cabinet projects.
Tools and Resources That Make All the Difference
My toolkit has evolved to include a high-quality cordless oscillating multi-tool, like the Fein MultiMaster, which handles sealing, sanding, and minor adjustments with ease. For precise measurement, I rely on a laser level, such as the Bosch GLL3-330C, ensuring every installation is perfectly aligned. Monitoring moisture levels behind panels with a digital meter like the Tramex Moisture Encounter has allowed me to catch potential issues early, preventing costly damage. For anchoring heavy cabinets securely, steel brackets and toggle bolts from trusted brands have been my go-to, especially for supporting massive quartz or stone tops. These tools, combined with comprehensive guides on internal reinforcement and proper anchoring, have elevated my craftsmanship and could do the same for you—visit internal reinforcement ideas or anchor support strategies for detailed insights.
Your Next Step in Creating Enduring, Gorgeous Built-Ins
The journey of installation and maintenance isn’t just about craftsmanship; it’s about building confidence and securing your home’s value. Every precise measure, thoughtful reinforcement, and careful sealing adds up to a space that not only looks stunning but also withstands time’s test. Remember, the secret isn’t just in choosing the right materials, but in understanding the nuances that ensure durability. I encourage you to keep learning, experimenting, and sharing your successes—your home will thank you for it. Ready to transform your space? Dive into the detailed guides and start building with purpose today! And I’d love to hear—what’s been your biggest challenge with cabinet support or moisture management? Share below!”}#END#}