

Ever tried installing a closet rail only to find it wobbling or pulling out after a few weeks? I remember the lightbulb moment when my latest closet project collapsed mid-installation because I underestimated how weak and brittle some drywall really is. It’s frustrating—like, you think you’re creating storage efficiency, but instead, you’re just inviting a mess of fallen shelves and broken drywall. That experience made me realize the importance of properly reinforcing drywall before hanging anything heavy.
Why Reinforcing Weak Drywall Matters for Your Closet Rails
Drywall is designed to be a smooth wall covering, not a load-bearing superhero. When it comes to supporting something like a closet rail, especially if you plan on hanging multiple items or heavier garments, the drywall alone often isn’t enough. Over time, weak spots can give way, leading to sagging shelves, wobbly rails, or worse—damaged walls that require costly repairs. Proper reinforcement not only ensures safety but also prolongs the life of your storage solutions.
Have you ever faced the sinking feeling when a closet rail starts to pull away or wobble? You’re not alone. Many homeowners overlook the importance of drywall strength, thinking that the wall itself will do the job. Unfortunately, drywall can be surprisingly fragile, especially in older homes or areas with moisture exposure, making reinforcement an essential step.
It might seem intimidating at first, but with the right techniques, reinforcing your drywall for closet rails becomes straightforward. I made a mistake early on by just screwing into the drywall without any additional support—this led to a quick failure. Trust me, taking the time to properly reinforce is worth every minute.
So, are you ready to learn how to make your closet rails rock-solid and worry-free? Let’s dive into the practical steps that will turn your weak drywall into a sturdy foundation for all your storage needs.
Strengthen the Wall Before Drilling
Begin by locating the wall studs using a stud finder to ensure secure attachment points. Mark these locations clearly with a pencil. If your wall lacks sufficient studs where you plan to install the rail, consider installing vertical wooden backing strips (furring strips) between studs to distribute weight evenly. Use a level to ensure your strips are perfectly vertical, then secure them with heavy-duty screws into the studs. This creates a sturdy platform capable of supporting heavy loads.
Upgrade Your Drywall with Steel Plates
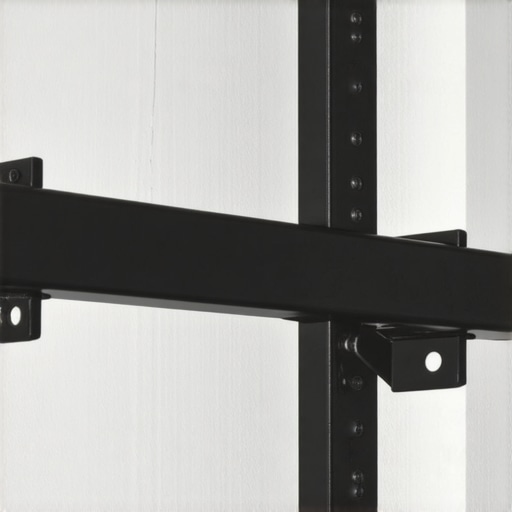
For added reinforcement, affix steel plates over the drywall sections where the closet rail will be mounted. Pick plates that are at least 4 inches wide and long enough to cover the mounting area completely. Drill holes into the plates aligned with your studs, then secure them tightly with screws. This spreads the load over a larger area, preventing drywall from cracking or pulling away. If you’ve ever struggled with shelves wobbling despite proper installation, reinforcing with steel plates can be a game-changer.
Anchoring Hardware for Heavy Loads
Utilize heavy-duty anchors designed for drywall, such as toggle bolts or molly bolts, for additional security. When mounting brackets or tracks, insert these anchors into pre-drilled holes, then tighten them securely. This method ensures the weight of hanging items is distributed across the wall’s internal structure rather than relying on the drywall alone. Remember, always size your anchors to match the expected load to prevent failures.
Install a Continuous Support Track
Use a steel or wooden support rail along the entire length of your closet wall. This rail acts as a backbone for the closet system, sharing weight and reducing stress on individual mounting points. Secure the rail into studs or reinforced areas using appropriate screws or bolts. By distributing the load across a broad area, you safeguard against sagging or tearing that often occurs with direct drywall attachments.
Test the Reinforcement Before Heavy Use
After installation, gently test the stability by hanging a few lightweight items initially. Gradually add weight to ensure your reinforcement holds up under load. If any wobbling or movement occurs, reinforce those areas further with additional screws or braces. This step prevents surprises once you start adding heavier garments or storage boxes.
Learning from my early projects, I once skipped proper reinforcement and ended up with a sagging rail after just a few weeks. Once I applied these reinforcement techniques—adding steel plates and securing backing strips—the wall held solidly under multiple coats and heavy hangers, saving me from future repairs. Proper reinforcement transforms weak drywall into a reliable support system, making your closet both safer and longer-lasting.When planning built-ins, vanities, or custom storage, many homeowners approach the project with a simplified mindset, believing that a straightforward installation will suffice. However, beneath the surface lies a series of misconceptions that can lead to costly mistakes and subpar results. Let’s explore some often-overlooked nuances and debunk common myths to elevate your project to professional standards.
One prevalent misconception is that standard drywall anchors can support heavy built-in units or large vanities. In reality, this approach is a trap—especially when dealing with substantial weight. The truth is, proper reinforcement techniques, like adding steel plates or anchoring into studs, are essential for long-term stability. Relying solely on drywall anchors might seem easier initially, but it puts your investment at risk of damage or failure over time.
Another popular myth is that all built-ins are inherently compatible with any wall type. This couldn’t be further from the truth. Walls vary significantly—ranging from plaster to concrete, with each material demanding different fixation strategies. For example, heavy bathroom vanities or wine racks mounted on a plaster wall without internal steel bracing may initially hold, but are prone to wobbling or even detaching. Consulting experts or referencing comprehensive guides can preempt these pitfalls.
Aside from misconceptions, many installers overlook the importance of load distribution. A common mistake is mounting heavy cabinets directly onto drywall without considering internal bracing or support tracks. This oversight can cause sagging or cracks, especially over time. Advanced installers mitigate this by installing vertical backing, continuous support rails, or steel reinforcements—techniques that are well-covered in resources like [effortless storage solutions](https://customcabinetrypro.com/effortless-storage-solutions-for-a-tidy-stylish-home).
Here’s an advanced question worth asking: *How can I ensure my built-in units remain perfectly level on uneven floors or walls?* The answer involves employing hidden shims, adjustable mounting brackets, or custom sub-frames—details often skipped by amateurs. Incorporating these elements not only achieves a seamless aesthetic but also enhances durability. For further insights, exploring [vanity installation hacks](https://customcabinetrypro.com/vanity-installation-hacks-that-save-time-and-money) can provide practical solutions.
Finally, a critical nuance is understanding the material interaction under load, especially with stone or heavy countertops. Heavy stone vanities can crack drywall if not secured with steel plates or proper framing. Experts recommend placing steel reinforcements behind drywall at mounting points to distribute weight evenly, a technique supported by studies on load transfer efficiency.
In conclusion, the key to flawless built-ins and storage solutions isn’t just accurate measurements or aesthetic design—it’s an in-depth understanding of wall dynamics, load management, and tailored reinforcement methods. Have you ever fallen into this trap? Let me know in the comments, and share your experiences or questions. Your insights can help others avoid these common pitfalls and achieve professional-grade results.Maintaining your built-ins, vanities, and storage installations requires more than just initial setup; it demands the right tools combined with a disciplined approach. Over the years, I’ve honed a set of specific equipment and methods that make ongoing maintenance and periodic upgrades straightforward and effective.
First and foremost, a high-quality digital level like the Bosch GLL 3-80 makes a noticeable difference. Unlike traditional bubble levels, a digital level provides precise readings, allowing me to detect any subtle shifts in the alignment of floating vanities or wall-mounted shelves. This precision is critical for ensuring everything remains perfectly level over time, especially as the house settles. Additionally, I constantly rely on a stud finder with an AC detection feature, such as the Zircon StudSensor e50, to locate internal framing or support structures before performing any maintenance. Knowing where the internal supports lie not only helps in reinforcing or upgrading but prevents accidental damage during inspections.
For periodic touch-ups and ensuring the integrity of drywall reinforcement, a cordless drill with a maximum torque setting is indispensable. I favor models with brushless motors like the Milwaukee M18 Fuel, which offers reliability and longevity. These drills allow me to tighten or replace anchors and bolts without stripping screws or damaging the wall surface. Paired with a set of high-quality accessories, including a variety of toggle bolts and steel plates, I can readily adapt to different load requirements.
Understanding the importance of surface consistency, I also invest in a small, handheld sander for smoothing out any scratches or uneven spots that occur after modifications. Regularly checking the visual alignment with these tools helps prevent minor shifts from turning into major issues down the line.
On the software front, I use 3D modeling tools like SketchUp to plan out reinforcement upgrades or new installation placements virtually. This proactive approach allows me to identify potential stress points before physically engaging with the wall, saving time and avoiding unnecessary damage.
The trend in maintenance is leaning toward integration of smart detection systems, and I predict that future tools will incorporate IoT technology. Imagine sensors that monitor wall stability and send alerts when certain thresholds are crossed, enabling pre-emptive reinforcement.
### How do I maintain my built-ins over time?
To ensure longevity, schedule regular inspections—quarterly if your home experiences significantSettling or environmental changes. During these checks, use your digital level to verify that everything remains aligned, and check structural supports with your stud finder to anticipate wear or degradation. Tighten bolts or anchors as needed, and reseal or repaint where paint has chipped. Maintaining your hardware, like steel plates and brackets, with a rust inhibitor like WD-40 Specialist Fast Dry Contact Cleaner, extends their service life.
Finally, I encourage you to borrow this proactive mindset: incorporate a quick monthly check using your digital level and stud finder. It’s a simple, inexpensive habit that prevents costly repairs later. For more advanced reinforcement techniques, try implementing steel plates behind heavy installations, referencing the expertise shared by load transfer specialists, such as in the detailed guides on heavy-duty wall fixes. A small investment in the right tools makes a significant difference in keeping your storage solutions durable and beautiful over the long haul. Looking ahead, embracing smart maintenance tools will further streamline this process, elevating your home improvement game.
Ready to start? Use your digital level today to verify the levelness of your floating vanities or shelves—small steps can lead to big savings and longer-lasting results.
Lessons Hidden in My Closet Construction Mistakes
One of my biggest surprises was realizing that even minor oversights in drywall reinforcement could lead to significant damage over time. For example, I once installed a closet rail without securing backing strips, only to find it sagging within weeks. That taught me that no detail is too small when anchoring heavy storage components, and that reinforcement techniques are a game changer for durability. Additionally, I learned that relying solely on drywall anchors is a recipe for wobble—steel plates and proper stud attachment make all the difference, a lesson I wish I had grasped sooner.
Tools and Resources That Elevated My Storage Projects
Over the years, I’ve come to trust a few key tools to ensure my built-ins stand the test of time. The Bosch GLL 3-80 digital level became my go-to for perfect alignment, preventing future sagging. I also depend on heavy-duty toggle bolts from GRK for extra support, especially when attaching to weaker drywall areas. For planning, SketchUp helped me visualize reinforcement strategies like steel plates and backing strips. Reading specialized guides, such as built-in storage ideas, has expanded my understanding of load distribution—it’s worth exploring these professional insights to perfect your installation game.
Let Your Confidence Grow—Time to Reinforce and Conquer
Embarking on your storage solutions or built-in projects might seem daunting at first, but knowing these reinforcement secrets transforms hesitation into confidence. When you prioritize proper support—like securing steel plates behind drywall or anchoring into studs—you’re not just installing; you’re creating a lasting foundation for your home. Remember, every successful project starts with a single step, and with the right tools and techniques, your storage ambitions become achievable. Take action today, reinforce solidly, and enjoy the peace of mind that comes from a job well done. Your space will thank you for it!