

The sound of a heavy oak desk meeting a laminate floor at 2 AM is something you never forget. It’s a sickening thud, followed by the tinkling of broken coffee mugs and the realization that your weekend project just became a Monday morning disaster. Years ago, I moved into a sleek, modern condo and decided to install a custom workspace. I bought the lumber, found the “studs” with a magnet, and drove in a dozen wood screws. I thought I was a pro. Ten minutes after I set my monitor down, the whole thing peeled away, leaving gaping holes in the drywall where those flimsy 25-gauge metal studs had simply given up. It was a humiliating lesson in physics. I realized quickly that the traditional rules of carpentry don’t apply when your home’s skeleton is made of glorified tin foil.
Why Metal Studs Feel Like Cardboard
If you have ever opened up a wall in a modern apartment or a commercial building, you know the frustration. Unlike the beefy 2×4 wood studs we grew up with, these metal studs are often just thin, cold-formed steel. When you are maximizing space with innovative built-in solutions, finding out your support system is this fragile is a massive gut punch. I made the classic rookie mistake of thinking a standard plastic wall anchor would solve everything, only to find that without the right approach, the metal just bends and shears under the weight of the cabinetry. The reality is that 25-gauge steel is surprisingly thin—often less than 0.02 inches thick—which is roughly the same as a few sheets of heavy construction paper. According to the Steel Framing Industry Association, these non-structural members are designed for vertical tension, not the outward pulling force of a heavy, cantilevered desk. This is exactly why floating desks pull away from walls when they aren’t anchored with a specific strategy. Today, I am going to show you how to bypass that structural weakness so your desk stays exactly where you put it.
Is it actually safe to trust a floating desk to steel?
I get this question all the time from neighbors who are terrified of their expensive monitors taking a dive. The short answer is yes, but only if you stop treating metal like wood. You cannot just bite into it with a screw and hope for the best. You need to trap it. By using a combination of heavy-duty toggles and perhaps even the steel gusset strategy for extra-wide built-in desks, you create a sandwich effect that distributes the load across the face of the stud rather than putting all the pressure on a single point. Have you ever had a shelf or a desk start to sag because you were unsure of the wall type? It is a common DIY nightmare that stops most people before they even pick up a drill. But do not let a little bit of thin metal stand in the way of your dream home office. We are going to look at the exact hardware that works and how to reinforce the span using internal steel supports for long floating desks to ensure your workspace is rock solid.
Forget Wood Screws and Grab the Toggles
To build a desk that doesn’t dive-bomb onto your lap, you have to abandon the idea of ‘biting’ into the stud. In wood framing, the screw threads create their own grip. In 25-gauge steel, there isn’t enough material for threads to hold. This is exactly why plastic wall anchors fail for heavy shelving and desks; they rely on friction in a material that just bends away. The only way to win is the ‘sandwich’ method. You need a heavy-duty toggle bolt, specifically the Snaptoggle variety, which uses a solid zinc channel that flips flat against the back of the metal stud. Think of it like a deadbolt for your wall. I remember a specific job where I was installing a massive corner unit in a high-rise. I tried to cheat with self-drilling screws, and within seconds, I watched the metal strip out and the screw just spin aimlessly. I had to pull everything down, patch the holes, and start over with 1/4-inch toggles. The difference was night and day; once those toggles were locked in, the wall and the desk became one single, rigid unit. 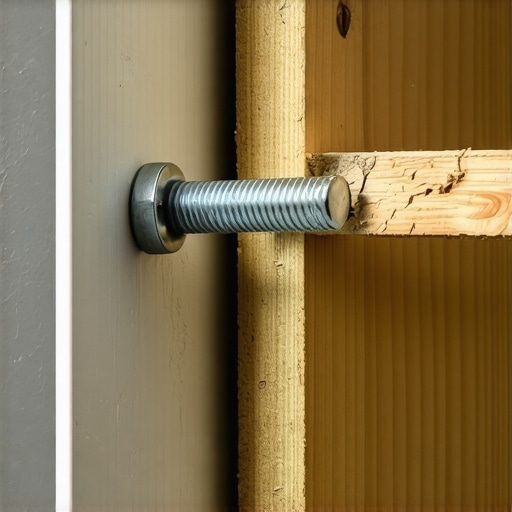
Pinpoint Your Studs Without Getting Fooled
Before you start drilling 1/2-inch holes for your toggles, you need to know exactly where the center of that thin metal channel is. Standard electronic stud finders often get confused by the interference of metal. I prefer using high-strength neodymium magnets to find the screw heads that hold the drywall to the studs. Once you find a vertical line of screws, you’ve found your target. However, metal studs are notorious for being ‘out of plumb’ or spaced irregularly. In commercial builds, you might find them at 24 inches on center rather than the standard 16. If your desk is particularly long, you might even need to look into the internal steel support for long floating desks to bridge the gap between those wide-set studs.
Build a Backbone with a Solid Ledger
A floating desk is essentially a giant lever. When you lean on the front edge, you are trying to pry the top of the desk away from the wall. To counter this, you cannot rely on the desk’s cabinet box alone. You need to install the structural wall cleat for heavy floating desks. This is a horizontal piece of hardwood or high-grade plywood that is bolted across multiple studs. By securing this ledger first, you create a massive surface area of contact. It’s the same logic used when maximizing space with innovative built-in solutions; you distribute the weight horizontally so no single toggle is doing all the heavy lifting. This ledger acts as a shelf that the back of the desk sits on, transferring the downward force directly into the vertical strength of the metal studs. For extra-wide setups, I always recommend the steel gusset strategy for extra-wide built-in desks, which adds a triangular reinforcement that prevents the desk from bowing in the middle.
Stop Opening Your Walls for Internal Blocking
You have likely heard the standard advice: if you want to hang a heavy vanity or desk on metal studs, you must perform ‘drywall surgery’ to install wood blocking. I am here to tell you that this is often a counterproductive mess. In my experience, opening the wall can actually compromise the lateral stability of those thin 25-gauge studs if you are not careful. Instead of weakening the wall’s integrity, I advocate for the external skinning method. By using a high-grade 3/4-inch plywood backer that spans multiple studs, you create a rigid substrate that distributes the weight across a much larger surface area. This is essentially a variation of the steel plate move for drywall-mounted floating vanities, but it is much easier for a DIYer to execute without needing a welder. This method treats the wall as a single structural unit rather than relying on a few isolated points of contact. 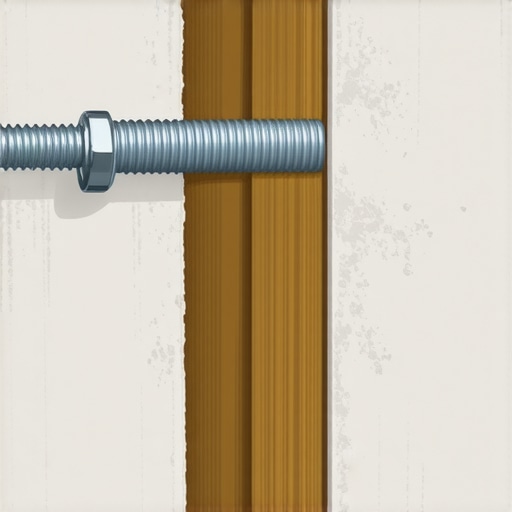
Avoid the Cantilever Trap Before It Breaks Your Studs
The biggest mistake I see, even among seasoned contractors, is ignoring the ‘moment arm.’ Most people focus entirely on vertical weight—the dead load of the cabinetry—but they forget about the dynamic load. When you lean on the front edge of a desk, you are creating massive torque. According to the Cold-Formed Steel Engineers Institute (CFSEI), eccentric loading on thin-walled steel can cause ‘web crippling,’ where the stud flange actually folds or twists under the pressure. This structural failure is exactly why floating desks pull away from walls even when the screws themselves remain intact. To prevent this, you must ensure your mounting hardware is placed as close to the stud’s web as possible to minimize the twisting force.
What happens when your studs are hidden and crooked?
Metal studs are notorious for being ‘out of square’ or slightly bowed during the initial framing. If you blindly screw a perfectly flat desk or vanity into a bowed wall, you are introducing massive tension into the system before you even set a monitor down. You need to master the scribing trick for installing vanities against out-of-square walls to ensure your furniture fits the reality of the room. By using shims at the toggle points, you can bridge the gaps between the straight cabinet and the wavy wall, ensuring that tightening the bolts does not pull the stud out of its floor track. For bathroom projects, always combine these structural moves with an expert guide to flawless vanity installation to ensure plumbing doesn’t interfere with your new support system. Have you ever fallen into the ‘it looks straight enough’ trap only to see a gap appear a week later? Let me know in the comments.To keep your workspace from becoming a disaster zone, you need the right kit from day one. I’ve learned the hard way that standard titanium-coated bits are useless here; they overheat and dull the moment they hit the cold-formed steel. Instead, I always reach for a M35 cobalt drill bit. It’s a game-changer because it bites into the 25-gauge metal without walking across the surface and scarring your drywall. Once the hole is prepped, my secret weapon is the 1/4-20 Snaptoggle. I’ve tried the knock-off brands, and they just don’t have the same tensioning strength. According to the Gypsum Association (GA-216), mechanical fasteners in steel framing must achieve a specific depth of penetration to maintain load-bearing integrity, but when we are dealing with the cantilevered weight of a desk, we aren’t just looking for penetration—we are looking for a total mechanical lock. 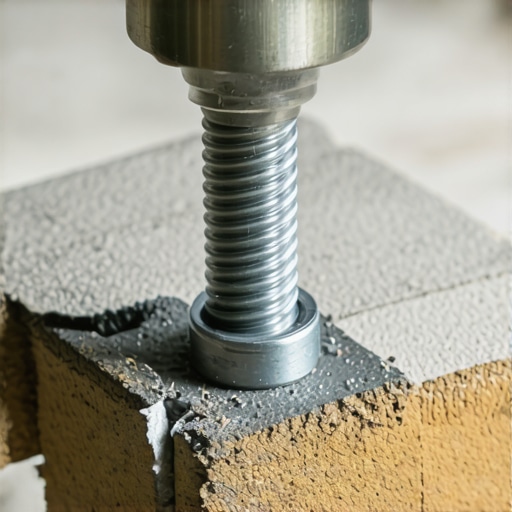
How do I keep my floating furniture level over the years?
The most common issue I see after a year or two isn’t the metal stud failing, but the drywall compressing under the pressure of the ledger. To fight this, you should periodically check your mounting bolts. If you notice even a millimeter of play, it is time to perform a stop drawer dragging with this under-mount slide adjustment routine or tighten your primary toggles. Metal studs are incredibly stable compared to wood—they won’t shrink or warp with the seasons—but the ‘sandwich’ you created between the desk and the wall can settle. If you have integrated storage, like creative storage solutions for vanities, the extra weight of your daily gear adds up. I recommend a quick level check every six months. If the front edge has dipped, you might need to look into a hidden support move for marble media benches to provide that extra bit of vertical lift that a standard cleat might lack.
Scale Your Storage Without Compromising the Wall
Once you have mastered the art of the metal-stud toggle, you can start thinking bigger. You don’t have to stop at a simple desk. I’ve used these same principles to install floor-to-ceiling shelving and heavy cabinetry in modern condos where every wall was ‘non-structural.’ The trick to scaling up is to never rely on a single stud for more than 50 pounds of dynamic load. By spreading your attachments across four or five studs using a continuous plywood backer, you can create effortless storage solutions for a tidy, stylish home that look like they are floating on air but are actually anchored with the strength of a commercial build. In the future, I expect we will see more ‘click-in’ steel rail systems designed specifically for residential metal framing, but for now, the ledger and toggle method remains the gold standard for DIYers who want professional results. My best advice? Don’t wait for a sag to appear. Grab a 1/4-20 Snaptoggle today and test it on a scrap piece of metal; once you feel that ‘click’ of the zinc channel locking behind the flange, you’ll never worry about your desk falling again.
The Hardest Lessons I Learned Behind the Drywall
Looking back at my first collapsed project, I realize my mistake wasn’t just a lack of hardware; it was a lack of respect for the material. When you are designing creative built-ins for seamless storage, you have to accept that metal studs are a different beast entirely. One lightbulb moment for me was realizing that if I can’t feel the toggle ‘bite’ and lock flat, it is not secure. I also learned the hard way that a single point of failure is inevitable if you don’t spread the load. I used to think I was over-engineering things, but after seeing a heavy workstation survive years of daily use because of a properly installed structural wall cleat for heavy floating desks, I will never go back to ‘good enough’ or ‘close enough’ again.
The Toolkit That Actually Works for Steel Framing
You do not need a truckload of tools to win this fight, but you need the right ones. First, throw away those plastic ribbed anchors; we have already seen why plastic wall anchors fail for heavy shelving and desks in thin metal. Instead, keep a box of 1/4-inch Snaptoggles in your drawer. I also swear by a neodymium magnet for finding those hidden screws—it is more reliable than any $50 electronic sensor I have ever owned. Finally, a set of M35 cobalt bits is non-negotiable. They slice through cold-formed steel like a hot knife through butter, preventing that frustrating ‘skating’ effect that ruins your drywall finish before you even start.
Take the First Step Toward Your Dream Workspace
Building a workspace that stays put is about more than just physics; it is about the peace of mind that comes from knowing your hard work and expensive gear are safe. Don’t let the thinness of a metal stud intimidate you. With the right toggles and a solid plan, you can create a floating desk that feels as solid as if it were bolted to a mountain. You have the knowledge and the strategy—now it is just time to pick up the drill and make it happen. #IMAGE_PLACEHOLDER_E# Have you ever felt that sinking feeling when a screw just keeps spinning in the wall? Let me know your close-call stories in the comments below!