

I stood there with a level in one hand and a cup of lukewarm coffee in the other, watching my “perfect” mudroom lockers rock back and forth like a boat in a storm. The wall behind them was a nightmare of heavy knockdown texture and a slight bow that I hadn’t noticed until I tried to install something straight. It’s a classic DIY gut-punch. You spend hours—and a fair bit of cash—on beautiful storage, only to realize your house isn’t actually made of 90-degree angles. If you have ever felt that sinking feeling when your screwdriver hits a void instead of a stud, or noticed a massive gap between your locker and the wall, you are in the right place. Today, I am going to show you exactly how to bridge that gap and ensure your entryway is both safe and stylish.
Fix the Lean Without Tearing Down Your Drywall
Installing built-ins is supposed to be the fun part, but textured walls turn it into a game of inches. Early in my DIY journey, I made the amateur mistake of thinking I could just crank down the screws and the locker would “squish” into the texture. Spoiler alert: I just cracked the back panel and the locker still shook every time someone sat down. To get it right, you need to look at the structural fix for wobbly entryway lockers, which usually involves a mix of shims and hidden cleats. It is about creating a flat plane where the house didn’t give you one. Have you ever tried to anchor something only to find the wall was more like a mountain range than a flat surface? It is frustrating, but totally solvable. According to data from the Consumer Product Safety Commission (CPSC), furniture tip-overs are a significant home safety risk, so getting this anchor right isn’t just about aesthetics—it’s about protecting your family. Beyond the wall, you might also need the leveling trick for mudroom benches on tile if your floor is as uneven as your walls.
Will My Heavy Lockers Actually Stay Up on This Lumpy Wall?
I get the skepticism. When you look at a wall that looks like it was plastered by a caffeinated squirrel, it’s hard to trust it with 200 pounds of lockers and gear. You’re probably worried that the anchors will pull out or the texture will crumble. But here is the secret: we aren’t relying on the texture; we are going through it. By using the scribing hack for fitting built-ins, you can make the locker sit flush against the wall regardless of the bumps. We will also dive into how to use a stealth ledger to stop the rocking for good. By the time we are done, those lockers will feel like they grew right out of the studs.To get these lockers to behave, you first have to stop treating the wall like a flat surface and start treating it like a topographical map of a mountain range. Take a 4-foot level and slide it horizontally across the area where your lockers will sit. You will likely see gaps behind the level—those are your valleys—and places where the level pivots—those are your peaks. If you ignore these, your locker will follow the curve, resulting in doors that won’t close and a unit that groans every time a kid throws a heavy backpack into it. I remember installing a floor-to-ceiling pantry in an old farmhouse where the wall bellied out nearly an inch in the middle. I tried to force it flush by sheer willpower and long screws, and the result was a cabinet that looked like it was trying to escape through the ceiling. That’s when I learned that you don’t fight the wall; you build a bridge over it.
Identify the Peaks and Valleys of Your Wall
Before you even lift the lockers into place, mark your stud locations with painter’s tape. Because textured walls like knockdown or orange peel hide imperfections so well, you cannot trust your eyes. Use a long straightedge to find the furthest-protruding point of the wall. This is your ‘zero point.’ Everything else will be shimmed out to match this depth. If you are working with cabinets that have to sit on the floor, you should also consider the leveling trick for mudroom benches on tile to ensure your base is not fighting your wall-mounting efforts. When I was first starting out, I ignored a slight bow in a mudroom wall and just drove 3-inch lags through the back of a wardrobe. By morning, the pressure from the uneven wall had popped the side panel right off its fasteners. It was an expensive lesson in physics. To avoid this, always check your expert guide to flawless vanity installation tricks even if you aren’t working in a bathroom; the structural principles of bracing remain identical.
Build a Straight Plane Using a Stealth Ledger
Mounting a 1×4 or 2×4 ‘stealth’ ledger onto the studs is the secret weapon for heavy built-ins. This ledger acts as a perfectly flat mounting strip that compensates for the wall’s curves. You can learn more about how to stop mudroom bench rocking with a stealth ledger to see exactly how this stabilizes the unit. By placing shims behind the ledger until it is perfectly plumb and level, you create a new false wall. When you eventually screw the locker into this ledger, the locker stays square because the wood it is attached to is square, regardless of what the drywall is doing behind it.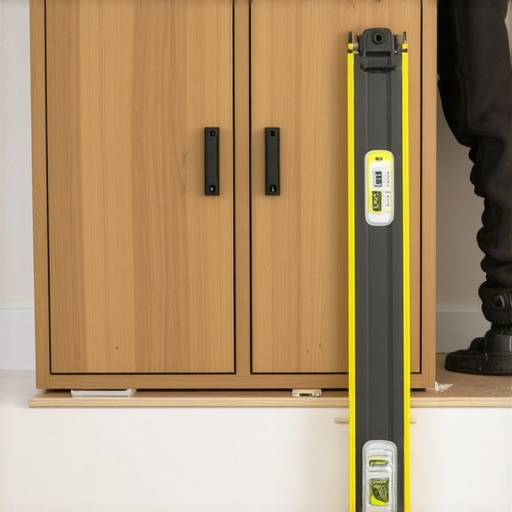
Shim Your Way to a Level Finish
Once the ledger is set, slide your lockers into place. You will likely still have a gap at the sides where the locker meets the textured wall. This is where you use cedar shims to fill any remaining voids between the locker frame and the ledger. Drive your cabinet screws through the frame, through the shim, and into the ledger or stud. This prevents the ‘oil-can’ effect where the back of the cabinet bows inward as you tighten the screw. If you are aiming for a high-end look, use the scribing hack for fitting built-ins to trim the side panels. This involves tracing the wall’s texture onto a piece of molding and cutting it to fit like a puzzle piece. For those looking to save on the overall project, these vanity installation hacks that save time and money apply perfectly to mudroom projects, helping you achieve a custom look without the custom price tag.Here is the thing no one tells you about ‘tight’ screws: more torque isn’t more security. The common advice is to snug the cabinet against the wall as tight as it will go, but in my experience, that is exactly how you ruin a $2,000 project. When you are dealing with heavy knockdown texture, over-tightening creates a fulcrum effect. The screw pulls the center of the back panel inward, while the high spots of the texture push the edges out. This ‘racks’ the entire cabinet box, leading to those mysterious door misalignments that no amount of hinge adjustment can fix. You might even notice your expert guide to flawless vanity installation tricks won’t save you if the internal frame is under constant tension.
Stop Overtightening Your Cabinet Screws Immediately
In the world of creative built-ins for seamless storage and home aesthetics, we often mistake force for stability. If you feel the back of the cabinet starting to deflect or ‘oil-can,’ stop. You need a shim to bridge that gap, not another turn of the impact driver. Another nuanced ‘oops’ factor involves the hidden climate behind your unit. If your mudroom lockers are on an exterior-facing wall, you are essentially creating a dead-air space that acts as a magnet for condensation. I have seen beautiful oak units rot from the inside out because the installer skipped the moisture barrier trick for vanities against cold walls. This isn’t just about the wood; it is about preventing a mold farm from growing where you store your clothes. 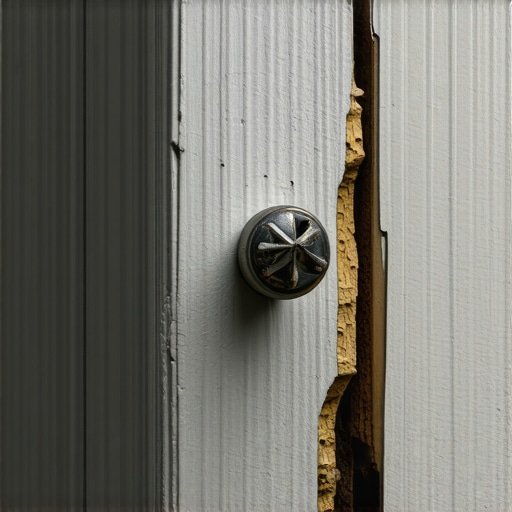
The Shear Force Reality Check
Professional installers use ‘blocking’ inside the wall whenever possible. If the wall is open, we bridge the studs with solid 2×4 material. If the wall is already closed, we rely on the ledger system to create a continuous ‘landing zone’ for your fasteners. If you ignore this and try to hit studs through thick knockdown texture, you might only be getting a fraction of the grip you think you have. It is the difference between a unit that lasts thirty years and one that sags after three months of winter coat storage. This level of detail is what separates a DIY weekend project from built-in storage ideas to declutter and enhance your home that actually add resale value.
How Much Weight Can Your Wall Truly Support?
It is a question that most DIYers avoid until they hear a loud crack in the middle of the night. The National Kitchen & Bath Association (NKBA) emphasizes that all hanging loads must be transferred directly to the structural studs with at least 1.5 inches of thread engagement into the wood itself. Relying on the drywall—or worse, those cheap plastic plugs—is a recipe for disaster. If you have ever wondered why plastic wall anchors fail for heavy shelving, it is because they lack the shear strength to handle the ‘pull-out’ force of a loaded locker. When you sit on a bench, you are pulling the top of the unit away from the wall. Without proper blocking, you are asking a half-inch of gypsum to hold up several hundred pounds. Have you ever fallen into this trap? Let me know in the comments.When I am deep in a project like this, I reach for my Bosch GLL3-330CG laser level before I even touch a screwdriver. Why? Because on a heavy knockdown texture, a traditional bubble level is a liar. The laser gives me a crisp green line that cuts through the shadows of the bumps and valleys, allowing me to see exactly where the ‘zero point’ of the wall is from ten feet away. If you are really serious about results, you also need a dedicated scriber—not just a compass from a 5th-grade math kit. I personally use the FastCap AccuScribe because it maintains its angle perfectly even when I am dragging it across aggressive wall textures. Using these tools ensures your built-in storage ideas to declutter and enhance your home actually look professional rather than like a rushed weekend mistake. 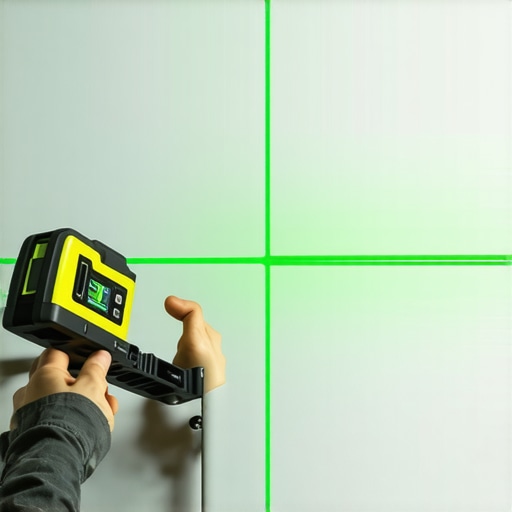
How do I maintain my mudroom lockers year after year?
Wood is a living material; it breathes and moves with the seasons. If you do not account for these shifts, your beautiful work will eventually groan, gap, or even split. This is especially critical if your unit is on an exterior wall where temperature swings are most extreme. I always advise people to follow the moisture barrier rule for cabinets on cold outer walls to prevent the back panels from soaking up condensation during the winter months. Beyond moisture, you should inspect your hardware every six months. If you start to see a slight dip in the door alignment, do not wait for it to get worse. You should check out why cabinet doors sag and the three hinge solution to see if your heavy winter coats are putting too much stress on standard fasteners. According to the Forest Products Laboratory (FPL), wood can change dimensions significantly with a 5% change in relative humidity, so keeping your home’s climate stable is the best way to protect your investment in creative built-ins for seamless storage and home aesthetics. Looking ahead, I predict we will see more built-ins incorporating integrated sensors that alert homeowners to moisture buildup or structural shifting before it becomes visible. For now, the best thing you can do is avoid ‘setting and forgetting’ your installation. I want you to try this: next time you see a tiny gap forming at the ceiling or floor, don’t just caulk it. Check the level of the unit first to ensure your ledger is still holding strong against the studs. It is a five-minute check that could save you a full day of repairs later. If you are just starting, remember to review vanity installation hacks that save time and money to keep your budget as tight as your joints.
Hard-Earned Truths from My Shaky Locker Days
Over the years, I have learned that the texture on your walls is often a mask for some pretty serious structural ‘character.’ One of the biggest lightbulb moments I had was realizing that you should never trust a corner to be square. If you are starting out, check out this step-by-step guide to vanity installation for beginners because the leveling principles are identical. Another mistake I see often is people forgetting to paint the wall behind the lockers before installing. Even if you scribe perfectly, the wood will move, and a sliver of unpainted knockdown texture will eventually peek through like a sore thumb. Finally, remember that shims are your best friends, not a sign of failure. Every professional uses them; the trick is just hiding them behind a clean piece of trim or using a the scribing trick for built-in cabinets against uneven brick or textured drywall to bridge that final gap.
The Gear That Rescued My Entryway Projects
To get these results, I rely on a few non-negotiables in my toolbox. First, stop using standard drywall screws; they are brittle and will snap under the shear force of a heavy locker. I only use GRK Cabinet screws because they have a built-in washer head that won’t pull through the wood. Second, if you’re working solo, get a pair of inflatable ‘air shims.’ They allow you to lift a heavy unit a fraction of an inch with one hand while you drive a screw with the other. Lastly, I always keep a digital angle finder nearby. It helps me realize exactly how much a wall is leaning so I can prep my shims before the heavy lifting starts. These tools are the secret to achieving effortless storage solutions for a tidy, stylish home that don’t just look good but stay put for decades.#IMAGE_PLACE_HOLDER_E#
Stop Waiting for a Perfectly Square House
It is easy to get paralyzed by the fear of making a mistake, especially when your house feels like it was built with a protractor that was slightly off. But here is the truth: no house is perfect. The skill isn’t in finding a flat wall; it’s in knowing how to work around the one you have. By using the ledger and scribing techniques we’ve discussed, you can turn a frustrating DIY weekend into a lifetime of organized mornings. You are fully capable of creating creative built-ins for seamless storage and home aesthetics that look like they were installed by a high-end cabinet shop. So, grab your level, find those studs, and get that first screw in. Have you ever discovered a massive bow in your wall halfway through a project? Let me know how you handled it in the comments below!