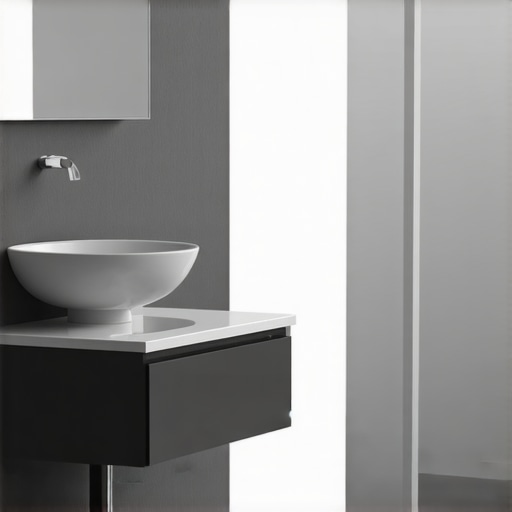
It was a frustrating morning when I finally looked closely at my bathroom vanity and realized it was swaying with the slightest touch. That sneaky wobble had been bothering me for months, but I ignored it, thinking it was just normal wear and tear. Until I caught myself nearly losing my balance trying to open a drawer—it was a wake-up call. If you’ve ever experienced similar instability with your floating vanity, you know how unsettling it can be. Not only does it diminish the sleek look you desire, but it also raises concerns about safety and long-term durability.
Why Fixing Vanity Vibrations Matters More Than You Think
A wobbly vanity isn’t just an aesthetic issue; it can compromise the integrity of your entire installation. Over time, vibrations and movement can lead to loosening of mounts, damage to plumbing, or even accidents—especially if you have a heavy quartz or marble top. Interestingly, according to research from the Home Improvement Research Institute, unstable fixtures are among the top causes of bathroom damage in modern homes, often resulting from improper mounting techniques. If you’re like me, early missteps included overestimating the strength of drywall anchors instead of opting for more reliable solutions.
Thinking about how to stabilize your vanity? You’re not alone. Many homeowners face this challenge, especially with heavier countertops, or if the wall framing isn’t optimal. Luckily, there’s a robust fix that I’ve personally tested and can recommend confidently: steel stud ties. These sturdy brackets help anchor your vanity securely to the wall’s metal studs—offering peace of mind and a polished look.
Do you often find your vanity wobbling after each use? If so, read on, because I’ll walk you through the practical steps to eliminate vibrations permanently, starting with understanding why standard mounting methods fall short and how steel stud ties can transform your installation. For more on smart storage solutions to complement your revamped vanity, check out our detailed guide on [smart built-in cabinets and vanities](https://customcabinetrypro.com/smart-built-in-cabinets-storage-solutions). Now, let’s dive into the specifics of ensuring your vanity remains rock solid.
Reinforce Wall Mounts with Steel Stud Ties
Start by locating your wall studs using a stud finder—think of it as your home’s skeleton map. Once identified, mark the positions where the vanity mounts will connect. Remove the vanity if necessary to access the wall and drill pilot holes into the studs at those marks. Install heavy-duty steel stud ties—these are like strong braces that act as the backbone for your vanity, preventing wobbling. Use a level to ensure the ties are perfectly horizontal for even weight distribution. Secure them firmly with long, drywall-compatible screws, tightening until snug but not overdriving, which could damage the drywall. In my experience, applying these ties keeps even the heaviest quartz countertops rock solid.
Upgrade Mounting Hardware for Enhanced Stability
Next, assess your existing mounting brackets. Often, standard brackets are like tiny crutches—helpful but not reliable enough for heavier loads. Replace them with heavy-duty L-brackets or mounting plates rated for higher weight capacity. Attach these brackets directly into the steel stud ties with lag screws, which are like the muscle behind the fix. Ensure that each bracket is level, and use a spirit level or laser level for precision. Remember, evenly distributing weight across multiple brackets is key—think of it as evenly spreading a heavy load to prevent tipping or stress points.
Secure Countertops and Vanity Top Properly
If your vanity has a stone or composite top, ensure it’s firmly secured to the base. Use high-quality construction adhesive in conjunction with mechanical fasteners—screws or clips designed for stone. Apply the adhesive in a continuous bead along the top edges, pressing the top into place gently but firmly. For added stability, consider installing steel brackets beneath the countertop at critical points, especially near the front edge where leverage can cause movement. Be cautious not to over-tighten, as this could crack delicate materials. My recent project involved reinforcing a marble top, which I secured with a combination of adhesive and steel clips, resulting in a sturdy, wobble-free finish.

Imagine a set of heavy-duty steel brackets precisely anchoring your vanity to the wall studs, ensuring stability for years to come.
Address Wall Imperfections for a Perfect Fit
Walls are rarely perfectly straight, which can cause mounts to sit unevenly and lead to wobbling. Use a chalk line or laser level to identify high or low spots around the mounting area. For minor imperfections, a belt sander or joint compound can smooth out uneven drywall surfaces. For more significant deviations, installing a vertical wood shim behind mounting brackets can create a flush surface. This technique is like customizing the wall surface to match your vanity’s needs, ensuring a snug, wobble-free fit. I once faced a sloped wall in an old apartment; applying shims along the wall cleared the gap and made my vanity as steady as if it were built into a flawless surface.
Many homeowners assume that installing built-in storage or vanities is a straightforward task, but there are nuanced pitfalls even seasoned DIYers often overlook. One prevalent misconception is that generic mounting solutions suffice for all wall types. In reality, what works for drywall might be disastrous on plaster or lath walls, leading to sudden failures or safety hazards. Moreover, many believe that heavy-duty hardware alone guarantees stability; however, the true secret lies in understanding the wall’s framing structure and choosing anchors rated for specific loads. For instance, anchoring a heavy vanity onto a wall with compromised studs is a recipe for wobbling or worse, extensive damage. This is where advanced techniques like steel stud ties come into play, ensuring that the fixture anchors into the structural framework itself, not just drywall, elevating safety and durability.
An often-overlooked detail is wall surface flatness. Many forget that uneven walls can cause misalignments, gaps, or wobbliness even if the hardware is impeccable. Addressing this requires more than just shimming; it involves precise wall assessment with tools like laser levels and, if necessary, wall surface modifications—sometimes even drywall reconstruction—to create a truly flush surface for seamless installation. This nuance can be the difference between a vanity that wobbles over time and one that remains perfectly stable.
Another common mistake is underestimating the importance of weight distribution across mounting points. Relying on a handful of screws or brackets might seem sufficient, but heavy countertops, especially stone or composite materials, require multiple secure attachment points and strategic bracket placement. The use of expert-graded hardware and understanding load-bearing principles goes a long way in preventing sagging or detachment. For example, recent research emphasizes that proper load distribution can prevent stress points that lead to long-term failure, especially in high-traffic or moisture-prone bathrooms.
For those considering custom solutions, understanding the subtle differences in framing and materials informs smarter design choices. Custom built-ins are not just about aesthetics—they demand strategic planning to avoid common issues like sagging, gaps, or unsafe mounting. Consulting detailed guides, like this [step-by-step guide to vanity installation](https://customcabinetrypro.com/step-by-step-guide-to-vanity-installation-for-beginners), can reveal critical insights that prevent costly mistakes.
Stay aware of these hidden details, and you’ll ensure your built-ins are both beautiful and resilient. Have you ever fallen into this trap? Let me know in the comments, and don’t forget to explore our comprehensive resources to master flawless installation techniques.Maintaining your bathroom fixtures and storage solutions is essential to ensure they stay beautiful and durable over time. One of my top recommendations is investing in a high-quality cordless drill, like the Makita XDT131, which offers excellent torque and battery life for drilling into walls, installing brackets, or tightening fasteners. A precise laser level, such as the DeWalt DW089, helps achieve perfect alignment during installation, preventing wobbling and uneven surfaces. For securing heavy countertops or vanities, using a stud finder with deep scanning capabilities, like the Zircon MetalliScanner, can locate wall studs behind multiple layers of drywall or tile, ensuring your anchors hold firm. When sealing joints or cracks, a reliable caulking gun like the Newborn 751-18 gives you control and precision, preventing leaks and water damage. Regular inspections with a moisture meter can catch early signs of water infiltration or mold, extending the lifespan of your built-ins. Moving forward, embracing smart tools paired with consistent maintenance routines will help your fixtures weather the years without issues. Prediction suggests that integrating IoT-enabled sensors to monitor humidity and structural health may soon become mainstream, making proactive care even easier.
How do I maintain my built-ins and vanities over time?
Routine cleaning, periodic tightening of fasteners, and inspecting for water damage are key steps. For more advanced maintenance tactics, consider installing magnetic access panels for hidden inspection points, simplifying the process of checking behind your cabinetry without disassembly. Don’t forget to use a stud finder to verify wall integrity before making major adjustments—this avoids accidental wall damage and ensures your fixtures remain secure. Try implementing these precise tools and techniques today to extend the life of your installations. For tailored advice and expert help, visit our contact page. Consistency in maintenance not only preserves your aesthetic but saves significant repair costs in the long run.
What the failed projects taught me about sturdy built-ins
One of my biggest realizations was that rushing the wall assessment step often leads to wobbling issues down the line. It became clear that understanding wall framing and surface flatness upfront is essential—skipping this can result in hidden gaps and shaky fixtures, no matter how heavy-duty your hardware. I also learned that relying solely on drywall anchors is a mistake; integrating steel stud ties into my installation process made a significant difference in stability and longevity.
Tools and resources I swear by for flawless installation
Over the years, I’ve refined my toolkit to include essential items like a laser level, high-quality stud finder, and steel brackets rated for heavy loads. The step-by-step installation guide became my blueprint for success, especially when working with complex or uneven surfaces. Investing in these trusted resources has saved me countless headaches and ensured my projects stand the test of time.
Finding joy in the process: why it’s worth the effort
After initial frustrations with wobbly fixtures, I discovered that thorough planning and attention to detail not only lead to a stronger, more durable installation but also make the entire process more rewarding. Completing a well-mounted vanity gives a sense of pride and peace of mind, knowing it will remain stable through years of use. Embracing these lessons means I can confidently recommend solutions like reinforcing with steel stud ties, making DIY projects both safer and more satisfying. Remember, your space is an investment—taking the extra steps now pays off in the long run.
One Reply to “How to Stop 2026 Floating Vanity Vibrations with Steel Stud Ties”
Leave a Reply
Related Posts

How to Mount Heavy 2026 Floating Vanities on Metal Studs Safely
I'll never forget the moment I tried to mount a…
Stop 2026 Floating Vanity Sag with Hidden Steel Wall Cleats
It was a frustrating Saturday in my bathroom renovation. I…
Fixing Wobbly Bathroom Vanities: 2026 Guide to Rock-Solid Mounts
I remember the exact moment I realized my bathroom vanity…
This was such an insightful post! I’ve dealt with wobbling vanities in my past remodeling projects, and I agree that relying solely on drywall anchors can be risky, especially with heavier countertops like quartz or marble. I found that installing steel stud ties made a huge difference not only in stability but also in giving my clients peace of mind knowing their fixtures are secure long-term. What I’ve learned is that accurate wall assessment and proper weight distribution are key to avoiding future issues. Have others found that combining steel ties with adjustable brackets simplifies future repairs or adjustments? I’d love to hear how different approaches have worked for different wall types, especially in older homes where framing can be unpredictable.