

I remember the morning clearly—coffee in hand, half-asleep, trying to grab a pair of socks from the bottom drawer of my new bedroom unit. I pulled. Nothing happened. I tugged harder, and the whole cabinet groaned while the drawer face felt like it might snap right off. My beautiful, “cloud-like” high-pile carpet had turned into a velvet trap. It’s a common heartbreak for anyone investing in creative built-ins for seamless storage and home aesthetics. We want the luxury of thick carpet and the utility of deep drawers, but they rarely play nice together. If you’ve ever had to “lift and pull” just to get to your jeans, you know exactly what I’m talking about. Today, we’re going to fix that friction for good without ruining your floor or your furniture.
Give Your Bottom Drawers the Room They Need
When I first started building, I made a massive rookie mistake. I assumed that a standard toe-kick height—about four inches—was a universal law. I installed a massive wardrobe directly onto a plush shag rug, and within a week, the bottom drawer slides were bent. I learned the hard way that why your drawer slides bind often comes down to the simple physics of compression. High-pile carpet doesn’t stay flat; it bunches and fights back against moving parts. The secret isn’t just “pulling harder,” it’s about creating a structural gap that the carpet can’t bridge. We need to talk about the hidden sub-base for leveling heavy media walls on carpet, because that same logic applies to your bedroom drawers. Have you ever felt like you were going to break your furniture just trying to open a simple drawer? You aren’t alone, and you definitely don’t have to live with it.
Is a taller toe-kick really the only answer?
Many people worry that fixing this will make their furniture look “tall” or awkward. They fear that adding height will create a gap at the top of the unit or make it look like it’s hovering in space. It’s a valid concern, but with the right effortless storage solutions for a tidy stylish home, we can hide the lift while reclaiming the function. According to the Carpet and Rug Institute, high-pile or plush carpets can have a pile height exceeding 1.5 inches, which is significantly taller than the standard 0.5-inch furniture clearance. This means that a standard build will almost always fail on a luxury rug. We are going to look at how to shim, brace, and elevate your drawers so they glide over even the thickest wool pile like it’s fresh ice.
Build a Foundation That Doesn’t Sink
The first thing you need to do is ditch the idea that your floor is stable. Carpet is essentially a giant sponge made of fabric. When you place a heavy wardrobe or vanity on it, the weight compresses the fibers directly under the wood, but the fibers just outside that footprint stay tall. This creates a ‘pit’ that the bottom drawer has to climb out of every time you pull the handle. To fix this, we implement a rigid sub-base. Think of it as a snowshoe for your furniture. Instead of the weight being concentrated on thin cabinet walls, we distribute it across a wider pressure plate. I usually use 3/4-inch plywood ripped to the exact dimensions of the cabinet’s footprint. You want this base to be slightly smaller than the toe-kick so it stays invisible, but strong enough to prevent the unit from ‘diving’ into the pile. 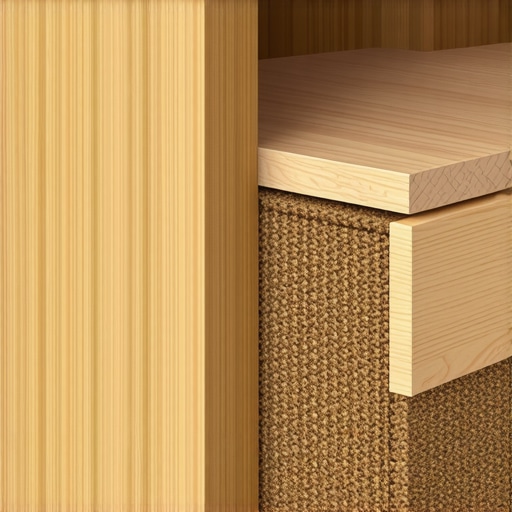
The Micro-Lift That Saves Your Slides
I learned this lesson the hard way during a renovation in a luxury condo. The client had a 2-inch thick wool rug that felt like walking on a cloud, but it was a nightmare for the built-in storage ideas to declutter and enhance your home we were installing. I thought I could get away with just a few plastic shims. Halfway through the install, the weight of the stone top caused the unit to tilt forward just enough that the bottom drawer wouldn’t even budge. I had to pull the whole thing out and start over. Now, I always use a ‘sleeper’ system—parallel strips of wood anchored through the carpet into the subfloor. This creates a solid, unmoving platform. The sleeper system is particularly effective because it bridges the gap between the soft rug and the hard subfloor. By driving long screws through the sleepers and into the joists, you create a ‘pier’ that doesn’t rely on the carpet for support at all. This is the same logic used in an expert guide to flawless vanity installation tricks tips. You want to eliminate the ‘bounce.’ If the cabinet can wiggle, the drawer will eventually bind. If you’re worried about damaging the carpet, don’t be. The fibers will eventually bounce back, but your drawer slides will never recover if they stay bent. For those working with uneven floors, borrowing the leveling leg strategy for sloped garage floors can be a lifesaver. Heavy-duty adjustable feet allow you to fine-tune the height until that bottom drawer clears the carpet by at least half an inch.
Will Shims Be Enough?
Sometimes a full sub-base is overkill, especially for smaller units. In those cases, you can focus on the hardware. If you notice a slight rub, you should stop drawer dragging with this under-mount slide-adjustment-2 by tweaking the vertical pitch of the tracks. Most modern slides have a small wheel or lever that can lift the drawer face by a few millimeters. When you’re adjusting those slides, look for the ’tilt’ adjustment. By tilting the back of the slide slightly down and the front slightly up, you give the drawer a natural ‘lift’ as it exits the cabinet frame. This tiny geometry hack is why some custom builds feel like magic while DIY efforts often feel like a workout. When combined with a step-by-step guide to vanity installation for beginners, you’ll see that even a tiny adjustment can make the difference between a drawer that glides and one that grinds. For the heaviest units, though, you really need the hidden sub-base for leveling heavy media walls on carpet to ensure the weight doesn’t shift over time as the carpet settles. You’re essentially building a stage for your furniture to perform on, ensuring that no matter how plush the floor is, the mechanics of the cabinetry remain isolated and free-moving.People often tell me, ‘Don’t worry, the weight of the vanity will eventually flatten the carpet.’ This is perhaps the most dangerous myth in the world of creative storage solutions for vanities to declutter in style. In reality, the weight doesn’t flatten the carpet—it ‘dishes’ it. According to the Architectural Woodwork Institute (AWI) standards for residential installation, any unit placed on a non-rigid surface is subject to structural deflection. This means the middle of your cabinet will likely sag while the edges remain supported by the carpet’s perimeter tension. The result? A drawer that opens fine on day one but starts sticking by month six because the frame has actually warped to follow the floor’s uneven compression. Have you ever fallen into this trap? Let me know in the comments. 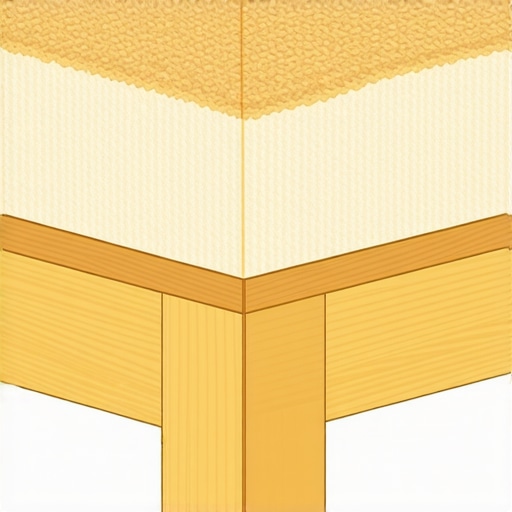
The Plumbing Shadow and Other Costly Overlooks
The ‘Oops’ factor that catches even seasoned DIYers is what I call the Plumbing Shadow. If you’re adapting maximize your space with custom vanities expert design tips for a bedroom or ensuite, you might forget that lifting the unit to clear a thick rug changes the relationship with your wall outlets and pipes. I’ve seen homeowners lift a cabinet by two inches only to find that why your vanity drawers are binding on the plumbing is now their primary headache. When the unit goes up, the P-trap stays where it is, often colliding with the back of the drawer box or the internal shelf. Before you commit to a lift, measure twice from the floor to the center of your drain pipe. If you don’t, you might find yourself cutting into your beautiful new drawer boxes just to make room for a pipe that used to fit perfectly.
What happens when the stone top is too heavy for the base?
If you are upgrading to a high-end look, you absolutely need the internal support move for heavy stone vanities. A standard cabinet box isn’t designed to support a 150-pound quartz or marble slab while sitting on a literal sponge. Over time, the weight causes the sides of the cabinet to ‘blow out’ or splay at the bottom because the carpet offers no lateral resistance. You might think why cabinet doors sag and the three-hinge solution is the answer to your crooked doors, but if the base is sinking into the pile, no amount of hinge adjustment will save the alignment. For heavy stone tops, I always recommend a secondary internal frame or ‘cleating’ that transfers the weight directly to the subfloor sleepers we discussed earlier. This prevents the ‘box-crush’ effect that ruins expensive custom work. When you’re looking for top storage ideas for 2025, remember that the most stylish solution is the one that doesn’t collapse under its own luxury. By isolating the furniture from the carpet’s movement, you ensure that your expert guide to flawless vanity installation tricks tips actually results in a piece that lasts a lifetime, rather than just until the next season.Maintaining a perfectly functioning storage unit starts long after the last screw is driven. I have seen countless homeowners invest in creative built-ins for seamless storage and home aesthetics only to let them seize up after a few seasons of humidity and dust. The secret to longevity isn’t just a sturdy build; it is the specific maintenance of the moving parts. I always keep a can of dry PTFE (Polytetrafluoroethylene) lubricant in my kit. Unlike standard oils, it doesn’t attract carpet fibers or pet hair, which are the primary enemies of smooth motion. If you want to how to fix loose pull-out pantry tracks for good, you must first ensure the tracks are clear of debris that the vacuum can’t reach. I use a small compressor to blow out the glides every six months, followed by a light spray of PTFE. This keeps the action ‘factory-fresh’ without creating the gummy residue that leads to hardware failure.
The Laser Level is Your Secret Weapon for Accuracy
When you are working on a surface as unpredictable as high-pile carpet, a standard bubble level is practically useless. Every time you shift your weight to check the bubble, the floor compresses and your reading changes. This is why I swear by the Bosch GLL 30 or any cross-line laser level mounted on a stable tripod away from the unit. By projecting a fixed horizontal line onto the cabinet face, you can see exactly how much the furniture settles as you load it with weight. This allows you to utilize vanity installation hacks that save time and money by identifying sag points before they become permanent bends in your wood. I’ve found that using the laser to set the height of your sleepers ensures the the hidden sub-base for leveling heavy media walls on carpet is truly level relative to the room’s architecture, not just the squishy floor beneath it. 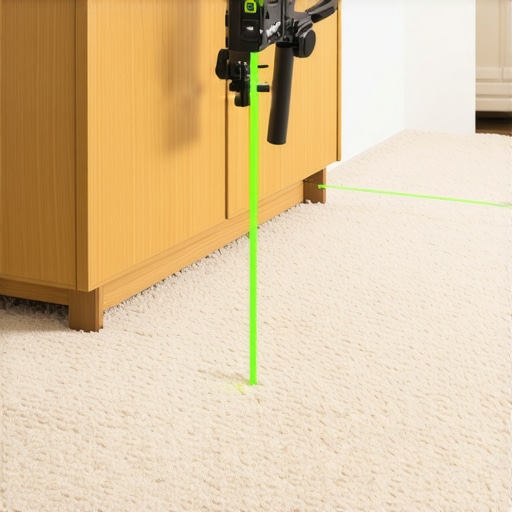
How do I keep my drawers sliding perfectly for years?
Beyond cleaning, you need to monitor the ‘squareness’ of the box. According to the Blum Technical Specification for Dynamic Load Capacity, high-end runner systems like the TANDEMBOX series can lose up to 30% of their weight-bearing efficiency if the cabinet frame deviates by more than 1.5mm from a perfect square. Over time, the weight of a stone top can cause this shifting. To combat this, I recommend checking your drawer gaps once a year. If you notice a wider gap on the left than the right, it is time to stop drawer dragging with this under-mount slide-adjustment-2. Using a simple Pozi-drive screwdriver to recalibrate the height and tilt can save you from a costly hardware replacement down the road. Looking toward the future, I see a major shift toward ‘active’ cabinetry—units with integrated sensor-driven LED lighting and wireless charging pads embedded under the veneer. As we move toward top trends in vanity designs you need to know in 2025, these electrical components will require even more stable, vibration-free bases to protect the delicate wiring. My challenge for you: next time you feel a drawer ‘catch’ even slightly, don’t just pull harder. Grab a flashlight, check the tracks for carpet fuzz, and use the tilt-adjustment lever to lift the face by just one millimeter. You will be amazed at the difference it makes.
Secrets Only the Pros Know About Furniture Sinking
After years in the field, I have realized that gravity is your most patient competitor. Even if a unit feels level during the initial install, the carpet fibers will continue to compress for up to six months under the weight of your belongings. I always suggest a simple test: if you cannot comfortably slide two fingers between the bottom drawer and the carpet pile when the unit is fully loaded, you are destined for a future of sticking and frustration. This is why a simple realignment of drawer slides is often just a temporary patch; the real fix is structural rigidity from the floor up. Additionally, avoid using MDF for your sub-bases; it absorbs moisture trapped in the carpet pile and can swell, causing the very friction you are trying to avoid. Stick to high-quality plywood or composite materials for anything that touches the floor. #IMAGE_PLACEHOLDER_E#
The Only Tools You Need for This Fix
If you want to achieve professional results without the guesswork, you need to step away from the standard spirit level. I personally rely on a cross-line laser because it provides a fixed horizontal reference that remains stable even as you walk around the room. For those applying vanity installation hacks that save time and money, extra-wide composite shims are non-negotiable. Unlike cedar shims, they won’t crush under the weight of a heavy stone top. I also keep a canister of Dry PTFE Lubricant in my pocket; it ensures the hardware stays slick without attracting the carpet fuzz and dust bunnies that typically ruin drawer tracks over time.
Reclaim Your Daily Routine
A home should be a place of ease, not a series of small frustrations. When your drawers glide open effortlessly, your whole morning routine feels lighter. By taking the time to elevate your cabinetry and isolate it from the movement of the floor, you are ensuring that your creative storage solutions for vanities to declutter in style remain as functional as they are beautiful. You don’t have to choose between luxury flooring and luxury utility; you just have to give your furniture the right foundation to stand on. Now that you have the blueprint for a friction-free home, you can stop fighting your furniture and start enjoying it.
Have you ever found a mysterious trap in your furniture that only appeared months after you moved in? Let me know your stories in the comments!