

I stood there with a level in my hand, staring at the bubble that refused to center, feeling that sinking pit in my stomach. My gorgeous, expensive floating vanity was dipping nearly half an inch at the front edge. It looked less like a modern design choice and more like a structural disaster waiting to happen. If you’ve ever felt that frustration after following a guide to flawless vanity installation only to have gravity mock your hard work, you aren’t alone. I spent three days trying to ‘ignore’ it before I realized that a tilted vanity isn’t just an eyesore—it is a ticking clock for your plumbing. It’s that visceral fear that one day you’ll hear a loud crack and find your sink on the floor. Today, I’m sharing the exact method we used to rescue our bathroom using hidden leveling shims that keep the sleek look intact without sacrificing an ounce of stability. We aren’t just talking about a quick fix; we are talking about making it rock solid.
Stop the Dip Before the Drywall Crumbles
When I first started DIY-ing these heavy units, I made the rookie mistake of thinking the wall studs were perfectly vertical and the floor was perfectly flat. Spoiler alert: they never are. In my early days, I once tried to brute-force a cabinet into place using nothing but sheer willpower and long screws, and I found out exactly why plastic wall anchors fail for heavy shelving and vanities alike. They just can’t handle the leverage of a heavy box hanging in mid-air. Floating units put an incredible amount of stress on the mounting point, turning the vanity into a giant lever that wants to pry itself off the wall. In fact, research from the Structural Engineering Institute suggests that even a minor 1% misalignment in cantilevered loads can significantly increase the pull-out force on wall fasteners. If you don’t account for the wall’s natural imperfections—the bows, the dips, and the ‘close enough’ framing—you’re basically asking for a collapse. By integrating vanity installation hacks that save time, specifically using internal shimming techniques behind the mounting rail, we can counteract the ‘lean’ that naturally occurs when the weight of a heavy stone countertop is finally added. I’ve seen beautiful bathrooms ruined by a 1/4-inch sag that caused the drain pipe to lose its pitch and start leaking.
Are Hidden Shims Just a Temporary Band-Aid?
Many homeowners fear that shimming a vanity is ‘faking it’ or that the shims will eventually slip out, leaving the vanity sagging again. I had that same skepticism until I saw how high-end professional cabinet makers handle multi-thousand-dollar installs in out-of-square rooms. The secret isn’t just shoving a piece of cedar in a gap; it’s about creating a solid bearing point that transfers weight directly into the home’s structure. Have you noticed a growing gap between your backsplash and the wall lately, or perhaps a drawer that suddenly starts sticking? That’s the primary sign that your vanity is losing its battle against gravity. We are going to look at how to stop floating vanities from dipping by combining these hidden shims with some strategic hardware like steel reinforcement. It’s about working with the house you actually have, not the perfectly square house you wish you had. Let’s get that level bubble right where it belongs.
Find the High Spot Before You Drill
Walls are like a bad first date—they often hide their biggest flaws until you are fully committed. I remember working on an old 1920s bungalow where the plaster wall was so bowed it looked like a literal banana. I tried to mount a sleek 48-inch vanity directly to it, and by the time I tightened the screws, the cabinet frame actually cracked because it was trying to conform to the curve of the wall. That’s when I learned that your first step isn’t even picking up the drill; it’s running a 4-foot level or a straightedge across your mounting zone to find the ‘bulge.’ This bulge is your pivot point. If you screw the ends of the vanity tight against the wall while the middle is sticking out, you will torque the cabinet out of square, causing those annoying door misalignments we often see in top trends in vanity designs that look great in photos but fail in reality.
The Secret to Zero-Gap Shimming
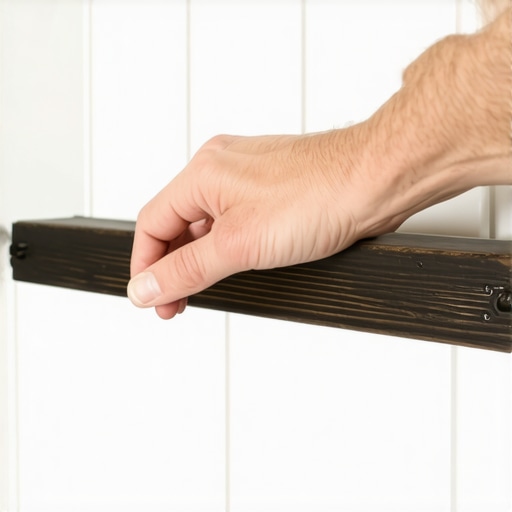
When you find those gaps between your level and the wall, that is where your shims go. I don’t use the cheap, soft cedar shims from the bin at the big-box store because they compress over time under the weight of stone. Instead, use composite shims or thin strips of plywood. You want to create a ‘shim sandwich’ between the vanity’s structural back rail and the wall. Think of it like a bridge pier—you are building a solid foundation for the screw to pass through. If there’s a gap, the screw acts like a winch, pulling the cabinet into the void and creating that dreaded forward tilt. I always recommend using the hidden sub-frame move for supporting massive quartz top vanities if you are dealing with a heavy double-sink setup.
Ditch the Plastic and Go for Steel
If you are hanging fifty pounds of wood and two hundred pounds of stone, plastic is your enemy. I once saw a DIYer try to use heavy-duty toggle bolts into drywall alone for a floating unit. Two weeks later, the whole thing had sagged three inches. You must hit at least two studs, but even then, standard wood screws can sometimes ‘bite’ into soft pine and slowly pull out under constant tension. This is where we look at how to stop floating vanities from dipping with steel plates. By placing a steel reinforcement plate behind the mounting rail, you distribute the pulling force across a larger surface area of the cabinet back. It is the difference between hanging a picture on a nail and hanging a swing on a reinforced beam.
Lock the Level Before the Top Goes On
The final core of the process happens before the plumber even arrives. Once your shims are in and your screws are tight, check the level front-to-back and side-to-side again. If it’s even a hair off, now is the time to loosen and adjust. In that bungalow project, I actually had to use vanity installation hacks that save time by pre-drilling my shim stacks so they wouldn’t split when the heavy lag bolts went through. Once it is locked, the vanity should feel like part of the house, not an accessory hanging on it. This solid base prevents the common issue of why your vanity plumbing is leaking into the cabinet base, as a shifting cabinet is the number one killer of P-trap seals.
Why Hitting the Studs is Only Half the Battle
Most DIY tutorials stop at ‘find the stud and drive a screw.’ But if you are working with a massive 72-inch double vanity, simply hitting the center of a 2×4 isn’t enough to prevent the long-term ‘creep’ that happens when gravity meets wood fibers. Everyone says more screws mean more strength, but in my experience, the sheer volume of fasteners doesn’t matter if they are all concentrated in the same vertical plane. When we look at why custom closets pull away from ceiling joists, the culprit is almost always a lack of lateral distribution. If your vanity only grabs two studs near the center, the outer wings are left to vibrate and flex every time you lean on the counter to brush your teeth. This constant micro-movement eventually wallows out the screw holes, leading to a vanity that feels ‘spongy.’ To fix this, I often advocate for a continuous horizontal ledger or an internal cleat that spans at least three studs, even if the vanity’s pre-drilled holes don’t align with them. We have to be willing to modify the cabinet box to save the installation.
Why Does the Center of Your Built-In Always Seem to Bow?
It’s a question I get from advanced DIYers constantly: ‘I leveled it perfectly, but now the middle is dipping.’ This happens because of a hidden nuance called ‘racking’ and internal tension. When you pull a cabinet tight against an uneven wall, you aren’t just securing it; you are physically distorting the box. This is why why particle board shelves sag so much faster than plywood—they have zero elastic memory. According to the Architectural Woodwork Institute (AWI), cabinets must be installed ‘plumb, level, and true’ within a tolerance of 1/8 inch over 8 feet. If you force a cabinet to conform to a bowed wall without using a scribing secret for perfect built-ins, the internal tension will eventually find the weakest point, usually popping the mitered corners of your doors or causing drawers to bind.
The Trap of Drywall Compression
Here is the ‘Oops’ factor that catches even seasoned pros: drywall is essentially a compressed chalk sandwich. It is not a structural material. When you tighten a heavy-duty lag bolt against the back of a cabinet, you are squeezing the drywall between the vanity and the stud. Over time, the gypsum crumbles under that localized pressure, creating a tiny gap. That gap is all gravity needs to start the downward tilt. This is a primary reason why your built-in cabinets are pulling away from the ceiling. To prevent this, I always suggest using ‘fender washers’ or even custom-cut plywood plates behind the mounting rail to distribute the pressure. If you are serious about a rock-solid feel, consider the hidden sub-frame move for supporting massive quartz top vanities, which bypasses the cabinet back entirely and transfers the load through a secondary internal frame. It’s the difference between a vanity that lasts five years and one that lasts fifty. Have you ever fallen into this trap where a perfectly level install started to sag after a few months? Let me know in the comments. If you’re still in the planning phase, checking out innovative storage solutions to transform your bathroom can help you pick a unit that is actually designed for this kind of structural integrity.
My Go-To Kit for Rock-Solid Installs
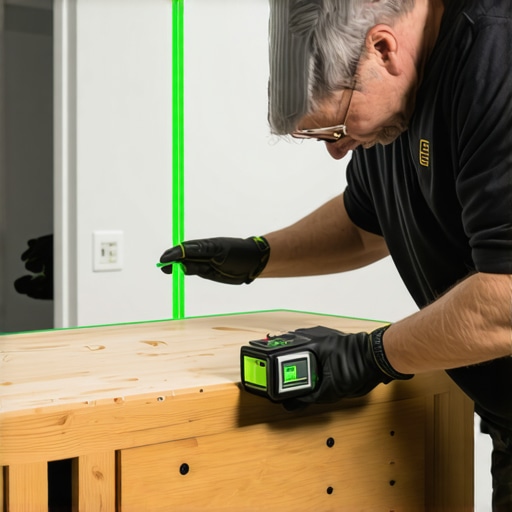
I’ve spent too many hours in crawl spaces and tight bathrooms to trust just any tool. If you see me on a job site, I’m never without my 12V offset installation driver. It’s the only way to get those lag bolts into the tight corners of a custom cabinet without stripping the head or marring the wood. When you’re following a step-by-step guide to vanity installation, the one thing they rarely mention is the ‘reach’—you need tools that allow you to apply torque in spaces that weren’t designed for human hands. I also swear by a 360-degree green beam laser level. It doesn’t just show me where the studs are; it highlights every single hump in the drywall across the entire room. It’s brutal honesty in a plastic box and keeps me from making mistakes that require a complete tear-down later.
How do I maintain my vanity’s structural integrity over time?
Maintenance isn’t just about wiping the counters. It’s about checking the tension on your mounting hardware every few seasons, especially if you live in a climate with high humidity swings. According to the National Kitchen & Bath Association (NKBA), a properly installed vanity should handle significant static loads, but that rating assumes the fasteners stay tight against the structural members. As wood expands and contracts, those screws can slightly loosen. I make it a habit to check the interior mounting rail for any visible ‘daylight’ between the cabinet and the wall. If you catch a gap early, you can tighten things down before the weight of the stone creates permanent structural fatigue. This is also the best time to stop cabinet doors from warping in humid bathrooms by ensuring your sealants are intact and your ventilation is moving enough air.
The Future of Floating Storage
Looking ahead, I see a shift toward modular mounting systems—think of them as heavy-duty French cleats made of extruded aluminum that run the full length of the wall. These systems distribute the load so evenly that the ‘sagging vanity’ might eventually become a relic of the past. We are already seeing these integrated into high-end built-in storage ideas to declutter and enhance your home. If you’re ready to level up your DIY game, I challenge you to try the ‘ledger board method’ on your next project. Instead of just hanging the box on screws, mount a temporary, perfectly level 2×4 ledger to the wall to support the weight while you fine-tune the fasteners. It’s one of those vanity installation hacks that save time and prevent the physical strain of holding a heavy unit in place. Trust me, your future self—and your P-trap—will thank you for the extra twenty minutes of prep work. If you need more specific advice for your layout, don’t hesitate to reach out on our contact us page.
The Hard Truth About How Gravity Wins Over Time
After years of installing these units, I’ve realized that the ‘stone surprise’ is the biggest trap for DIYers. You spend hours leveling an empty cabinet, only for the quartz top to arrive and pull the whole thing down another eighth of an inch. This is why pre-tensioning your shims matters—if you aren’t accounting for that final weight, you’re essentially building a house on sand. I always tell my friends that a floating vanity is essentially a giant lever trying to pull your drywall off the studs. If you’ve noticed your unit shifting, you might need to check out how to stop floating vanities from dipping with steel plates to give it that structural backbone. It’s better to over-engineer the mount now than to fix a cracked pipe later.
#IMAGE_PLACEHOLDER_E#
The Tools That Saved My Sanity in Small Bathrooms
You don’t need a truck full of gear, but you do need the right stuff. First, toss those wooden shims—they compress under load. I exclusively use composite shims or high-density plastic because they are moisture-proof and rock-solid. Second, a 360-degree laser level is your best friend; it reveals the ‘bow’ in your wall that a standard level might miss. If you’re looking for ways to streamline the process, my list of vanity installation hacks that save time and money includes using a temporary support ledger, which turns a two-person struggle into a one-person breeze. Finally, never underestimate a good stud finder with deep-scanning capabilities—hitting the center of the wood is non-negotiable for 2025.
Go Build Something That Stays Plumb Forever
There is a unique kind of satisfaction in seeing that bubble hit the dead center of the level and knowing it’s going to stay there for the next twenty years. By taking the time to shim correctly and reinforce your mounting points, you are turning a simple bathroom upgrade into a permanent structural improvement. Whether you are working with innovative storage solutions to transform your bathroom or a custom-built masterpiece, the foundation is everything. Don’t be afraid to take it slow—the best results come to those who measure three times and shim once. If you’re feeling overwhelmed, head back to my step-by-step guide to vanity installation for beginners to reset your process. Have you ever tightened a cabinet only to see it pull the drywall right along with it? Let me know in the comments below!