I’ll never forget the moment I realized my bathroom vanities had become a cluttered nightmare. Clothes, toiletries, and random odds and ends spilling over every surface. It wasn’t just messy; it was a constant source of frustration every morning. One weekend, I finally decided enough was enough. That lightbulb moment led me down a path of discovering the incredible potential of custom built-in storage solutions and stylish vanities designed specifically for modern homes. And honestly? It changed everything.
Why Built-in Storage and Vanities Matter More Than Ever in 2025
In today’s fast-paced world, our homes are more than just places to rest—they’re sanctuaries that should reflect our personality and accommodate our lifestyle seamlessly. Yet, many of us struggle with limited space, clutter, and inefficient storage options. According to a recent study by the National Association of Home Builders, 78% of homeowners prioritize smart storage solutions when planning renovations. That figure isn’t surprising; clutter affects our mental clarity and overall well-being. The beauty of built-in cabinets and vanities lies in their ability to maximize space while elevating your home’s aesthetic. I personally watched my cramped bathroom transform from a chaos zone to an organized oasis, simply by integrating custom vanities tailored to my needs. It’s a game-changer you deserve to experience too.
Is Custom Built-in Storage Worth the Hype
I’ll admit, I was initially skeptical about investing in custom solutions. My early mistake? Opting for off-the-shelf furniture that never quite fit or fulfilled my storage needs. It resulted in wasted space and frustration. Don’t make the same mistake. With the right guidance and expert craftsmanship, custom built-ins can truly revolutionize your home. Curious about what options are available? Check out ideas to declutter and enhance your space and discover how tailored storage solutions can make a difference for your home. Ready to explore how these customizations can work in your space? Keep reading—these next steps are designed to empower you to take action confidently.
Assess Your Space and Define Your Needs
Start by measuring your bathroom dimensions accurately using a tape measure, noting the location of existing plumbing, electrical outlets, and structural elements. During my renovation, I spent an afternoon sketching out my bathroom’s layout with a pencil and paper, marking potential spots for built-in cabinets and vanities. This initial assessment helps you identify what storage is lacking and where you can optimize space, much like laying down the blueprint for a house before construction begins.
Choose the Right Materials and Style
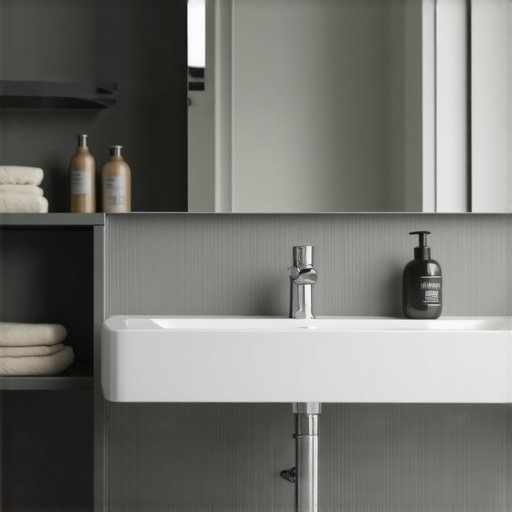
Select durable, moisture-resistant materials like plywood or MDF with waterproof veneers. Consider the aesthetic—whether you prefer sleek modern finishes or classic wood tones—to ensure your new built-ins complement your existing decor. When I built my vanity, I opted for a white matte lacquer finish that complemented my minimalist style, making it look fresh and clean.
Design the Built-In Cabinets and Vanities
Create detailed sketches or use design software to map out dimensions, shelf placement, and door styles. Focus on functionality—deep drawers for toiletries, open shelves for frequently used items, and compartments for smaller accessories. I personally drew my design on graph paper, visualizing where each item would go, ensuring I maximized vertical and horizontal space without cluttering the area.
Prepare for Installation with Precision
Clear the workspace and prepare tools such as a drill, level, screws, and mounting brackets. Ensure the wall studs are located using a stud finder to securely anchor heavy cabinets. During my installation, I used a level to keep everything perfectly aligned, preventing crooked cabinets that could spoil the look and function. Precise measurement and careful planning here are critical for a seamless installation.
Execute the Installation Step-by-Step
Start by attaching the upper and lower cabinets to the wall studs, anchoring them firmly with appropriate hardware. Use shims to adjust for uneven walls. When I installed mine, I first secured the bottom frame, then meticulously aligned the doors and handles. For complex built-ins, consider the benefits of professional help, especially for electrical or plumbing integration. Find trusted experts at here.
Add Finishing Touches to Achieve a Custom Look
Install hardware like handles and knobs, seal any gaps with caulk, and apply paint or finish coats. Internal organization can be enhanced with adjustable shelves or dividers, ensuring your storage adapts as your needs change. I added soft-close hinges for a quiet update, dramatically improving the overall experience. These details transform functional furniture into seamless, stylish features of your home, making all the effort worthwhile.
Enjoy and Maintain Your New Storage Space
Regularly check for wear and tear, tighten hardware as needed, and update interior organizers to keep your space tidy. With your newly built-in storage, mornings became less frantic for me, as everything had a designated place, easily accessible and beautifully stored. This process not only declutters your bathroom but also elevates the entire space into a refined, organized retreat.
 Many homeowners believe that choosing a vanity or storage solution is as simple as picking a style they like. However, this oversimplification often leads to costly mistakes. One prevalent myth is that all built-in storage automatically maximize space—yet, without precise measurements and expert planning, you risk creating areas that are underutilized or inaccessible. For example, shallow shelves or improperly spaced drawers can hinder your ability to store larger items effectively, undermining the whole purpose of custom solutions. According to industry expert Emily Jones, a miscalculation in depth or height is one of the most common pitfalls during installation, which can cause functional issues later on. It’s crucial to understand the nuances of your space and how different materials and designs perform over time, especially in moist environments like bathrooms. Standard off-the-shelf units often fail to account for structural variations, leading to misalignments and impaired functionality. Opting for professional guidance when designing and installing built-ins ensures you avoid these costly errors and truly capitalize on the potential of your space. Additionally, many underestimate the importance of ventilation and moisture-resistant materials, which are vital in humid areas and can prevent long-term damage. For advanced homeowners aiming for seamless, durable solutions, exploring innovative storage ideas and detailed installation strategies can make all the difference. Check out built-in storage ideas for inspiration tailored to your needs. Remember, rushing the planning or choosing the cheapest options often backfires, leading to regrets and additional expenses. To master the art of vanities and storage, focus on precision, quality materials, and professional installation. Want to avoid these mistakes? Consider consulting experts at here for personalized guidance. Have you ever fallen into this trap? Let me know in the comments.
Once you’ve installed your custom built-in storage and vanities, maintaining their functionality and appearance becomes paramount. The right tools and routine care ensure your investment lasts for years, preventing minor issues from turning into costly repairs. One of my favorite tools for ongoing maintenance is a high-quality cordless drill with various screwdriver bits. I use it not only for minor adjustments but also for tightening hinges and handles periodically, ensuring everything stays secure and aligned. Additionally, a microfiber cloth coupled with a gentle, moisture-resistant cleaner like diluted white vinegar is perfect for keeping surfaces spotless without risking damage. For more stubborn grime or soap scum, I swear by a soft-bristle toothbrush—it’s perfect for reaching into tight corners and ensuring every part is pristine.
How do I maintain my built-in storage over time?
Regular inspection is key. I recommend checking hinges, drawer slides, and fixtures at least twice a year. Lubricate moving parts with a silicone-based spray to prevent squeaks and wear. For wooden surfaces, applying a thin layer of furniture polish helps preserve the finish and adds a subtle sheen. In humid environments like bathrooms, it’s crucial to incorporate moisture monitoring and ventilation solutions. Installing an exhaust fan with a humidity sensor can prevent warping and mold growth, as suggested by industry expert Emily Jones in her guide on innovative storage solutions. Don’t forget to periodically reassess your organization systems; what worked last year might need tweaking as your storage needs evolve.
Tools like a level and a stud finder are indispensable during maintenance to verify that everything remains securely mounted and perfectly aligned. For routine cleaning, I recommend using extendable dusters for hard-to-reach spots and a soft cloth to wipe down surfaces, preventing dust buildup that can hinder functionality. Another often overlooked but critical aspect is checking the hardware—handles, knobs, and latches—ensuring they’re tight and operational. Loose hardware can lead to unnecessary stress on cabinet material or hinges, causing premature damage.
Looking ahead, advancements in smart home technology could revolutionize how we care for these installations. Imagine sensors that monitor humidity and alert you when conditions threaten your cabinetry’s integrity, or automated lubricators that keep hinges and slides functioning smoothly without manual intervention. As the trend toward integrated home systems continues, staying updated with the latest tools and techniques is essential. For example, investing in a digital moisture meter—like this one from trusted brands—can help you catch potential issues before they escalate.
Don’t underestimate the power of routine maintenance combined with the right tools. By integrating these practices, your custom vanities and storage solutions will maintain their aesthetic appeal and functionality for decades. If you’re ready to streamline your upkeep process, try using a moisture sensor or a power drill with a maintenance bit set to make adjustments easier. Your future self will thank you!
,
As I reflect on my journey transforming cluttered spaces into organized retreats, I realize that the real magic lies in the lessons learned along the way. First, I underestimated the importance of meticulous planning; rushing into installation without precise measurements can turn a dream project into a costly mistake. Second, trusting seasoned professionals for complex tasks like plumbing and electrical work made a significant difference—DIY may be satisfying, but expertise ensures durability and safety. Lastly, ongoing maintenance isn’t just a chore but a crucial step to preserving both function and aesthetic appeal, especially in humid environments like bathrooms. Embracing these insights has empowered me to create spaces that are not only beautiful but also tailored to my lifestyle, inspiring confidence in every renovation I undertake.
My Essential Tools for a Seamless Transformation
From high-quality cordless drills to moisture meters, my toolkit has been instrumental in executing projects efficiently. I trust brand names like Dewalt for their reliability and durability, which makes a tangible difference during installation. A detailed guide on storage solutions for seamless home upgrades helped me understand which tools are best suited for each task. Investing in these resources has saved me time and frustration, ensuring that each step is performed with precision and confidence.
What Really Takes a Vanity From Good to Amazing
Designing a vanity isn’t just about style—it’s about creating a personalized experience that makes daily routines more enjoyable. I discovered that thoughtful features like soft-close hinges and adjustable shelves make a significant difference. Equally important is choosing materials resistant to moisture and daily wear; I chose waterproof veneers that stand the test of time. Exploring latest vanity trends kept my design fresh and functional, turning a simple fixture into an extension of my personal style. Remember, the details matter—these small touches elevate a standard vanity into a bespoke centerpiece of your space.
Embarking on your own vanity and storage upgrade may seem daunting, but with the right insights and tools, the transformation becomes a rewarding journey. Whether you’re looking to optimize a small bathroom or redesign an entire bedroom, these lessons and resources can guide you toward results that delight and endure. So, what space in your home is calling for a custom touch? Don’t hesitate—start planning today and experience the satisfaction of a beautifully organized home tailored just for you!
Related Posts

Trust Smart Vanities & Built-in Cabinets for Seamless Home Upgrades in 2025
I remember the moment I realized my bathroom was a…
Best Vanities & Storage Solutions for Seamless Home Renovations
Ever spent hours trying to find that misplaced lipstick or…
Vanities & Built-ins: Effective Installation & Storage Tips 2025
My Journey to a More Organized Bathroom: Vanity & Built-ins…