Ever had that sinking feeling when you open your bathroom vanity or kitchen cabinets, only to find chaos staring back at you? I remember the moment I realized my storage solutions were more of a frustration than a convenience. Items shoved into corners, trailing cords, and a lack of accessibility made me wonder if I was the only one battling this ongoing clutter. That lightbulb moment prompted me to explore smarter, more effective ways of installing built-in cabinets and optimizing storage.
Your Home Deserves Better Storage Solutions
Is Reinventing Built-ins Worth the Hype?
Initially, I was skeptical. It’s easy to think that making changes to built-in cabinets might be costly and complicated. But I learned early on that many common mistakes—like mismeasuring or ignoring the importance of seamless design—can cost both time and money. For instance, my first attempt at a custom vanity ended up being too deep, making access difficult and space feel cluttered. A quick visit to this resource provided invaluable insights into efficient storage ideas that I wish I had known from the start.
Research shows that organization systems can increase home efficiency by up to 30%, and proper built-in cabinetry is often the secret weapon for maximizing space in small or awkward areas. Don’t just take my word for it—real experts advocate for carefully planned installation and storage strategies, emphasizing that the right built-in solutions can truly transform your space and daily routines.
}
Measure with Precision to Avoid Costly Mistakes
My first attempt at installing a custom vanity ended in frustration because I mismeasured the space, leading to a cabinet that was too deep and inaccessible. To prevent this, use a sturdy tape measure and a spirit level to get accurate dimensions of your wall and floor areas. Double-check your measurements on multiple points—height, width, and depth—since even minor errors can cause misalignment. When measuring, consider the clearance needed for doors or drawers to open fully, and account for existing plumbing or electrical fixtures. Record all measurements meticulously, as they form the foundation for your entire project.
Design Your Layout with Purpose and Style
Choose Functional Compartments
Before you start building, sketch a layout focusing on your storage needs. Think of your vanity as a personal wardrobe; include drawers for smaller items like brushes and skincare, shelves for towels, and cabinets for larger items. My experience showed that compartmentalizing makes your space look neater and more accessible. Use creative built-ins to blend style with utility, integrating hidden compartments or pull-out trays for maximum efficiency. This approach ensures every inch serves a purpose and avoids clutter.
Select Materials that Match Your Home’s Vibe
Opt for durable, high-quality materials suited for humid environments if installing in bathrooms—like moisture-resistant MDF or hardwood. I chose a sleek laminate for my vanity, which was affordable and easy to clean, but the final touch came with custom hardware for a modern look. Review the latest vanity design trends to stay ahead. Material choice impacts the longevity and aesthetics of your cabinets, so select based on both style and practical needs.
Prepare for Common Installation Challenges
When I installed my vanity, I encountered uneven walls, which caused gaps and misalignment. To overcome this, use shims to adjust the fit and ensure the unit sits flush against the wall. Secure the cabinet to the wall studs using appropriate anchors—stud finder is your best friend here. A helpful tip from installation experts is to pre-drill holes to prevent splitting the wood and to avoid over-tightening screws. Patience during installation ensures a seamless finish that lasts.

Utilize spacers during installation to keep your cabinets level and plumb, thereby avoiding skewed alignments that diminish the overall look. After placing the units, check with a level and make small adjustments as needed.
Secure and Finish for a Flawless Look
Once the cabinet is in position, mount it firmly to the wall and install all hardware. For a tidy appearance, hide screws with caps or filler compounds. Apply a protective finish or paint that matches your decor, whether gloss, matte, or semi-gloss. During my project, I found that sealing the wood not only protected against moisture but also enhanced the color. For ideas on matching styles, visit styling tips to perfect your look.
Even seasoned DIY enthusiasts often fall for misconceptions about installing vanities and built-ins. A common myth is that more storage always equals better organization, but quantity without thoughtful design leads to clutter. In reality, strategic compartmentalization tailored to your habits makes a significant difference. Many overlook that improper weight distribution during installation can cause long-term structural issues—using heavy cabinets without proper support risks damaging walls or floors. It’s crucial to understand that the finesse of leveling and anchoring, often underestimated, is what sustains a sleek, durable finish. Advanced homeowners are increasingly aware that choosing materials solely based on appearance can be a mistake; moisture-resistant options are essential in humid environments to prevent warping and mold. Regarding installation, rushing measurements is a frequent trap. Even minor inaccuracies can cause gaps or misalignments that compromise aesthetics and function. Double-check all dimensions with a spirit level and confirm the clearance for doors and drawers. For the seasoned DIYer, integrating smart storage solutions with built-in furniture elevates functionality—it’s not just about fitting more, but about optimizing access and usability. For example, pull-out trays or hidden compartments can be game-changers, streamlining daily routines. To truly avoid pitfalls, consider consulting expert guides like these professional design tips that reveal untapped strategies. Remember, the difference lies in attention to nuance—overlooking details like proper support or material suitability can turn a simple upgrade into a renovation nightmare. Have you ever fallen into this trap? Let me know in the comments.
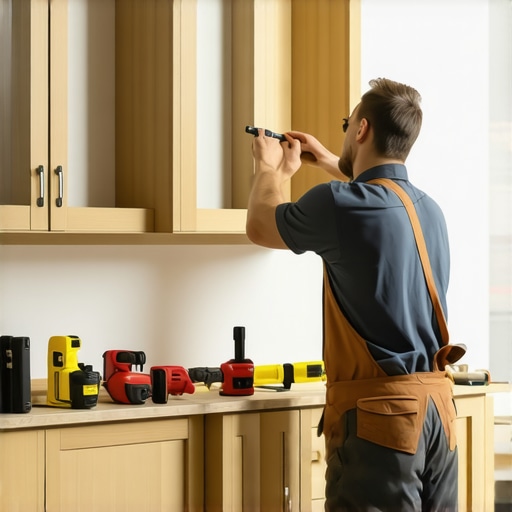
Keeping your custom-built vanities and storage systems functional over time requires the right tools and diligent maintenance practices. Investing in quality equipment not only simplifies the installation process but also ensures longevity and sustained aesthetics. One indispensable tool I rely on is a digital laser level. Unlike traditional bubble levels, a laser level provides precise, even readings over large surfaces, making it easier to maintain perfect alignment during installation or regular adjustments. I personally use the DeWalt DW088K because of its durability and accurate calibration, which cuts down installation time and reduces errors.
Power drills with multiple speed settings are another essential. For delicate tasks such as securing hardware or drilling into moisture-resistant materials, adjustable torque controls prevent over-tightening that could damage your cabinets. I recommend the Makita XFD10Z for its lightweight design and dependable performance, especially during long projects.
Maintaining your storage systems isn’t limited to the tools of installation. Regularly inspecting for moisture damage or loose screws extends the lifespan of your built-ins. Using a high-quality, dry silicone spray can keep hinges and sliding mechanisms moving smoothly. That way, doors and trays operate effortlessly, maintaining the sleek, functional look over years of use. For cleaning and preserving finishes, I swear by the Howard Restore-A-Finish, which rejuvenates wood surfaces without harsh chemicals.
How do I keep my cabinets working smoothly over time?
Consider implementing a routine check of all hardware every few months. Tighten any loose screws and observe how hinges and sliders are functioning. Applying a protective sealant annually, especially in humid environments, guards against warping and mold. Moreover, integrating smart sensor lighting, like motion-activated LEDs, can enhance visibility and reduce accidental damage, promoting longer-lasting fixtures. Looking ahead, advancements in corrosion-resistant materials and self-healing coatings are poised to revolutionize household fixtures, making maintenance more effortless and effective. Stay updated with the latest trends—like the top vanity design trends in 2025—to ensure your storage solutions remain both stylish and durable.
Remember, consistent care paired with the right tools is key. Try applying a silicone spray to your hinges today to keep everything operating flawlessly—small steps lead to big longevity. For more expert tips on maintaining your built-ins, visit this resource.
Reflecting on my journey to create a more organized and stylish home, I’ve come to realize that the most profound lessons often emerge from missteps. One of the toughest truths I’ve uncovered is that rushing the measurement process can lead to costly mistakes that set back progress. Taking the time to double-check dimensions and plan meticulously saved me from deep frustration and unnecessary expense, underscoring the importance of patience in DIY projects.
What I Wish I Knew Before Diving Into Built-In Vanities
- Measure Twice, Think Once: The devil truly is in the details. Precise measurements prevent misalignments and ensure a seamless fit. I underestimated the importance of considering plumbing and electrical fixtures, which caused delays I could have avoided with better planning. Remember, a laser level tool is worth its weight in gold for achieving perfect alignment.
- Design with Daily Use in Mind: Prioritizing functionality alongside style made all the difference. Incorporate accessible compartments, pull-out trays, and hidden storage to maintain a tidy space without sacrificing aesthetics. Creative built-ins can harmonize utility and beauty effortlessly, especially when you explore innovative options like those highlighted in these design ideas.
- Materials Matter More Than Looks: Selecting moisture-resistant and durable materials protects your investment. I chose high-quality laminate that withstands humidity and abuse, which reassures me daily. Staying updated with latest design trends ensures your vanity remains both trendy and resilient.
- Embrace Expert Guidance and Resources: Sometimes, it’s wise to consult seasoned pros or trusted tutorials. I found that professional installation tips significantly improved my results, making the process smoother and the outcome more polished. Check out comprehensive guides at these instructions for a successful build.
Tools That Turn Dreams Into Reality
Investing in quality tools turned my project from a guessing game into a precise craft. A dependable cordless drill allowed me to work efficiently, while a digital laser level kept everything perfectly aligned. Regular maintenance, like lubricating hinges and tightening screws, prolongs the lifespan of your built-in vanities. For ongoing care, I rely on products like Howard Restore-A-Finish, which rejuvenates wood surfaces without harsh chemicals. Staying on top of maintenance not only preserves functionality but also keeps your space looking fresh and inviting.
Transform Your Space, Transform Your Life
Building bespoke vanities and integrated storage solutions isn’t just about aesthetics; it’s about reclaiming your home from clutter and creating a sanctuary that reflects your personality and needs. With patience, the right tools, and a dash of creativity, you can turn any space into a functional masterpiece. If you’re inspired to elevate your home, start planning today, and remember—each step forward is a step toward a more organized, beautiful life.
What has been your biggest challenge in installing built-in vanities? Share your experience below—I’d love to hear your story!
Related Posts

Top Installation Tips for Effective Built-ins & Storage Solutions Today
Imagine this: you’ve finally decided to take on that home…
Expert Built-in Cabinets & Storage Solutions for Seamless Spaces
I remember the moment clearly. I opened my bathroom cabinet,…
Fixing Gaps: How to Scribe Custom Built-in Cabinets to Uneven Walls
I'll never forget the time I installed a beautiful set…