I remember the exact moment I realized my home’s clutter was taking over my life. It was late evening, and I was frantically searching for my keys amidst a mountain of magazines, shoes, and random clutter. That sinking feeling hit me—how could I live like this? My whole space felt chaotic, and I knew I needed a serious upgrade. That’s when I stumbled upon the game-changing idea of smart built-in cabinets and integrated storage solutions—something I wish I had embraced years earlier.
Why Smart Storage Solutions Are a Game Changer for Modern Homes
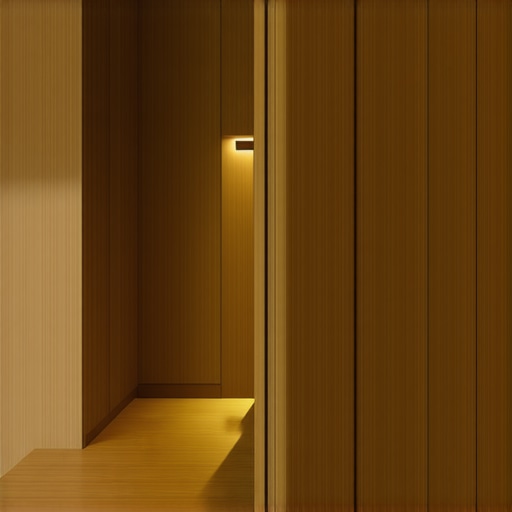
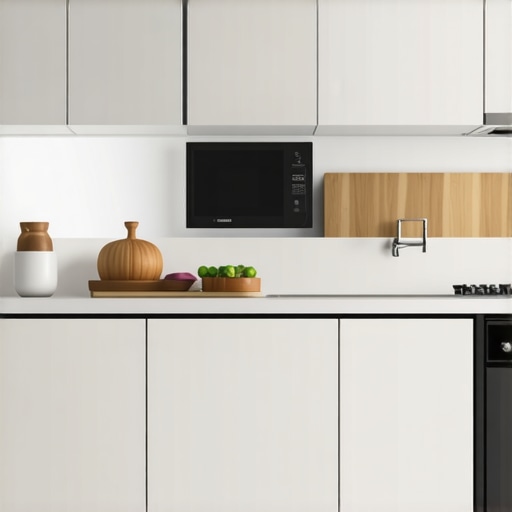
For years, I struggled with inefficient storage that made my home feel smaller and more cluttered. Traditional furniture, no matter how stylish, often just pushes messes out of sight temporarily. But once I invested in well-designed, custom built-in cabinets, everything changed. Not only did my space look more sleek and organized, but I also gained precious extra room for the things I actually use daily. The beauty of smart built-ins is that they are tailored to your unique needs, seamlessly blending into your home’s aesthetic while maximizing every inch of space.
Is Installing Built-In Cabinets Actually Worth the Hype?
Early on, I made the mistake of thinking that built-ins were a luxury reserved for upscale homes. But I quickly realized they are a practical investment that pays off in convenience and style. Plus, modern solutions like hidden compartments and smart shelving help keep everything tidy and accessible. If you’re skeptical about the cost or effort, I encourage you to explore options that suit your budget and DIY comfort level. There are many expert tips and innovative ideas that make installation easier and more affordable than you might think. For example, check out these vanity installation hacks that can save you time and money during your upgrade.
Thinking about transforming your space? Whether it’s your bathroom, bedroom, or living area, smart built-ins offer a versatile way to declutter and elevate your home’s look. Ready to get started? Let’s dive into the details of how you can choose the perfect storage solution that fits your lifestyle and budget.
},
Identify Your Storage Needs
Start by assessing what you want to store and where. For example, I once realized my bathroom was overflowing with toiletries and towels. I measured the space and listed items that needed dedicated spots. This clarity helps determine the size and type of built-in cabinets you need, whether they’re for the bedroom, bathroom, or living room. Consider using innovative storage ideas to maximize functionality.

Choose the Right Material and Style
Opt for durable materials like MDF, plywood, or solid wood, depending on your budget and aesthetic. I chose a sleek matte finish for my living room built-ins to match my modern decor. Think about whether you want open shelving, closed cabinets, or a mix of both. Browsing vanity styles can inspire your design choices.
Plan Your Layout Precisely
Use graph paper or digital tools to sketch your cabinet layout. I measured wall dimensions and plotted shelves and compartments accordingly. Remember to leave space for handles or hardware if needed. Precision here prevents surprises during installation. For detailed guidance, check this installation guide.
Prepare the Space for Installation
Clear the area and check wall surfaces for levelness. I removed old fixtures and patched holes to ensure a flat surface. Mark your reference points with a pencil for accurate placement. Proper prep makes the installation smoother and safer. For tips on leveling, see expert installation tips.
Gather Your Tools and Materials
You’ll need a drill, screwdriver, level, measuring tape, stud finder, and clamps. I also bought shims to adjust uneven walls. Having everything ready prevents delays. If you’re new to DIY, these hacks can make the process easier and more cost-effective.
Start the Installation Process
Follow your plan step-by-step. Attach the cabinet frames first, ensuring they are level and plumb. Use a level frequently—imagine it as your home’s “spine,” keeping everything straight. Secure each piece into studs for stability. I once skipped a stud and had to redo a section—lesson learned! For detailed steps, consult this comprehensive guide.
Secure and Finish
Once the frames are in place, attach shelves, doors, and hardware. Use shims to correct minor misalignments. I painted and sealed my cabinets afterward to match my decor. This final step elevates the look and protects your investment. For finishing touches, see installation tips.
Let’s dig deeper into the nuances that often trip up homeowners when it comes to vanities, storage solutions, and installation techniques. While it’s tempting to follow popular advice, many people overlook the critical details that can make or break a home upgrade. One prevalent myth is that all built-in cabinets are created equal. In reality, the quality of materials and craftsmanship significantly impacts durability and aesthetics. For example, opting for cheaper MDF might save money upfront but can lead to warping or damage over time, especially in humid spaces like bathrooms. Experts recommend choosing sturdy materials like plywood or solid wood for longevity, which might seem pricier but pays off in the long run.
Another common mistake is underestimating the importance of precise measurements. Rushing through layout planning can lead to ill-fitting cabinets that disrupt the flow of your space. Advanced homeowners invest in digital tools or professional consultations to ensure perfect fit and alignment. Skipping this step often results in gaps, misaligned doors, or hardware issues. Remember, the devil is in the details, and meticulous planning prevents costly rework later. For detailed guidance, check this installation guide.
Many assume that installing built-ins is a DIY-friendly task, but the reality is more complex. A significant trap is ignoring wall imperfections or not securing cabinets into studs properly. This oversight can cause instability or safety hazards. Using a level and a stud finder is essential, but understanding how to adapt to uneven walls is equally important. For instance, shimming and adjusting during installation ensures a seamless look and sturdy setup. Additionally, advanced users know that integrating smart storage features, like hidden compartments or adjustable shelving, enhances functionality without sacrificing style. Explore these expert tips for smarter solutions.
What about the myths surrounding quick fixes versus long-term solutions?
Many believe that quick, cheap fixes are sufficient for a tidy home. However, quick fixes often lead to recurring problems, higher costs, and even safety concerns. Investing in quality, custom solutions tailored to your space pays dividends over time. For example, a well-designed vanity with integrated storage not only declutters but also elevates your space’s aesthetic. The key is to prioritize durability and thoughtful design over short-term savings. Modern trends lean toward seamless integration and multifunctional furniture, which require careful planning but offer superior results. For more insights, visit this resource.
In summary, understanding the nuances—such as material quality, precise measurement, proper installation techniques, and long-term planning—can dramatically improve your project’s success. Don’t fall into the trap of believing everything you hear or see online. Instead, focus on expert-approved practices to truly upgrade your home. Have you ever fallen into this trap? Let me know in the comments!
Once you’ve installed your custom built-in cabinets and integrated storage spaces, the journey doesn’t end there. Proper maintenance ensures these investments stay functional and beautiful for years to come. I rely on specific tools and methods to keep my built-ins in top shape, and I highly recommend adopting a routine that combines both preventative care and timely repairs.
Tools That Make Maintenance Easier and More Effective
One of my go-to tools is a high-quality microfiber cloth paired with a gentle, pH-balanced cleaner. This combo is perfect for dusting and cleaning surfaces without scratching or damaging the finish. For stubborn stains or grime, I use a soft-bristled brush and a mild soap solution, which effectively lifts dirt without harming the material. An electric handheld vacuum with a brush attachment is invaluable for reaching into tight corners and crevices—especially in built-in vanity units where dust and debris tend to accumulate.
To keep hinges, handles, and slides functioning smoothly, I keep a small can of silicone spray handy. Applying it periodically prevents squeaking and ensures drawers open and close effortlessly. For more detailed maintenance, I turn to digital tools like a smart home app that can remind me when to check for loose hardware or signs of wear—helping me stay proactive rather than reactive.
Long-Term Care for Your Storage Solutions
Long-term upkeep involves more than routine cleaning. I suggest inspecting your built-ins every six months for signs of damage, warping, or hardware issues. Addressing small problems early prevents costly repairs later. For example, tightening loose screws or replacing worn-out hardware can extend the life of your cabinetry significantly.
Another key tip is controlling the environment around your built-ins. Humidity and temperature fluctuations can cause materials like wood to expand or contract, leading to cracks or warping. Using dehumidifiers in damp areas and avoiding direct sunlight can preserve your finishes and structural integrity. Additionally, consider applying a protective finish or wax periodically, especially on wood surfaces, to maintain their luster and resistance to moisture.
How do I maintain built-in storage over time?
Regular inspections and cleaning are your best allies. Keep tools like microfiber cloths, gentle cleaners, and silicone sprays in your maintenance kit. Make a habit of checking hinges, handles, and hardware every few months, tightening or replacing parts as needed. Managing humidity and environmental factors extends the lifespan of your cabinetry and keeps it looking fresh. For more advanced tips, explore these expert strategies to optimize your storage spaces and ensure they remain functional over the years. Remember, a small investment in maintenance now prevents much larger repairs later—so get into the habit and enjoy the long-term benefits of your beautifully organized home.
Lessons that Transformed My Approach to Built-Ins
- One key insight I wish I had embraced earlier is the importance of tailored storage. Off-the-shelf solutions often fall short, but custom built-ins can transform a chaotic space into a sanctuary of organization, saving time and reducing stress every day.
- I learned the hard way that precise measurements and planning are non-negotiable. Rushing installation or ignoring wall irregularities can lead to costly mistakes. Taking the time to measure twice and plan meticulously makes all the difference.
- My biggest lightbulb moment was realizing that investing in quality materials like plywood or solid wood, despite higher initial costs, pays off in durability and long-term beauty. Cheaper options may seem tempting but often need replacing sooner.
Tools and Resources That Make a Difference in Home Upgrades
- My go-to toolkit includes a high-quality stud finder and a reliable level. These simple tools prevent misalignments and ensure stability, which is crucial for long-lasting built-ins. Trust me, cutting corners here leads to headaches later.
- The book “Effortless Storage Solutions for a Tidy Stylish Home” offers practical advice that helped me optimize every inch of my space. It’s packed with innovative ideas for integrating storage seamlessly into your design.
- For expert installation tips, I highly recommend exploring online guides like the “Step-by-Step Guide to Vanity Installation for Beginners.” Clear instructions and troubleshooting tips can save you time and frustration during your project.
Your Next Step Toward a More Organized Home
Creating custom built-in cabinets tailored to your needs is more than just a renovation—it’s an investment in your daily comfort and home’s value. Whether you’re tackling a small bathroom or transforming a living room, the right storage solutions can make your space feel larger, more inviting, and uniquely yours. Don’t wait to start—your dream home is within reach. What’s the first area you want to upgrade with smart storage? Let me know below and share your plans!
,
One Reply to “Smart Built-in Cabinets & Storage Solutions for Modern Homes”
Leave a Reply
Related Posts

Expert Guide to Built-in Cabinets & Storage Solutions for Seamless Homes
My Journey Into Seamless Storage: Discovering Built-in CabinetsWhen I first…
Revamp Your Space with Custom Built-in Cabinets & Storage Solutions
I remember the exact moment I realized my home’s lack…
Smart Built-in Cabinets: Efficient Installation & Storage Solutions
I remember the exact moment I realized how much clutter…
This post really resonated with me because I’ve been contemplating how to maximize storage in my small apartment without sacrificing style. The idea of custom built-in cabinets is especially appealing because it combines functionality with aesthetic appeal—something I often struggle to balance. I appreciate the detailed breakdown of the planning and installation process, which can seem overwhelming at first glance. One challenge I foresee is measuring and ensuring the walls are truly level, as my space has some uneven spots. Has anyone here found effective ways to deal with walls that aren’t perfectly straight? Also, I was surprised to learn how much investing in quality materials pays off in the long run. I’d love to hear any tips from those who’ve already gone down this path. Overall, this has inspired me to finally take the plunge on a storage upgrade, especially in the living room to de-clutter and enhance the room’s modern vibe.