I remember the exact moment I realized my home was turning into a chaotic storage nightmare. It was a Saturday afternoon, and I was desperately digging through a mountain of clutter just to find a single screwdriver. That’s when it hit me—my storage solutions were simply not keeping up with my life. I had tried DIY shelves, random boxes, and even some trendy organizers, but nothing truly made a difference. The frustration was real, and I knew I wasn’t alone in this struggle. If you’re tired of tripping over clutter or feeling overwhelmed every time you open a closet, then this post is for you.
Why Smart Storage Matters More Than Ever in 2025
In 2025, the demand for innovative storage solutions has skyrocketed. Our homes are becoming smarter, more efficient, and designed with purpose. But why does this matter to you? Well, studies show that clutter can negatively impact mental health, productivity, and even sleep quality—yes, it’s that serious. The good news? With expert installation tips and the right built-ins, you can turn your space into a sanctuary of order and style. I’ve been through the learning curve myself, making plenty of mistakes early on. One common error I made was choosing cheap materials that warped over time, which only added to my frustration. Trust me, investing in quality, like the kind you find in innovative storage solutions, makes all the difference.
Is All the Hype Around Built-ins Actually Worth It?
That’s a question I hear a lot and honestly, I was skeptical at first. I worried about the cost, the installation process, and whether they’d really fit my space. My early mistake was attempting a DIY install of a custom cabinet without proper measurements or tools, which led to uneven surfaces and a less-than-stellar look. After that, I learned that proper planning and expert guidance are crucial. When installed correctly, built-ins can seamlessly blend into your home, providing customized storage that actually works for your lifestyle. Want to avoid the pitfalls I faced? Keep reading, and I’ll share proven tips to help you make smart choices and install like a pro.
Plan Your Space Carefully
Start by measuring your area precisely with a reliable tape measure. I once sketched out my closet dimensions on a piece of paper, which helped me visualize what could fit where. This step prevents costly mistakes later. Use a pencil to mark key points on the wall, such as where the shelves or cabinets will sit. Remember, a well-planned layout is the backbone of effective storage. For inspiration and detailed planning tips, visit this guide.
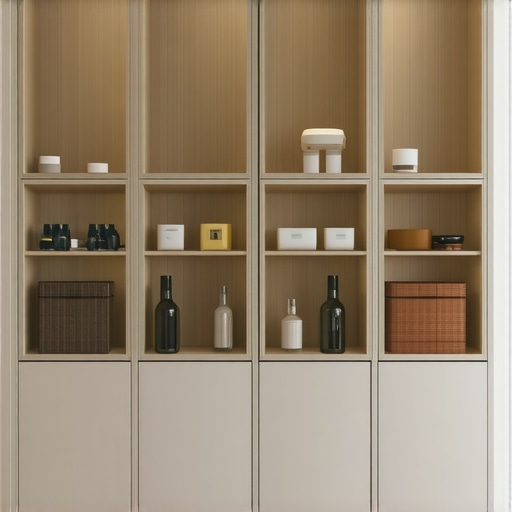
Select the Right Materials and Design
Choose durable, moisture-resistant materials for areas prone to humidity like bathrooms. I opted for high-quality plywood and finished with a waterproof coating, which kept my shelves looking new despite the damp environment. When designing your built-ins, consider a mix of open shelves for easy access and closed cabinets for hidden storage. Think of it like creating a wardrobe that balances accessibility with aesthetics. For modern styles and trending designs, check this resource.
Prepare for Expert Installation
Proper installation is crucial. I learned this the hard way when my first attempt was uneven because I didn’t use a level. Use a laser level or a good bubble level to ensure your cabinets are perfectly straight. Anchoring built-ins securely to studs in the wall prevents accidents and damage over time. If you’re unsure, consider consulting a professional. You can find trusted installers at this contact page. When I finally hired a pro, the outcome was flawless, and I saved hours of frustration.
Secure and Level Every Step
Fasten your built-in units to the wall with heavy-duty screws directly into wall studs. Use shims to adjust for uneven floors or walls; I used a few shims behind my early attempts, which made a big difference. Double-check measurements before fixing each piece in place. This meticulous approach ensures your storage solutions will be both functional and visually appealing. For more installation hacks, visit this resource.
Finish with a Professional Touch
Once installed, finish your built-ins with paint, stain, or a protective sealant. I chose a sleek matte paint that matched my room’s decor perfectly. Adding soft-close hinges and custom handles can elevate the look and functionality. Think of these details as the jewelry on a well-dressed outfit—they make all the difference. For styling ideas and tips on choosing the perfect hardware, see this article.
Many homeowners approach built-in storage with a set of assumptions that, while seemingly logical, often lead to suboptimal results. One of the most widespread misconceptions is the belief that cheaper materials will suffice for long-term durability. In my experience, opting for budget-friendly options often results in warped shelves, loose fixtures, and the need for early replacements. Investing in high-quality, moisture-resistant materials not only extends the lifespan of your storage but also maintains its aesthetic appeal over time. For instance, using waterproof coatings on plywood can prevent warping, especially in humid environments like bathrooms, ensuring your built-ins look pristine for years to come. Don’t fall into the trap of thinking all materials are created equal; quality matters more than most homeowners realize.
Another common myth revolves around the idea that a simple, one-size-fits-all design works for every space. This misconception neglects the importance of customization. Built-ins should be tailored to your specific needs—whether that’s integrating corner shelves, hidden compartments, or adjustable height installations. Overlooking these details can lead to wasted space or cumbersome access, defeating the purpose of a sleek, seamless look. Advanced homeowners understand that a smart design considers the unique quirks of their homes, optimizing every inch for maximum functionality. For example, incorporating creative built-ins that fit into odd corners or under stairs can dramatically improve storage efficiency.
What about the myth that DIY installation saves money and is always straightforward?
This is a dangerous misconception. While DIY can be rewarding, it often results in costly mistakes—improper measurements, uneven surfaces, or insecure anchoring—that compromise both safety and aesthetics. Professional installation, with precise tools like laser levels and expert techniques, ensures your built-ins are perfectly aligned and securely fastened. Skipping this step may seem like a savings upfront, but the long-term costs and frustration outweigh the initial effort. To avoid these pitfalls, consider consulting trusted installers at this contact page. Properly installed built-ins not only look better but also last longer, providing peace of mind and a polished finish.
Lastly, many underestimate the importance of finishing touches—like soft-close hinges, custom handles, or protective sealants—that elevate the overall look and usability. These details are often overlooked but can make or break the perceived quality of your storage solutions. Think of these features as the jewelry on a well-dressed outfit—they complete the look and add that extra layer of sophistication. For styling ideas and hardware options, explore this resource.
Understanding these hidden nuances and avoiding common mistakes can transform your storage project from a DIY disaster into a sleek, durable, and highly functional feature of your home. Have you ever fallen into this trap? Let me know in the comments.
Maintaining your built-in storage solutions over time is essential to ensure they continue to serve your needs and look great. From choosing the right cleaning tools to scheduling regular inspections, a proactive approach helps prevent issues before they become costly repairs. I personally recommend using a soft microfiber cloth for dusting surfaces, which prevents scratches and preserves the finish. For deeper cleaning, a gentle mix of warm water and mild soap works wonders without damaging the materials. Avoid harsh chemicals that can degrade finishes or warp wood, especially in humid environments like bathrooms or kitchens.
One of my favorite maintenance tools is a handheld cordless vacuum with a brush attachment. It’s perfect for quickly removing dust and debris from shelves and crevices without displacing screws or damaging delicate hardware. I also keep a small can of compressed air nearby to blow out hard-to-reach corners, ensuring dust doesn’t accumulate where it can cause operational issues or discoloration over time.
Investing in high-quality hinges and drawer slides is another way to extend the life of your built-ins. When properly lubricated with a silicone-based spray, these components glide smoothly and resist corrosion, especially in moist areas. Checking these periodically and tightening loose screws prevents squeaks and misalignments, saving you from more extensive repairs later.
Planning for future upgrades by selecting versatile hardware and finish options can make long-term maintenance easier. For example, choosing hardware that’s easy to replace or upgrade allows you to refresh your storage’s look without a full remodel. Regularly inspecting your built-ins for signs of wear, such as warping, loose joints, or peeling finishes, enables you to address problems early, maintaining both function and aesthetic appeal.
Looking ahead, I believe the trend toward smart maintenance tools will continue to grow. Devices like app-controlled vacuum cleaners, robotic dusters, and moisture sensors are becoming more affordable and integrated into our homes. These innovations can automatically alert you to issues like leaks or dust buildup, helping you stay ahead of potential problems. Staying updated with the latest tools and techniques ensures your storage solutions remain reliable and stylish for years to come.
How do I maintain built-in storage over time?
Start by incorporating easy-to-use cleaning tools like microfiber cloths, silicone lubricants, and compressed air into your routine. Schedule regular inspections—every six months—to check for structural issues or hardware wear. Keep hardware updated with the latest, easy-to-replace options, and consider investing in smart sensors that monitor humidity or detect leaks. By adopting these practices, you can enjoy beautifully maintained storage that stands the test of time. For more advanced tips, explore this resource and try implementing one new maintenance routine today. Your future self will thank you!
The Hardest Lesson I Learned About Built-Ins
I once believed that choosing the cheapest materials was a smart way to save money. It wasn’t until a year later that I realized how quickly warping and damage can occur, costing me more in repairs than I initially saved. Now I know that investing in moisture-resistant, high-quality materials is essential for lasting built-ins.
Why Customization Beats Off-the-Shelf Solutions
I used to think that a standard design would fit any space, but I quickly discovered that every home has its quirks. Tailoring your built-ins to your specific needs—adding hidden compartments or adjustable shelves—maximizes space and functionality, transforming your home into a truly organized sanctuary.
Professional Installation Is Worth Every Penny
Attempting a DIY install seemed tempting, but uneven surfaces and insecure fixtures taught me a harsh lesson. Hiring experts, who use tools like laser levels and proper anchoring techniques, guarantees a seamless, durable finish that stands the test of time.
Curated Tools and Resources for Effortless Storage
- Smart Storage Solutions: My go-to resource for innovative ideas and expert installation tips is this comprehensive guide. It’s packed with actionable insights to maximize your space effectively.
- High-Quality Hardware: I trust this brand for durable hinges and drawer slides that resist corrosion and ensure smooth operation for years.
- Design Inspiration: For stylish, modern designs, this resource helps me stay updated with the latest trends.
Your Turn to Try
Building or upgrading your built-in storage can feel overwhelming, but with the right knowledge and tools, you can create a space that’s both functional and beautiful. Don’t hesitate to start small and gradually refine your design. Remember, every expert was once a beginner, and your home deserves the best in storage solutions.
What’s the one storage challenge you’re facing right now? Share your experience below—I’d love to hear your story!
Related Posts
Smart Storage Solutions & Built-ins: Expert Installation Tips Today
Ever opened a closet or a bathroom cabinet and felt…
Top Storage Solutions & Built-ins for Seamless Organization in 2025
I vividly remember the moment I realized my cluttered living…
Smart Storage Solutions & Built-ins for Seamless Home Organization 2025
My Journey to a Clutter-Free Home: Embracing Built-ins and Smart…