Ever stood in front of your bathroom mirror, desperately digging through cluttered drawers or overflowing cabinets just to find that one essential item? I’ve been there. That frustrating moment when your space feels more chaotic than peaceful. It hit me one morning, when I was late for work, searching for my favorite skincare product amidst a mountain of clutter. That lightbulb moment made me realize: I needed smarter storage solutions, and I needed them now.
Why Smart Vanities and Built-in Storage Make All the Difference
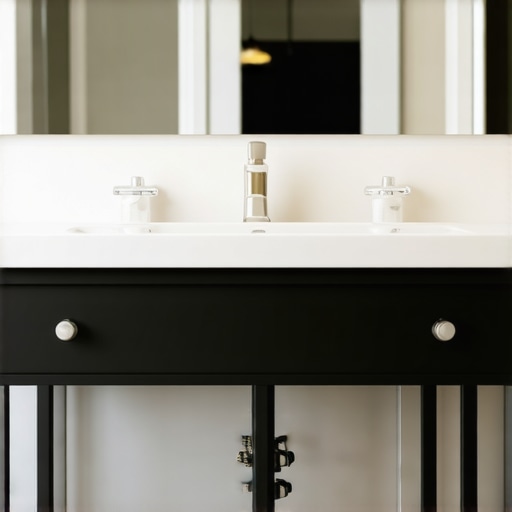
Modern homes are all about maximizing space without sacrificing style. Traditional vanities and storage options often fall short, leaving us with cluttered countertops and awkward corners. That’s where custom built-in storage and smart vanities come into play. They’re designed to seamlessly blend function with aesthetics, giving you a tidy, organized space that feels as good as it looks.
Is This Trend Just Hype or Really Worth It?
Honestly, I initially hesitated. I thought, “How hard can it be to add a few shelves?” But I made the mistake early on of choosing off-the-shelf solutions that didn’t fit my space. The result? More clutter and a space that felt more cramped. When I finally invested in custom vanity design and built-in cabinets, everything changed. The difference was night and day. My bathroom became a serene oasis instead of a storage nightmare. The key is tailored solutions that fit your unique space, which is why I always recommend consulting with experts who understand expert installation tips.
So, if you’ve ever felt overwhelmed by bathroom clutter or unsure about whether upgrading your storage is worth the effort, I get it. But trust me, the right built-in options can turn your bathroom into a sanctuary. And the best part? You don’t have to gut your entire space. Small changes, smartly implemented, can make a huge impact.
Selecting the Right Materials and Design
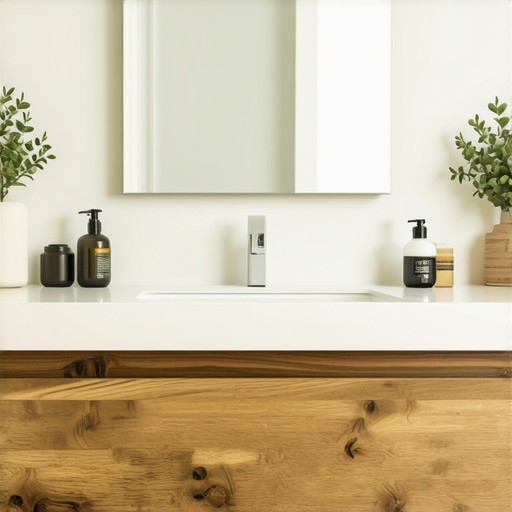
Start by choosing durable, moisture-resistant materials like plywood, MDF with waterproof laminate, or solid surface for your vanity. When I replaced my old countertop, I opted for a quartz surface because it’s not only stylish but also resistant to water and stains. This choice made my cleaning routine easier and kept my space looking pristine longer. Check out tips on selecting the perfect vanity style to match your decor.
Measuring and Planning Your Space Accurately
Accurate measurements are the backbone of a seamless installation. I grabbed my tape measure, a level, and a notepad, then meticulously measured every inch of the space, including ceiling height, existing plumbing, and wall irregularities. I recorded these details to ensure my custom-built vanity would fit perfectly without needing adjustments later. Remember, a good plan prevents costly mistakes. For detailed guidance, visit step-by-step installation tips.
Designing for Functionality and Accessibility
Think about your daily routines. I designed my vanity with multiple drawers for skincare, a tall cabinet for towels, and a pull-out tray for frequently used products. To visualize how these features work together, I drew a simple layout on graph paper, ensuring each component was within easy reach. This approach turned my cluttered space into an organized oasis. Use creative built-in solutions for inspiration.
Preparing Your Space for Installation
Before installing, clear the area, disconnect water supply lines, and protect your flooring. I moved all items out of the way, covered the floor with drop cloths, and shut off the water. This preparation saved me from a messy cleanup during installation. For a smoother process, review installation hacks and tips.
Executing the Installation with Precision
Aligning the vanity perfectly is crucial. I used a level to ensure it was straight, then anchored it securely to the wall studs. Connecting plumbing required patience; I followed the manufacturer’s instructions closely, sealing all connections to prevent leaks. During this step, I also double-checked the fit and made minor adjustments for a flush appearance. For detailed guidance, consult expert installation tips.
Adding Final Touches and Organization
Once installed, I added organizers, baskets, and labels to maintain order. Installing a mirror with integrated lighting enhanced both function and style. These finishing touches turned my bathroom into a sleek, organized space. For more creative ideas, explore built-in storage ideas.
Many homeowners jump into renovating their bathrooms or bedrooms, thinking they understand the essentials of vanities and storage solutions. However, even seasoned DIYers often fall prey to misconceptions that can lead to costly mistakes or suboptimal results. Let’s dig deeper into what most people get wrong about vanities, installation, and built-in options, and how to sidestep these pitfalls.
Are All Built-Ins Really Worth the Extra Cost
One of the biggest myths is that built-in storage or custom vanities are just luxury add-ons, not essential upgrades. In reality, custom solutions often provide the best return on investment because they optimize space and improve functionality in ways off-the-shelf options simply can’t match. The misconception stems from underestimating how much clutter can accumulate over time and how poorly generic solutions fit specific spaces, especially in unusual layouts or tight corners.
Common Mistake: Overlooking the Nuances of Material Selection
Many assume that selecting affordable, standard materials will suffice, but this often leads to durability issues. For example, choosing MDF without waterproof laminate in a bathroom can result in warping or swelling over time. Experts recommend using moisture-resistant materials like sealed plywood or solid surface countertops for longevity. The right choice not only extends the lifespan but also maintains the aesthetic appeal, reducing the need for frequent replacements. For guidance on making the best material choices, check out expert tips on vanity materials.
Why Installation Can Make or Break Your Project
Another widespread mistake is underestimating the importance of precise measurement and professional installation. DIY installation might seem tempting, but it often results in crooked vanities, plumbing misalignments, or unstable fixtures. Even small errors can cause leaks, damage, or a visually unbalanced look. Engaging specialists ensures that your built-ins are perfectly aligned, securely anchored, and correctly connected to plumbing and electrical systems. For those considering a DIY route, reviewing installation hacks can help avoid costly mistakes.
How Can Advanced Design and Planning Enhance Your Space?
Many overlook the importance of detailed planning that considers accessibility, daily routines, and future needs. For instance, designing for ease of reach and proper lighting can transform a basic vanity into a truly functional hub. Advanced planning involves not only measuring but also visualizing how each element fits into your lifestyle. Drawing layouts or consulting with experts can prevent the common trap of creating beautiful but impractical spaces. To learn more about designing for maximum functionality, visit expert design tips.
Have you ever fallen into this trap? Let me know in the comments. The key is to approach your project with awareness of these nuances, ensuring your investment delivers both beauty and practicality for years to come.
Maintaining your custom vanities and built-in storage solutions is crucial to ensure they stay functional and beautiful for years. One of the best investments you can make is in high-quality tools and a systematic approach to upkeep. I personally rely on a few key items that help me keep my installations in top shape, and I recommend these to anyone serious about long-term durability.
Power Tools for Precision and Ease
First, a good cordless drill with adjustable torque settings is indispensable. I use a DeWalt DCD791D2 because its lightweight design and reliable battery life make assembly and minor adjustments straightforward. For finer work, a precision screwdriver set like the Wiha 26194 ensures I can tighten screws without damaging delicate surfaces, especially in integrated lighting or hardware fittings. These tools have saved me countless hours and prevented stripping screws or damaging materials.
Cleaning and Care Supplies
To keep countertops and surfaces looking pristine, I swear by a microfiber cloth and a gentle, pH-balanced cleaner. For stubborn stains, a mixture of warm water and a few drops of dish soap works wonders. Regular cleaning prevents buildup of dust, soap scum, or water stains, extending the life of your finishes. For more thorough maintenance, especially on quartz or solid surfaces, consider a polish like Weiman Quartz Cleaner. This keeps surfaces shiny and protected against scratches or stains.
Measuring and Leveling Instruments
Accurate measurements are vital for seamless installation. I always keep a high-quality laser level, like the Bosch GLM 50 C, which projects a laser line across the space, making it easy to verify levelness and alignment over larger areas. This tool has dramatically increased my confidence that everything is perfectly positioned, reducing the need for adjustments later and ensuring a professional finish.
Long-term Planning and Upkeep
Looking ahead, I predict that smart maintenance will become more integrated with technology. Devices that monitor humidity or detect leaks can alert homeowners before minor issues turn into costly repairs. In the meantime, routine checks—such as inspecting plumbing connections and re-tightening fixtures—are essential. Set reminders to clean ventilation filters and reseal surfaces every couple of years to prevent water damage and maintain their appearance.
How do I maintain built-in storage over time?
Consistency is key. Regularly wipe down surfaces with non-abrasive cleaners, check for loose screws or fittings, and ensure hardware functions smoothly. Applying a light coat of furniture wax or sealant on wooden surfaces annually can protect against moisture and scratches. If you notice any signs of warping or damage, addressing these promptly prevents larger issues down the line.
Remember, investing in quality tools and scheduling routine maintenance not only prolongs the life of your vanities and built-ins but also keeps your space looking polished and functional. For detailed installation and upkeep tips, check out this comprehensive guide. Don’t wait for problems to arise—start your maintenance routine today, and your space will thank you for it!
The Hardest Lesson I Learned About vanities, storage solutions, installation, built-ins
One of the most eye-opening lessons I discovered was that investing in tailored storage options isn’t just about aesthetics; it’s about long-term functionality. Early on, I thought quick fixes or off-the-shelf cabinets would do the trick, but I quickly realized they often lead to clutter and frustration. Embracing custom built-in storage taught me that a well-designed space requires thoughtful planning and precision—lessons I wish I’d learned sooner.
My Essential Toolkit for vanities, storage solutions, installation, built-ins
Having the right tools makes all the difference. I rely on a DeWalt DCD791D2 cordless drill for its power and portability, and a Bosch GLM 50 C laser level to ensure perfect alignment. For measuring, I trust a high-quality tape measure and a square to double-check dimensions—accuracy is everything. A microfiber cloth and a gentle cleaner help me keep surfaces spotless, extending their lifespan. These tools have saved me countless hours and headaches, and I highly recommend them for anyone tackling similar upgrades.
Don’t Just Dream—Build Your Sanctuary Today
The future of bathroom design is about seamless integration of beauty and function. With the right installation tips and innovative storage solutions, you can create a space that feels both luxurious and practical. Start small, think smart, and don’t wait for perfect—your upgraded bathroom is within reach. Remember, a thoughtfully designed vanity isn’t just a fixture; it’s an investment in your daily comfort and style.
Related Posts
Why Your Bathroom Vanity Needs a Steel Frame Support in 2026
I remember the first time I saw a bathroom vanity…

Vanities & Built-in Storage: Expert Tips for Seamless Installation in 2025
Discovering My Perfect Vanity: A Personal JourneyWhen I decided to…
Guide to Installing Vanities & Built-ins for a Modern Home Makeover
Transforming My Space: A Personal Tale of Vanity and Built-in…