I remember the day I finally gave up on my favorite floating shelf. It wobbled every time I reached for a book or a decorative piece, making me dread using it at all. That frustrating wobble was a lightbulb moment for me—realizing I’d forgotten the simplest fix. Turns out, a tiny internal bolt move can make all the difference. If you’ve ever struggled with unstable shelves or shaky built-ins, then stick around. Today, we’ll explore how a quick internal bolt adjustment can transform your wobbling woes into rock-solid stability.
Why Wobbly Shelves Can Ruin Your Decor and Confidence
Looseness Is Your Enemy
First, identify the wobble source by gently pressing the shelf to see where it moves. Remove any decorative items to access mounting points. I once tackled a hanging bookshelf that wobbled every time I reached for my favorite novel — it was messy, but the fix was straightforward.
Secure the Mounting Brackets
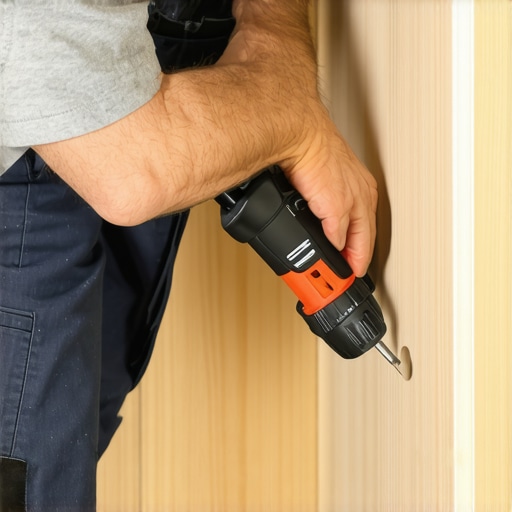
Inspect brackets or anchors holding the shelf. Tighten any loose screws with a screwdriver, applying downward pressure while tightening to prevent further wobble. Think of it like tightening a car’s wheel nuts; if loose, everything rattles. Use a drill with a screwdriver bit for faster work. For added support, install wall anchors if drywall is involved, ensuring they can handle the weight. Remember, a loose bracket is like a weak link in a chain — it compromises the entire structure.
Adjust Internal Bolts and Supports
Many shelves wobble because internal bolts or support braces are misaligned. Remove the shelf if necessary, then locate the internal bolts—often hidden behind decorative panels or at the back. Loosen them slightly, then re-tighten while pressing the shelf firmly against the wall. I once applied this method to a built-in delay closet shelf, and it instantly stabilized. Think of internal bolts as the spine of your shelf—if they’re crooked or loose, stability suffers. Carefully tighten each bolt without over-torquing, which can cause material stress.
Reinforce with Additional Support
If the wobble persists, add extra brackets or support rails underneath. Use metal L-brackets, fixing them into studs or solid wall areas. For lightweight shelves, silicone brackets can work temporarily, but metal offers long-term strength. Consider installing a hidden support rail, which can be especially effective for large or heavy shelves. This method is like adding a backbone to your shelf—distributing weight more evenly to prevent future wobbles. When installing, drill pilot holes to prevent splitting wood or drywall. Remember to position supports at multiple points along the shelf’s length for balanced stability.
Seal and Look Nice
Once stabilized, seal any visible screw holes with touch-up paint or wood filler. This not only improves aesthetics but also prevents dust accumulation. Replace decorative items, ensuring they’re not unevenly distributed, which could cause imbalance. A stable shelf is like a sturdy foundation for your decor and peace of mind. If your shelf is in a high-traffic area or subject to vibrations, consider anchoring to the floor or ceiling joists for extra security. For comprehensive info on installation techniques, check out our step-by-step install guide.
Prevent Future Wobbles
Regularly check screws and bolts for tightness, especially after major cleaning or moving furniture nearby. Using anti-slip pads or rubber bumpers under decorative items can reduce vibrations that amplify wobbling over time. Remember, a little maintenance now can save you from big headaches later. If your project involves built-in solutions, explore creative built-ins for a more permanent fix. Still unsure? Contact us for expert advice on professional support.
Many homeowners believe that installing storage solutions or built-in units is a straightforward task, but in reality, there’s more nuance than most realize. One frequent myth is that pre-made cabinets are always sufficient; however, custom solutions often better accommodate unique spaces and aesthetic goals, as detailed in our comprehensive guide on creative built-ins for seamless storage. A hidden trap is assuming that anchoring hardware alone guarantees stability—materials and wall types matter immensely, especially when dealing with heavy fixtures. For advanced DIYers, understanding the importance of internal support structures prevents wobbling and sagging, which are common mistakes that compromise both safety and design. Have you ever fallen into this trap? Let me know in the comments.,
Maintaining your storage solutions and built-in vanities requires more than just initial installation; it involves a set of precise tools and regular upkeep. Over the years, I’ve streamlined my process using professional-grade equipment that ensures longevity and stability. One of my top recommendations is a high-quality cordless impact driver, such as the DeWalt DCF887. I prefer it because of its compact design combined with powerful torque, making screw tightening and bolt adjustments quick and effortless—even in tight spaces like cabinet corners or behind fixed panels.
For aligning and leveling, I rely on a sensitive 12-inch digital level, like the Stabila 37816. Its accuracy to within 0.1 degrees helps me ensure that everything from built-in vanities to shelving units remains perfectly horizontal and vertical over time. This precise leveling prevents uneven wear and wobbling, especially in areas exposed to seasonal shifts or minor floor movements. Using a laser level occasionally, such as the Bosch GLL 55, is also invaluable for marking straight lines across multiple points—saving time and guaranteeing consistent installation quality.
Beyond physically adjusting fixtures, I employ software tools like SketchUp for planning and visualizing storage layouts before actual work begins. Carefully mapped designs reduce the chance of future adjustments and help anticipate support requirements—be it internal braces or additional anchors. Connecting design accuracy with the right hardware means long-term stability. Materials matter, too; for instance, when anchoring heavy cabinets, I always use steel lag bolts recommended for masonry and heavy drywall anchors, referencing the guidelines outlined in structural fastening standards.
Routine maintenance is key to keeping storage solutions working flawlessly. I recommend inspecting screws and bolts every six months, especially after seasonal changes which can impact wall materials. Tighten any loose fittings promptly using the impact driver. Regularly check for signs of material stress or sagging—early detection prevents costly repairs down the line. For added protection, applying a natural wood conditioner or rust-inhibiting spray on metal supports extends their lifespan and maintains aesthetic appeal.
How do I maintain built-ins over time?
To ensure your built-ins stay in top shape, consider installing adjustable supports or brackets that can be tailored as your space evolves. For instance, adjustable steel supports under floating shelves or flexible brackets for wall-mounted cabinets facilitate easy realignment without invasive work. Whenever possible, install supports into wall studs rather than drywall alone, which greatly enhances durability. Check out our creative built-in solutions that incorporate these support strategies for peace of mind and a clean look. Don’t shy away from upgrading supports as your needs change to maximize your investment’s lifespan. Autonomously handling small adjustments with the right tools can prevent larger issues and keep your storage looking and functioning great for years. Try using your impact driver with a torque setting to reinforce internal bolts after installation—it’s a simple step that pays off in stability.
What I Wish I Knew When Tacking Built-ins and Vanities
One of my biggest lightbulb moments was realizing that internal support structures are the unsung heroes of stable shelves and cabinets. Skimping on these can lead to wobbling, even when the exterior looks perfect. The importance of working into wall studs instead of drywall alone cannot be overstated—it’s the difference between a secure, lasting installation and ongoing frustrations. Additionally, I learned that combining regular maintenance checks with the right hardware choices extends your storage solutions’ lifespan far beyond initial setup. My secret weapon? Incorporating adjustable supports that evolve with your space, avoiding the all-too-common sagging problems faced in the long run.
Tools and Resources That Transformed My Approach
A few tools have become indispensable in my storage and built-in projects. First, a quality impact driver like the DeWalt DCF887 makes tightening bolts effortless, especially in tight spots. For precise leveling, nothing beats a digital level such as the Stabila 37816—accuracy in alignment is essential for stability. To plan layouts before lifting a finger, I trust SketchUp for its ability to visualize every detail, minimizing surprises during installation. When choosing fasteners, I rely on steel lag bolts and proper wall anchors, informed by structural standards detailed in resources like the Strong-Tie guides. These tools and references keep my projects safe, durable, and visually top-notch.
Your Next Step in Creating Lasting Storage Solutions
Remember, the journey of organizing and installing built-ins doesn’t end at completion—it’s about ongoing care and adjustments. Embrace regular inspections and minor tweaks to maintain stability and style. Explore innovative support strategies, like adjustable brackets or concealed support rails, to future-proof your space. Building confidence in your skills begins with small, deliberate actions—like tightening an internal bolt or adding an extra support brace—making a profound difference over time. If you’re eager to elevate your storage solutions further, check out our comprehensive guide to creative storage and turn your visions into reality. What’s been your biggest challenge when installing built-ins or vanities? Share your stories below and let’s learn together.


 Many homeowners believe that installing storage solutions or built-in units is a straightforward task, but in reality, there’s more nuance than most realize. One frequent myth is that pre-made cabinets are always sufficient; however, custom solutions often better accommodate unique spaces and aesthetic goals, as detailed in our comprehensive guide on creative built-ins for seamless storage. A hidden trap is assuming that anchoring hardware alone guarantees stability—materials and wall types matter immensely, especially when dealing with heavy fixtures. For advanced DIYers, understanding the importance of internal support structures prevents wobbling and sagging, which are common mistakes that compromise both safety and design. Have you ever fallen into this trap? Let me know in the comments.,