Ever found yourself knee-deep in clutter, wishing your storage solutions would just work? I remember the moment I realized my DIY built-ins were more of a headache than a help. It was late at night, tools scattered everywhere, and I thought, “There has to be a better way.” That lightbulb moment led me down a path of trial, error, and finally, expert tips that transformed my space—and I want to share those secrets with you.
Why Choosing the Right Storage Matters More Than Ever
Today, more than ever, our homes need smart storage solutions that blend function with style. With limited space in many homes, especially in urban environments, optimizing every inch is crucial. I’ve learned the hard way that rushing into built-in installations without proper planning can turn your dream renovation into a chaotic mess. According to a recent study, clutter can increase stress levels and decrease productivity—so effective storage isn’t just nice to have, it’s essential for mental well-being. In this post, I’ll guide you through the practical steps to avoid common pitfalls, so your installation process becomes seamless and satisfying.
Is It Really Worth the Effort to Invest in Custom Built-ins?
Early on, I made the mistake of thinking generic solutions would do the trick. Spoiler alert: they didn’t. Custom built-ins, although initially more effort, pay off in the long run by maximizing your space and adding value to your home. If you’re skeptical about whether the investment is worth it, consider this: tailored storage can increase your home’s resale value and drastically improve daily living. Want to learn how to avoid the common mistakes I made? Check out effortless storage tips for guidance.
Prepare Your Space and Tools
Start by clearing the area where you’ll install your built-ins. Remove any existing furniture or fixtures that might obstruct access. Gather all necessary tools—drill, level, measuring tape, screws, and a stud finder. I once jumped into installation without a stud finder, which led to misaligned shelves and wasted time. Using a stud finder ensures you anchor your built-ins securely into wall studs, providing stability and safety.
Measure and Mark Precisely
Accurate measurements are the backbone of a flawless installation. Measure the height, width, and depth of the space, then mark your reference points with a pencil. Think of this step as laying out the blueprint—skipping it can turn your project into a crooked mess. I once skipped this step and ended up with uneven shelves; a simple mistake that could have been avoided with careful marking.
Double-Check Measurements
Before drilling, double-check all measurements. Use a level to ensure your markings are perfectly horizontal or vertical. This minimizes errors during assembly. I recommend marking both ends of your shelves and connecting the points with a chalk line for visual clarity. It’s a small step that saves hours of frustration later.
Use the Right Fasteners and Hardware
Choosing appropriate screws and anchors is crucial. For wall-mounted built-ins, toggle bolts or wall anchors rated for your wall type provide extra support. When I installed built-ins in my living room, I used heavy-duty anchors, which prevented sagging over time. Avoid generic screws; invest in quality hardware for long-lasting results.
Securely Attach the Built-Ins
Position your panels or shelves according to your markings, then drill into the wall studs. Use a level to confirm alignment as you go. For added precision, clamp pieces together temporarily before drilling. During my first attempt, I neglected to clamp, resulting in slight misalignments that I had to fix later—worth the extra step for a professional look.
Finish with Adjustments and Finishing Touches
Once assembled, check for levelness and stability. Adjust screws if needed. Fill any gaps or holes with wood filler, then sand smooth. Applying a coat of paint or stain can elevate the aesthetic. I once left rough edges, which distracted from the overall look; finishing touches make all the difference in creating a seamless appearance.
Verify and Clean Up
Finally, load your built-ins with items to test stability. Walk around to ensure everything feels secure. Dispose of debris, and tidy up the workspace. A well-executed installation not only looks great but also functions reliably for years to come.
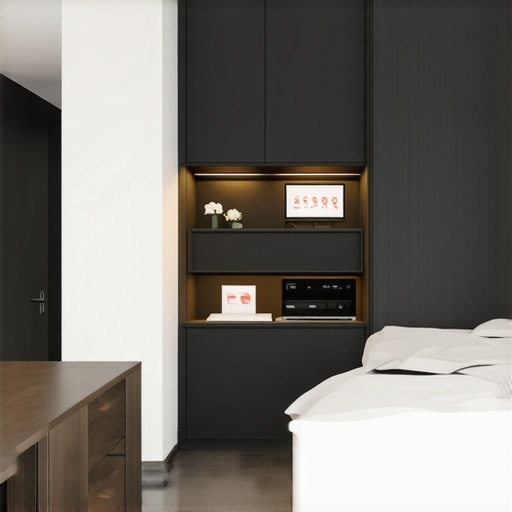
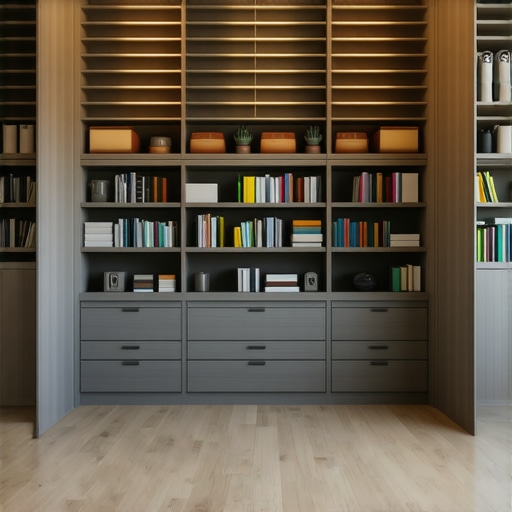
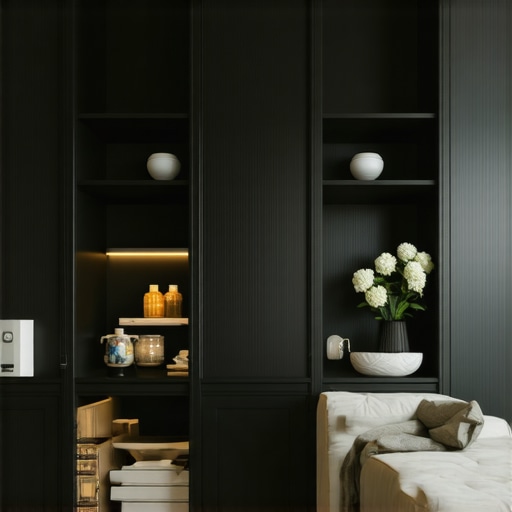
Many homeowners jump into installing built-in storage without fully understanding the nuances, leading to costly mistakes and less-than-ideal results. One of the most persistent myths is that more storage always equals better organization. In reality, poorly planned storage can create clutter and accessibility issues, especially if you overlook the importance of custom-fit solutions. For example, choosing generic shelving without considering your specific space dimensions often results in wasted gaps or awkwardly placed items, which defeats the purpose of built-ins in the first place. To truly optimize your storage, focus on tailored designs that maximize every inch—this approach is emphasized in the ultimate guide to seamless installation.
Once you’ve installed your custom built-ins, keeping them in pristine condition requires the right tools and a consistent maintenance routine. I personally rely on a few specialized items that have made a significant difference in preserving the quality and appearance of my built-in storage solutions. One must-have is a high-quality microfiber cloth, which is perfect for dusting without scratching surfaces. I avoid harsh chemicals, opting instead for a gentle wood cleaner or a mixture of mild soap and water, to maintain the finish and prevent deterioration.
For addressing minor scratches or wear, I keep a small jar of wood touch-up markers on hand. These are invaluable for quick fixes that keep your cabinetry looking brand new. When it comes to hardware, I recommend periodically tightening screws and checking hinges with a precision screwdriver—loose hardware can compromise stability over time. Investing in a good magnetic screwdriver set ensures you can easily handle these small but crucial adjustments.
Power tools also play a role in maintenance, especially for larger repairs or modifications. A cordless drill with adjustable torque settings is essential; it allows for safe tightening of screws and even minor adjustments to shelving or panels without risking damage. I prefer models with a LED light, which illuminates tight spots, making upkeep easier. Regularly inspecting the wall anchors and replacing any that show signs of wear helps prevent sagging or collapse, ensuring your storage remains reliable for years.
How do I keep my built-in storage working smoothly over time?
Developing a maintenance routine is key. I suggest setting a monthly reminder to dust, check for loose hardware, and clean the surfaces. Applying a fresh coat of furniture polish or wax every six months can rejuvenate the finish and provide a protective barrier against moisture and dust. For deeper cleaning, a soft cloth dampened with water or a recommended cleaner specifically designed for cabinetry will do the trick without stripping the finish.
Looking ahead, I believe the trend in built-in storage will lean further toward smart solutions that incorporate automated features. Think adjustable shelving that adapts to your needs or integrated lighting systems that activate with motion sensors. Staying updated with these innovations can help you maintain and enhance your storage over the long term. For detailed advice on maintenance techniques, I recommend checking out effortless storage tips.
Now, I challenge you to try out a professional-grade touch-up kit on your next maintenance day. It’s a simple step that can dramatically extend the life of your cabinetry and keep everything looking sleek and new. Remember, regular care is the secret to making your investment last for many years to come!
The Hardest Lesson I Learned About Built-In Storage
One of the most valuable lessons I discovered was the importance of precise measurements. Rushing through this step led to crooked shelves and wasted effort. Now, I always double-check my measurements and use a level to ensure everything aligns perfectly—this simple change saved me hours of frustration and ensured a professional look.
My Biggest Mistake with DIY Built-Ins
I once underestimated how crucial wall anchors and proper hardware are. Using cheap screws and ignoring the wall’s structure resulted in sagging shelves over time. Investing in quality hardware and understanding your wall type beforehand can make all the difference in durability and safety.
Why Custom Fit Trumps Off-the-Shelf Solutions
Initially, I thought standard shelves would suffice, but they left awkward gaps and limited accessibility. Tailoring built-ins to my space maximized storage and improved aesthetics. This taught me that personalized designs, though more effort upfront, provide long-term benefits—both in function and value.
How I Maintain My Built-Ins for Longevity
Regular cleaning with microfiber cloths and gentle wood cleaners keeps my storage sleek. I also periodically tighten screws and check hinges, preventing issues before they escalate. Developing a maintenance routine ensures my investment stays beautiful and functional for years to come.
One Reply to “Storage Solutions & Built-ins: Expert Tips for Seamless Installation”
Leave a Reply
Related Posts
Smart Built-in Storage Solutions to Maximize Your Space in 2025
Discovering the Power of Built-in Storage in My HomeWhen I…
Top Storage Solutions & Built-ins for Efficient Space Use in 2025
My Journey to Finding the Ideal Storage SolutionsWhen I first…
Smart Storage Solutions & Built-ins: Expert Installation Tips 2025
My Journey into Smarter Storage: From Chaos to CalmI'll never…
I really appreciate the detailed step-by-step guidance in this post. One thing I’ve learned from my own experience is the importance of patience during installation — rushing often leads to misalignment or gaps that are hard to fix afterward. Using a chalk line when marking your measurements made a huge difference in my own project, ensuring everything stayed straight and even. I’ve also found that investing in quality hardware pays off in the long run; cheap screws tend to strip or cause sagging shelves over time. Have any of you found specific brands or types of hardware that work best in your projects? I’m always on the lookout for tried-and-true products, especially for wall anchors that can support heavier loads without fail.