

I remember the sound vividly: a slow, agonizing groan of metal followed by a sharp crack that sounded like a gunshot in my quiet garage. I had just finished loading up my new heavy-duty shelving with my collection of spare engine parts and floor jacks. I thought I was being clever, using those oversized plastic ribbed anchors because they were easy to tap in. Within an hour, the top rack was leaning four inches off the wall, and the concrete around the base was crumbling. I realized then that I had fallen for a dangerous DIY myth. If you are trusting your heavy gear to anything less than a mechanical steel connection, you are essentially playing a game of high-stakes Jenga with your property. Today, I am going to show you how to execute the concrete wedge anchor move so your storage remains rock-solid for decades.
Stopping the Lean Before Your Racks Collapse
It is a hard truth to swallow, but most homeowners drastically underestimate the sheer leverage a tall, heavy rack exerts on its base. When I first started out, I made the mistake of thinking gravity did all the work. I figured the weight would hold the rack down. I was wrong. A top-heavy shelf acts like a giant lever, and without the right mechanical bite into the slab, those forces will eventually rip standard fasteners right out of the floor. This is exactly why plastic wall anchors fail for heavy shelving every single time the load gets serious. Wedge anchors, on the other hand, utilize a flared base that expands against the walls of the hole as you tighten the nut, creating a permanent, high-friction bond with the concrete itself. Have you ever noticed your shelving unit looks just a little bit more tilted than it did yesterday? If so, you are already in the danger zone.
Is Drilling Into Your Floor Really Necessary?
Many people get nervous at the thought of taking a hammer drill to their pristine garage slab. They worry about cracking the concrete or hitting a tension cable. While you should always check your local building codes and slab type, the reality is that a properly drilled hole for a wedge anchor is significantly safer than a collapsing rack. According to structural testing data from Hilti, a standard 1/2-inch wedge anchor can provide an ultimate tension load of over 6,000 lbs in 4,000 PSI concrete, which is a level of security you simply cannot get from adhesives or light-duty screws. Beyond just the anchors, you also have to consider the grade of the floor. I have spent many afternoons figuring out how to level garage cabinets on sloped concrete floors because if the base isn’t level before you anchor it, you are just bolting a problem into place. You might also want to look into the lag bolt pattern for heavy tool chest anchoring if you are dealing with wall-adjacent units. By the end of this guide, you will have the confidence to drill, set, and torque your anchors like a pro.
Setting the Stage for a Lifetime Hold
To get a rack that refuses to budge, you have to treat your garage floor like the foundation of a skyscraper. You are not just putting a screw into a hole; you are engaging a mechanical expansion system. Before you even touch a tool, you must map out your anchor points with surgical precision. I always recommend assembling the base of the rack first and positioning it exactly where it will live. If you are dealing with an uneven slab, this is the moment you employ the leveling leg strategy for sloped garage floors. Marking the holes through the actual footplates of the shelving unit ensures that your drill bit goes exactly where the steel demands, preventing that frustrating ‘drift’ where the bolts don’t line up with the holes later.
Mark Your Territory with Precision
Once the rack is positioned and leveled, use a permanent marker or a center punch to hit the middle of every mounting hole. Don’t eyeball this. I remember a job where I rushed the marking phase on a set of industrial lockers. I ended up with three bolts that fit and one that was off by just an eighth of an inch. That tiny gap meant the locker rattled every time someone closed a door, eventually requiring me to drill a completely new hole and patch the old one. It was a messy, avoidable headache. To ensure the rack stays put, especially if it is tall, you might also look at how we fixed wobbly bedroom wardrobes with floor anchors for similar stability principles in a home setting.
Don’t Fear the Hammer Drill
You need a SDS-plus hammer drill for this; a standard cordless drill will just burn out your motor and dull your bits. Choose a carbide-tipped bit that matches the diameter of your wedge anchor exactly. If you are using a 1/2-inch anchor, use a 1/2-inch bit. The hole depth is equally critical. You want to drill at least 1/2 inch deeper than the anchor will sit to allow for any leftover dust. 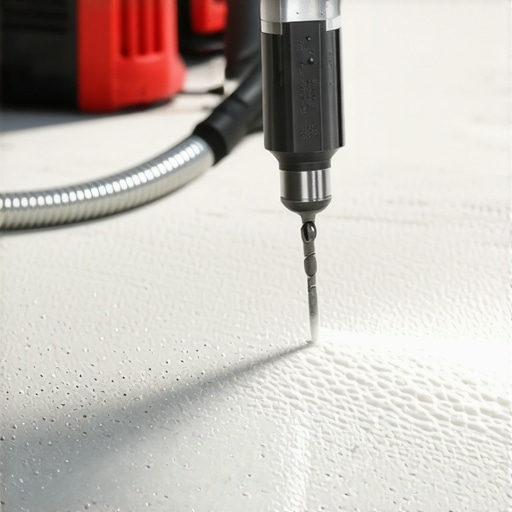 While drilling, keep the drill perfectly vertical. If you tilt the drill, the hole becomes oblong, and the wedge anchor won’t be able to grip the sides uniformly. This is a similar level of care required when you stop garage tool walls from sagging with horizontal steel bracing by ensuring every pilot hole is true.
Clear the Dust Before the Anchor Dives In
This is the step most people skip, and it is the reason anchors fail. After drilling, you must blow out the dust. If you leave concrete powder in the hole, the expansion clip will slide on the dust rather than biting into the solid concrete. I use a dedicated blow-out bulb or a shop vac with a narrow crevice tool. In my early days, I once skipped this on a heavy bench install. When I went to torque the nut, the entire anchor just spun in the hole like a loose tooth. I had to extract it, which is a nightmare, and start over. This attention to detail is just as vital as the floor bolt hack for stable island cabinetry where clean contact is king.
Drive and Torque for Maximum Friction
Slide the washer and nut onto the anchor first, ensuring the nut is flush with the top of the threads to protect them from hammer damage. Tap the anchor through the shelving foot and into the hole until the washer is snug against the steel. Now, use a torque wrench. As you tighten the nut, the threaded bolt pulls upward, forcing the flared wedge at the bottom into the expansion clip. This clip jams against the concrete walls with thousands of pounds of force. This is the same mechanical principle used in the internal support move for heavy stone vanities to handle immense weight without failure. Stop once you feel the resistance hit the manufacturer’s specified foot-pounds. Over-tightening can actually snap the bolt or crack the surrounding concrete.While the mechanical bite of a wedge anchor is impressive, there is a nuance most DIYers—and even some professionals—completely ignore: the density and age of the concrete. Everyone tells you that bigger anchors are better, but in my experience, over-sizing an anchor in old, brittle concrete is a recipe for a blowout. If you use a 3/4-inch anchor where a 1/2-inch would suffice, you are actually increasing the internal stress on the slab, which can lead to radial cracking. This is particularly dangerous when you are trying to execute the internal support move for heavy stone vanities where precision is more important than raw size.
Why Does My Floating Vanity Still Bounce Despite Hitting Every Stud?
It is a question I get all the time. You have found the studs, used the right screws, but the unit still feels springy. The hidden culprit isn’t the fastener; it is the lack of lateral blocking. For heavy installations, hitting the vertical stud only solves half the equation. Without the steel plate move for drywall-mounted floating vanities, the weight of the unit actually compresses the drywall itself. Over time, that half-inch of gypsum crumbles under the pressure, creating a gap that leads to a permanent lean. The National Kitchen & Bath Association (NKBA) emphasizes that for cantilevered loads, structural blocking—usually 2×6 or 2×8 lumber installed horizontally between studs—is non-negotiable for a professional-grade finish. This is the same principle I use when I apply the structural fix for wobbly entryway lockers; you have to bridge the gap between the studs to distribute the tension.
Stop the Drywall Crush Before it Starts
Another ‘oops’ factor is ignoring the creep of the material. Just like the internal steel support for long floating desks is designed to fight gravity over years, your vanity needs a hidden support rail for floating master vanities to ensure the load is transferred to the floor framing, not just the wall skin. If you are bolting directly through drywall without a solid backer, you aren’t just mounting a cabinet; you are slowly crushing a soft rock between two pieces of wood. Have you ever fallen into this trap where you thought a stud was enough, only to find the drywall failing months later? Let me know in the comments.Even the most perfect installation is subject to the laws of physics and material fatigue. I have seen 500-pound garage racks stay perfectly level for three years, only to start leaning in the fourth because the homeowner didn’t account for the concrete’s natural expansion and contraction cycles. If you want a setup that lasts a lifetime, you have to move beyond the initial install and into a mindset of structural maintenance.
Check Your Torque or Watch Your Hard Work Fail
It sounds tedious, but I make it a habit to re-torque my wedge anchors every twelve months. According to technical bulletins from the American Institute of Steel Construction (AISC), mechanical fasteners in concrete can experience ‘tension relaxation’ over time, especially if you are frequently loading and unloading heavy gear. A simple quarter-turn with a wrench can be the difference between a rock-solid unit and a catastrophic collapse. This is particularly vital when you are dealing with the hidden support system for heavy marble vanity tops, where the sheer mass of the stone puts constant, unrelenting stress on your mounting points. 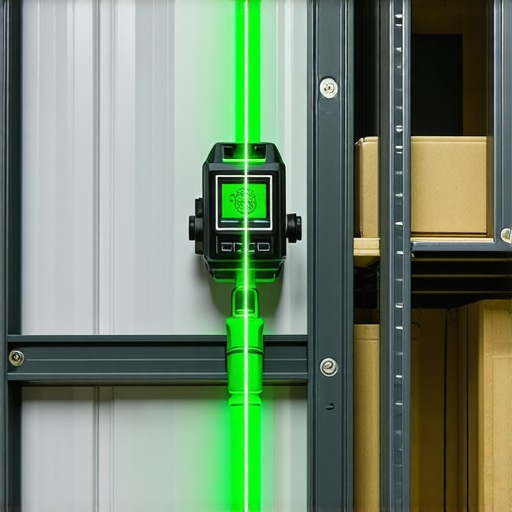
The Laser Level Is Your Best Friend
If you are still using a bubble level for long-run built-ins, you are living in the past. I personally swear by a 360-degree green beam laser level. It allows you to see the ‘sag’ in real-time across an entire wall. I used this tool when perfecting my vanity installation hacks that save time and money, because it highlights exactly where the floor dips before you even set the cabinet. When you are trying to transform your bedroom with custom vanities top storage ideas for 2025, a laser ensures that your lines stay crisp even if your house is settling. Looking forward, I predict we will soon see Augmented Reality (AR) apps that overlay structural load paths directly onto our phone screens, showing us exactly where the stress points are in our shelving before they fail.
How do I keep my heavy-duty storage from settling over time?
The most effective way to prevent settling is to combine mechanical anchoring with periodic inspections of the surrounding material. For example, if you see fine white powder around your wedge anchors (efflorescence), it means moisture is getting into the concrete and potentially weakening the bond. In humid environments, you also need to stop cabinet doors from warping in humid bathrooms by maintaining consistent airflow, as warped wood can shift the center of gravity of your entire storage unit. If you followed my step-by-step guide to vanity installation for beginners, you already have a solid foundation, but checking your hardware annually is what separates the DIYers from the masters. My big challenge for you: go into your garage or bathroom this weekend and put a wrench on your heaviest anchor. If it moves easily, you just saved yourself a massive headache.
Three Mechanical Truths I Learned the Hard Way
Over the years, I have realized that the ‘feel’ of a wrench is a skill developed through failure. First, never trust a ‘clean looking’ hole without actually blowing it out; that dust acts like ball bearings, letting your anchor slip. Second, older concrete (20+ years) is often more brittle than you expect. If you feel the resistance soften as you drill, back off and reconsider your anchor size to avoid a blowout. Finally, the best installations happen when you stop treating the rack like furniture and start treating it like a structural extension of the home. These insights are what help you maximize your space with custom vanities expert design tips and industrial shelving alike.
Gear That Won’t Let Your Anchors Fail
If you are serious about this, put down the standard drill. I personally rely on a heavy-duty SDS-Plus rotary hammer; the percussion action is the only way to get a clean, straight hole without fatiguing the material. I also keep a digital torque wrench in my kit. It takes the guesswork out of the final set, ensuring you hit that perfect PSI every time. For those looking for innovative storage solutions to transform your bathroom, having the right specialized bits for tile is just as crucial. Finally, never underestimate a simple blowout bulb—it is the cheapest tool in my bag but the one that ensures the anchor actually bites.
Own Your Slab and Secure Your Space
You now have the technical blueprint to stop the lean and secure your heavy-duty storage for the long haul. Whether you are troubleshooting why your garage tool wall is pulling away from the studs or anchoring a massive floor rack, the principles remain the same: precision, cleanliness, and mechanical force. Don’t let the fear of drilling into concrete hold you back from a safer, more organized home. Your equipment—and your peace of mind—is worth the extra effort it takes to execute a professional concrete wedge anchor move properly. Have you ever had an anchor spin in the hole or pull out unexpectedly? Let me know in the comments below.