

I still remember the sickening sound of cracking drywall when my father tried to steady himself in the guest bathroom. I had installed that grab bar myself, feeling pretty proud of my handiwork and those expensive-looking toggle bolts I’d picked up at the hardware store. But as he put his weight on it, the wall simply gave up. I realized right then that I hadn’t built a safety feature; I’d built a trap. It was a humbling, scary moment that forced me to rethink everything I knew about bathroom safety and structural support. If you have ever felt that tiny, heart-stopping wiggle when you grab a rail, you know exactly what I am talking about. Have you ever wondered if your ‘safety’ bars are actually safe, or are they just waiting for the right moment to fail?
Drywall Anchors Are Not Your Friend in the Bathroom
The biggest mistake I made—and I see neighbors make it all the time—is trusting plastic or metal anchors to do a job they weren’t meant for. We often treat grab bars like we treat heavy shelving where plastic wall anchors fail, but a human body in motion creates dynamic force that is much more aggressive than a static shelf. When someone slips, they don’t just lean; they lunge. According to the Centers for Disease Control and Prevention (CDC), over 230,000 nonfatal bathroom injuries occur annually in the U.S., many of which could be mitigated by properly installed support. Relying on the thin layer of gypsum in your drywall to catch a falling adult is a recipe for disaster.
Is finding a stud really not enough for safety?
You might think that just hitting a vertical stud is the end of the story. In a perfect world, sure. But in reality, studs are rarely exactly where you need the bar to be for proper ergonomics. If you force the bar to fit the studs rather than the person using it, you end up with a bar that is too high, too low, or at an awkward angle. This is where most people get stuck between a rock and a hard place—choosing between structural integrity and actual usability.
The Magic of Hidden Structural Blocking
To get the job done right, we have to look behind the scenes, much like we do when preparing for a flawless vanity installation. The ‘Hidden Blocking Strategy’ involves opening up a small section of the wall to install horizontal 2×6 or 2×8 lumber between the studs. This creates a solid wood ‘landing zone’ across the entire area where the grab bar will live. If you are working with a tiled surface, I highly recommend looking into the plywood backer strategy for tiled bathroom walls to ensure the tile itself doesn’t crack under the pressure. It sounds like more work because, well, it is. But the peace of mind knowing that bar is physically tied into the house’s skeleton is worth every extra minute. Even if you are a novice, following a step-by-step guide for beginners can help you understand how to navigate these structural shifts without feeling overwhelmed. We are going to dive into how to execute this without making your bathroom look like a construction zone for a month.The first move isn’t reaching for the drill; it is reaching for a level and a roll of painter’s tape. You need to simulate the user’s movements to ensure the placement is ergonomic. Have the person who will be using the bar sit on the toilet or stand in the shower and reach out naturally. Mark that sweet spot with tape. If you miss the ergonomics, the bar becomes a decorative piece of chrome rather than a life-saver. This is similar to how we plan creative built-ins for seamless storage and home aesthetics—if it isn’t functional for the daily routine, it isn’t worth the wall space. Once you have your location, you have to accept a hard truth: you are probably going to need to cut a hole. I usually cut a rectangle between two studs that spans the width of where the bar will go. Think of this like an expert guide to flawless vanity installation tricks tips where we reinforce the wall to hold a heavy cabinet. Use an oscillating multi-tool for a clean cut; it is like a surgical scalpel for drywall.
How to Add Solid Wood Where There is Only Air
Now comes the core technique. You take a 2×6 or 2×8 piece of kiln-dried lumber and bridge it horizontally between the two vertical studs. Secure it with 3-inch deck screws driven at an angle, also known as toenailing, or through the studs if you have side access. This creates a bridge that can support hundreds of pounds of downward force. I remember a project last summer where the homeowner was terrified I was destroying his new bathroom. I had to cut a 14-inch hole in his pristine drywall to install the blocking. But once I showed him how the bar didn’t even flinch when I hung my entire 200-pound frame on it, he realized that a patch is temporary, but a fall is permanent. 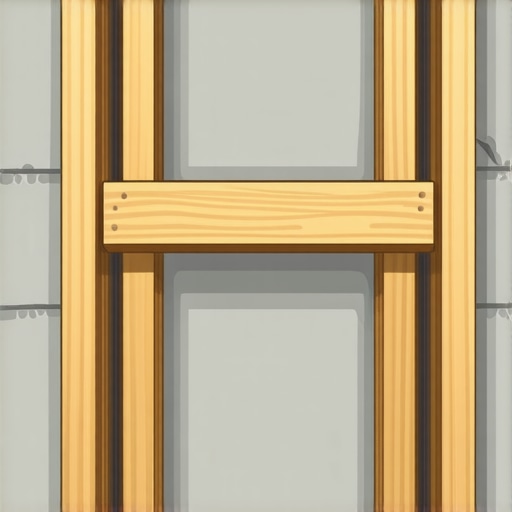
Support for Different Wall Surfaces
If you are dealing with tile, the stakes are higher. You do not just want wood blocking; you want a sandwich. I often use the plywood backer strategy for tiled bathroom walls to distribute the pressure across the back of the tile. This prevents the grout from cracking or the tiles from popping under the torque of the bar. It is the same logic we use for the internal support move for heavy stone vanities—heavy materials need more than just a single point of contact.
Mount the Bar with Precision
Once your blocking is in and the drywall is patched or the tile is set, you can finally mount the bar. Because you have a massive block of wood behind the wall now, you aren’t hunting for a narrow 1.5-inch stud. You have a huge target. Use stainless steel screws that are long enough to penetrate the drywall and sink at least 1.5 inches into that new 2×6 blocking. If you have ever seen why plastic wall anchors fail for heavy shelving, you know that the grip is only as good as the material it bites into. With solid wood, the screw threads are locked into the fibers of the house itself, providing a bond that drywall can never replicate.Most DIYers think that if the screw is tight, the job is done. But here is a contrarian take: the screw is the least likely part to fail. The real danger is the leverage force on the mounting flange. Think of it like the internal support move for heavy stone vanities; if the weight isn’t distributed, the stone (or in this case, the tile) will eventually snap under the torque. When you pull on a 24-inch bar, you aren’t just putting weight down; you are prying the top of the flange away from the wall. This ‘lever effect’ can multiply your body weight by three or four times. According to the International Code Council (ICC) A117.1 standards, these fixtures must withstand 250 pounds of concentrated force, but a dynamic slip can easily exceed that if the installation geometry is off.
The Leverage Trap You Probably Ignored
People often obsess over screw length but ignore the flange diameter. A small flange concentrates all that prying force into a tiny area. If you’ve ever seen expert guide to flawless vanity installation tricks tips, you know that wider bases distribute load better. If your grab bar has a small mounting plate, you’re essentially creating a high-pressure point that will eventually crush the drywall or crack the grout. The hidden nuance often missed is the ‘shear’ versus ‘tension’ force. While most people worry about the bar pulling out of the wall (tension), the most common failure is the bar sliding down (shear) and crushing the material beneath it. This is why I often suggest the plywood backer strategy for tiled bathroom walls—the plywood acts as a rigid plate that stops that downward movement dead in its tracks.
Don’t Let Your Safety Fix Rot the Wall
Here is the ‘Oops’ factor that kills many bathrooms: moisture. When you cut into that drywall to install your blocking, you are breaking the vapor barrier. If you don’t seal the edges of the grab bar flange with 100% silicone, steam and splashes will migrate into your new wood blocking. Within two years, that solid 2×6 will be a sponge. It is the same reason we emphasize the moisture barrier trick for vanities against cold walls. A safe bar in a rotten wall is no longer safe.
Does the thickness of my blocking actually matter for long-term safety?
I get asked this all the time: ‘Can I just use a 1×4?’ No. A 1×4 is too thin to provide enough ‘bite’ for a 2.5-inch stainless steel screw. You want a minimum of 1.5 inches of solid wood penetration. If the screw tip hits air on the other side of the blocking, it loses nearly 30% of its pull-out resistance. We use similar logic when implementing vanity installation hacks that save time and money—structural integrity is never the place to cut corners. 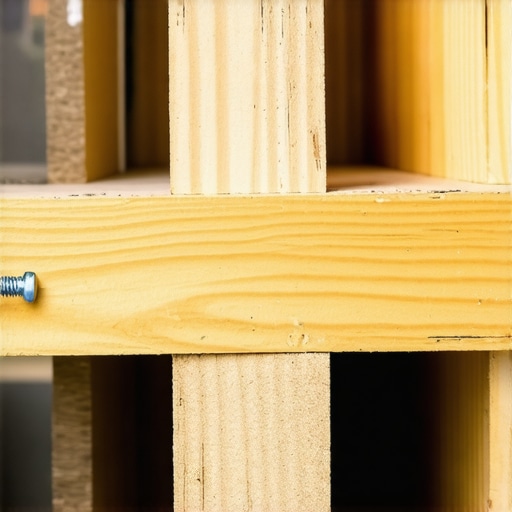 Before you close that wall, double-check that your screws aren’t just long, but the right kind of long. Have you ever fallen into this trap where you thought you were done, only to find a wiggle a month later? Let me know in the comments. If you’re still feeling unsure about the structural side of things, checking out the latest tips on maximizing your space with custom vanities expert design tips can help you integrate these safety features into a cohesive, rock-solid layout.
Invest in These Tools Before Opening Your Walls
To move from a ‘handyman’ install to a professional-grade structural fix, you need the right gear. I never start a project like this without my Bosch professional-grade stud finder and a high-torque impact driver. While a standard drill is great for making holes, an impact driver uses a rapid-fire internal hammering action that sinks those long stainless steel screws into the blocking without stripping the heads. If you strip a screw halfway into your 2×6 blocking, you are stuck with a structural nightmare. I also swear by using a 1/8-inch cobalt drill bit for pilot holes. This ensures the wood doesn’t split when the heavy-duty screw enters, maintaining the maximum grip strength. This level of precision is exactly what I recommend when utilizing vanity installation hacks that save time and money because it prevents the need for expensive repairs later on.
How do I keep my grab bars from loosening over the years?
Maintenance is actually simpler than the installation, but most people ignore it until they feel a wiggle. Once a year, give the bar a firm ‘tug test.’ If you notice any movement, it’s usually not the screws loosening from the wood; it’s the drywall or tile beneath the flange compressing. You should also inspect the silicone seal around the flange. As soon as that seal fails, moisture creeps in. I recommend reapplying a fresh bead of 100% kitchen and bath silicone every two to three years to protect the internal wood blocking from rot. This is a similar philosophy to the moisture barrier trick for vanities against cold walls, where preventing internal dampness is the key to longevity. 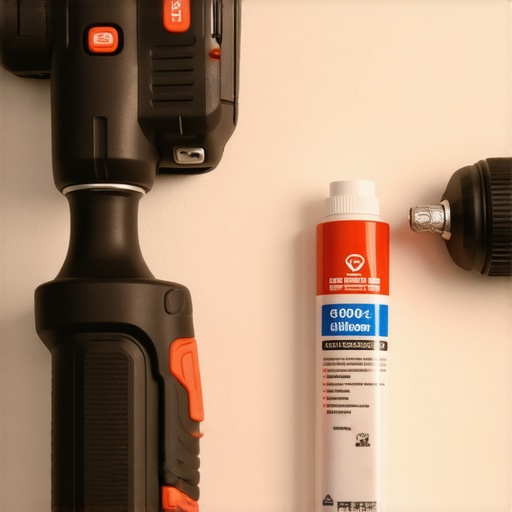
The Rise of Invisible Support Systems
Looking ahead, I see a massive shift toward ‘integrated safety.’ We are moving away from the institutional look of chrome bars and toward innovative storage solutions to transform your bathroom that double as structural supports. Think of a towel bar or a soap dish that is actually rated for 250 pounds of force. According to the 2010 ADA Standards for Accessible Design, Section 609.8, the structural strength of any grab bar or support must allow for a 250-pound load to be applied at any point. In the coming years, more homeowners will likely install full-wall plywood sheets behind their entire shower area during a remodel, essentially making the entire wall a safe mounting zone. This is the ultimate version of the expert guide to flawless vanity installation tricks tips where the wall itself is engineered for heavy loads. For your next project, I challenge you to try the ‘double-blocking’ method: install your horizontal 2×6, then cap it with a layer of 3/4-inch structural plywood. This creates a mounting surface that is virtually indestructible.
Lessons I Had to Learn After the Drywall Cracked
Over the years, I’ve realized that a safety bar is only as good as the silence it produces. If there is even a faint squeak when you pull on it, something is moving behind the scenes, and that movement is the enemy. One lightbulb moment for me was realizing that I should always take a photo of my blocking with a tape measure in the frame before I patch the drywall. It saves so much guesswork three years down the line if you ever need to swap the bar for a different model. I also stopped trying to save the existing paint job; it is always better to cut a clean, large hole and do a proper patch than to struggle through a tiny opening and compromise the structural integrity. This approach mirrors the precision needed for an expert guide to flawless vanity installation tricks tips where the foundation determines the finish.
The Gear That Makes Your Safety Bars Unshakeable
If you want to move beyond basic DIY, you need a toolkit that prioritizes torque and moisture protection. First, never use the cheap screws that come in the box; buy high-grade stainless steel structural screws that won’t snap under the lever effect. I also rely heavily on 100% kitchen and bath silicone because a safe bar in a rotten wall is a disaster waiting to happen, a principle similar to the moisture barrier trick for vanities against cold walls. For those looking to integrate these safety features into a broader remodel, I recommend studying the 2010 ADA Standards for Accessible Design—it is the gold standard for ergonomics. You can combine these safety rules with vanity installation hacks that save time and money to create a space that is both beautiful and bulletproof.
Build a Bathroom That Actually Protects Your Family
At the end of the day, structural support isn’t about following a manual; it’s about the peace of mind that comes when a loved one reaches out and finds something solid. Whether you are adding a single bar or planning innovative storage solutions to transform your bathroom, the goal is the same: longevity and reliability. Don’t be afraid to open that wall. A little bit of drywall dust today is a small price to pay for a lifetime of security. Proper grab bar installation is the ultimate gift of independence for yourself or your parents. Have you ever felt a grab bar wiggle and wondered if it was actually going to hold? Let me know your close-call stories in the comments below.