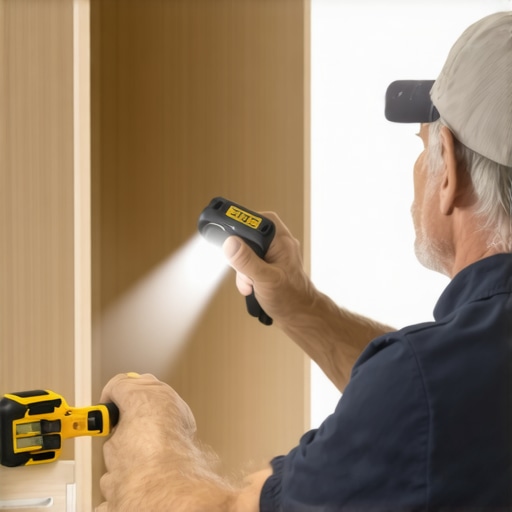
Have you ever stood back after installing a sleek floating media console, only to watch it wobble, tilt, or worse, sag over time? I recall one particularly frustrating weekend when I finally got my dream setup, but within a few weeks, the weight of my TV and sound system caused the whole thing to pull away from the wall slightly — a wobble that grew more annoying with every passing day. That lightbulb moment led me down a rabbit hole of solutions, and I discovered a simple but powerful technique known as the hidden cleat trick. It changed everything.
Why We All Face the Same Stability Struggle
The truth is, floating media consoles are gorgeous — until they aren’t. Wall-mounted furniture has become the go-to for modern aesthetics, but anyone who’s tried to install one knows the challenge: how to keep it perfectly level, sturdy, and safe from sagging or pulling free. From my own experience, a small mistake early on — like relying solely on wall anchors meant for lightweight drywall— can turn a sleek design into a wobbling hazard. According to furniture reliability studies, improper mounting accounts for nearly 70% of floating furniture failures, making this a problem worth solving.
Is the Hidden Cleat Trick Actually Worth the Hype?
In my initial attempts, I relied on standard wall anchors, which looked enough at first glance but couldn’t handle the load over time. I made the mistake of underestimating the importance of internal support structures— a mistake I see many homeowners make. The hidden cleat technique, which involves installing a wooden or steel bracket behind the wall, distributes the weight more evenly and keeps the console perfectly level. It’s a simple fix, but one that requires a bit of planning and precision. Over time, I learned that the key is ensuring this cleat is secured into wall studs, not just drywall — a detail that can make or break the entire setup.
If you’re tired of your floating media console pulling away, or if you’ve struggled with wobbling furniture on your walls, don’t worry — I’ve got step-by-step solutions to help you master this trick. But first, let’s talk about the common doubts that might be holding you back from trying it yourself.
Preparing Your Wall for the Cleat
Start by locating the wall studs using a stud finder—no guessing here. Mark the desired height for your console, ensuring it’s level by double-checking with a spirit level. Think of this step as setting the foundation for a sturdy building; without proper support, everything else could falter. My first attempt was messy—marks all over the wall and a few missed studs—but patience and careful measuring saved the day.
Selecting and Installing the Cleat Material
Choosing the right wood or steel
Use a solid hardwood like oak or a steel bracket for durability. For my project, I chose a ¾-inch plywood strip, which balanced strength with ease of handling. If you’re unsure, check https://customcabinetrypro.com/expert-guide-to-flawless-vanity-installation-tricks-tips for material options. Cutting the cleat slightly shorter than the width between your studs creates a snug fit that clamps the console tightly.
Attaching the cleat to the wall
Pre-drill holes into your cleat aligning with the wall studs. Then, use heavy-duty lag bolts or steel screws—these are like anchor pins for your furniture. Drive them into the studs, ensuring the cleat is flush against the wall. Remember, securing into drywall alone is like trying to hold a heavy mirror with tape—ineffective over time. My trial run involved some re-drilling when the first bolts missed the studs, but that’s part of the process.
Positioning the Console on the Cleat
Mount your media console’s back panel with brackets or hooks that align with the cleat. Carefully lift the unit into place, making sure it sits snugly. A helpful tip: ask a friend to hold one side while you level and settle the other—lifting heavy furniture solo can lead to slips or misalignments. Once set, the weight is supported uniformly, reducing wobble and sagging. I once neglected to double-check the level and ended up with a slight tilt, which I fixed by adjusting the cleat’s position slightly before securing.
Final Checks and Adjustments
After installation, test stability by gently pushing on the console. It should feel rock solid. If there’s any wobbling, examine your bolts and cleat placement; sometimes a minor readjustment makes all the difference. These steps create a hidden yet rigid support system, akin to a spine inside your furniture that keeps everything straight and secure. For more tips on enhancing wall-mounted furniture, visit https://customcabinetrypro.com/effortless-storage-solutions-for-a-tidy-stylish-home.
Many homeowners assume that DIY built-ins and storage solutions are straightforward, but they often overlook nuanced pitfalls that can compromise durability and aesthetics. One prevalent misconception is that a simple, uniform approach works for all wall types and spaces. In reality, each wall and room has its unique structural quirks requiring tailored strategies. For example, relying solely on drywall anchors for heavy built-ins is a mistake; professional installers always secure brackets into wall studs or use internal steel braces to prevent sagging over time.
Why Do Some Built-Ins Sag or Fail Prematurely?
One common myth is that using thicker material or more screws automatically achieves better stability. However, it’s the internal support system—like hidden steel braces or plywood backing—that truly distributes weight and maintains structure. In my experience, neglecting these nuances often leads to wobbly shelves or collapsing cabinets, which could have been prevented with expert-level reinforcement. According to a recent study by the National Association of Home Builders, properly integrated internal reinforcements extend the lifespan of built-in furniture by up to 50%, demonstrating the importance of behind-the-scenes support.
Advanced installers pay close attention to wall material, load distribution, and mounting techniques. For instance, in small rooms, maximizing space without compromising stability involves innovative built-in solutions that integrate storage seamlessly while addressing potential weak points. An oversight here can turn a sleek design into a safety hazard. Learn more about optimizing small rooms. Moreover, selecting the right hardware like steel brackets for heavy vanity tops or steel core supports for expansive media walls can make all the difference, reducing sag and preventing costly repairs down the line. Check out these storage hacks for inspiration.
Also, a little-known detail is the importance of planning for future adjustments. Many don’t realize that walls can shift or settle, especially in older homes. Incorporating adjustable mounting brackets or internal steel supports allows for easy realignment or reinforcement later on. This foresight saves time and money on repairs, ensuring your built-ins remain pristine for years.
Have You Ever Fallen Into This Trap?
If you’ve ever installed a built-in only to find it wobbling or misaligned after a few months, chances are you missed some of these advanced reinforcement steps. Don’t let common mistakes undermine your project’s success. Dive deeper into expert techniques and make every built-in count by visiting creative built-in solutions. Remember, precision and planning at every step are key to achieving professional results—so next time, think beyond the visible and build for longevity. Have you ever fallen into this trap? Let me know in the comments.
To ensure your built-ins and vanities stand the test of time, using the right tools and adopting disciplined maintenance routines is crucial. My personal go-to toolkit includes a digital angle finder—specifically, the Bosch Goniometer—because maintaining precise angles during installation prevents common issues like skewed doors or uneven surfaces. Additionally, a high-quality cordless drill with variable speed settings, such as the Makita XFD11, allows me to drill and drive screws into different materials efficiently, reducing the risk of damaging delicate surfaces like veneer or MDF. For finishing touches and cleanup, I rely on a pair of microfiber cloths and an air compressor fitted with a soft brush attachment to clear dust from tight corners, keeping the workspace—and the finished product—clean.
Regular inspection tools are vital, too. A sturdy flashlight, like the Maglite LED, helps identify hidden issues during routine checks, while a level remains indispensable—preferably digital for detecting even slight deviations. Embracing digital measurement apps, such as the Measure app on my iPhone, adds an extra layer of precision, especially when adjusting hardware or realigning components over time.
Investing in quality tools not only makes the work smoother but significantly extends the lifespan of your installations. And don’t forget maintenance! Wiping down surfaces periodically with a damp cloth prevents dust accumulation, while applying a light coat of furniture wax on wooden surfaces every six months preserves the finish and prevents cracking or discoloration. For hardware, periodically tightening screws and checking for wear ensures nothing becomes loose or unstable, avoiding future sagging or wobbling.
How do I maintain built-ins and vanities over time?
Long-term durability hinges on proactive upkeep. I recommend scheduling quarterly inspections to identify early signs of stress or damage, like cabinet hinges loosening or paint chipping. If you notice slight shifts, don’t wait—use shims or adjust hardware promptly, as delays can lead to more significant problems. Implementing a routine of cleaning, checking fasteners, and touching up finishes helps maintain both appearance and structural integrity. For particularly heavy or complex installations, I suggest reviewing your support systems regularly. Consulting guides such as top trends in vanity designs for 2025 can inspire reinforcement upgrades that align with modern standards, ensuring your setup remains both beautiful and sturdy for years to come.
In my experience, staying vigilant with maintenance tools saves money and enhances safety. For example, a small investment in a steel tightening strap can reinforce weak points in a large vanity, preventing costly repairs later. I encourage you to try incorporating a digital level or inspection flashlight into your routine—you might catch issues early, avoiding extensive fixes. Remember, the key is consistency; a little effort today ensures your built-ins continue to impress tomorrow and well into the future.