

I’ll never forget the first time I tried to install those massive built-in shelves in my living room. Everything seemed straightforward—measure, cut, secure. But once I mounted the final piece, I noticed a visible wobble that just wouldn’t go away. It was a frustrating, eye-opening moment that led me down a rabbit hole of troubleshooting—until I discovered the game-changing Hidden Sub-Frame Hack. Suddenly, my heavy cabinets felt as solid as a vault, and my DIY confidence skyrocketed.
Why Your Built-ins Keep Falling Short (And How to Fix Them)
There’s nothing quite as satisfying as a sleek, custom-built wall unit—until it starts sagging, wobbling, or, worst of all, pulling away from the wall. If you’ve faced these issues, you’re not alone. The problem often isn’t your craftsmanship; it’s the unseen support structures that hold everything together. This is where understanding and applying the Hidden Sub-Frame Move can totally transform your approach to built-ins.
Is the Sub-Frame Hack Really Worth the Fuss?
Trust me, I’ve made my fair share of early mistakes—like neglecting internal reinforcement that could have saved me headaches later. The truth is, the initial effort to add a proper hidden sub-frame might seem extra, but it pays off in durability and peace of mind. Plus, a well-supported unit prevents those embarrassing sagging shelves or cracked drywall that can make even the most beautiful design look shoddy. If you’re skeptical, consider this: when I finally adopted this technique, I noticed a dramatic decrease in future repairs and adjustments, saving time and money. Want to see how this can work in your space? Dive into more expert tips on effortless storage solutions and ensure your built-ins last a lifetime.
Up next, I’ll walk you through the core principles of installing a secure, robust hidden sub-frame—so your gorgeous living room features aren’t just beautiful but built to stand the test of time. Let’s get to it!
,
Secure the Frame First
Begin by measuring the area accurately, then cut a sturdy plywood sub-frame slightly smaller than your built-in’s perimeter. For example, I once used a 2×4-foot plywood sheet to create a mock-up of my bookshelf, which helped me visualize the support placement. Fasten the plywood securely to the wall studs using heavy-duty screws, ensuring it acts as a solid backbone for the entire structure. This step is vital because, like the backbone in a human body, it carries the load and maintains stability.
Attach the Hidden Support Rails
Next, install steel support rails or cleats on the plywood sub-frame, aligned precisely to distribute the weight evenly. Use a level to ensure the rails are perfectly horizontal; a crooked rail can cause shelves to tilt or sag. During my project, I kept a laser level handy to double-check each rail’s alignment, which saved me from future adjustments. These hidden rails serve as the “bones” that keep your built-in sturdy—think of them as the internal braces in a bridge, providing strength without being visible.
Mount the Cabinets onto the Support System
Now, hang your cabinet carcasses directly onto the steel rails or cleats, anchoring them with lag bolts or screws that go into wall studs through the plywood. This creates a direct, fortified connection between the wall and the cabinet, avoiding the common wobble caused by mounting structures alone. For my own built-in, I used stainless steel brackets to attach my cabinet frames to the support rails, which eliminated any wobbling even when loaded with heavy books or decorative items. This method ensures that your built-in can support heavy countertops or shelves without strain.
Double-Check and Reinforce
Finally, verify the entire assembly for stability. Gently shake the structure—if there’s any movement, add extra fasteners or steel braces at weak points. During one installation, I discovered a slight wobble, so I added a steel brace diagonally across the frame, much like a cross-brace in a truss, which dramatically improved rigidity. Remember, the goal is to create an internal support network that behaves like a single, monolithic piece of furniture, not a collection of parts prone to shifting or cracking.
Implementing this hidden sub-frame method will radically improve the durability of your built-ins, preventing issues like sagging shelves or pull-away cabinets. For additional tips on efficient installation techniques, check out vanity installation hacks and learn how to streamline your project without sacrificing quality. Remember, a well-executed internal support system is the backbone of long-lasting, beautiful furniture that stands the test of time.
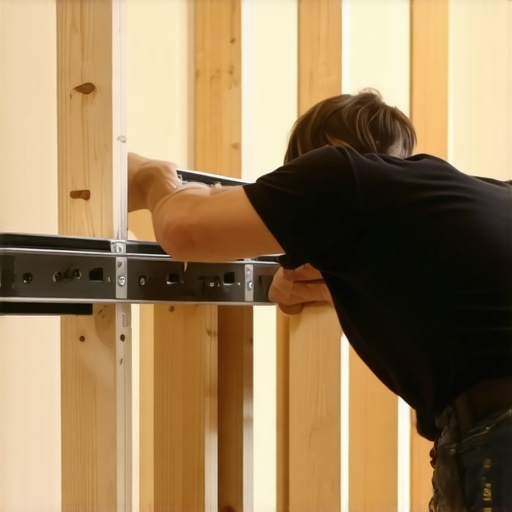 Many seasoned DIYers assume they’ve mastered the ins and outs of vanities, built-ins, and storage installation, but even experts can fall prey to misconceptions. One pervasive myth is that choosing the most expensive or complex materials guarantees durability—nothing could be further from the truth. The strength of your installation hinges more on proper support techniques, such as implementing hidden reinforcement strategies like the Hidden Sub-Frame Hack, than on material cost alone. Overlooking these nuanced details often results in sagging shelves, unstable cabinets, or costly repairs down the line. Additionally, many installers underestimate the importance of internal support structures, which are critical for supporting heavy countertops or fixtures. For instance, not reinforcing wall anchors adequately can lead to pulling away or damaging drywall, especially in load-bearing applications. An advanced mistake is neglecting to account for the imperfections in your space—such as uneven floors or crooked walls—which require specialized techniques like shimming or custom scribing to achieve a flawless finish. External experts suggest that understanding the subtle interplay between support systems and material choices dramatically improves longevity. The key is to go beyond the basics and consider every nuance, from anchoring methods to space variables, before beginning your project. For more detailed guidance on optimizing your storage solutions, check out effortless storage ideas that combine form and function seamlessly. Recognizing these subtleties can save you from common pitfalls and elevate your craftsmanship. Have you ever fallen into this trap? Let me know in the comments.
Tools That Keep Your Built-Ins and Vanities Working Smoothly
Maintaining your custom-built vanities and storage solutions is crucial to ensure longevity and consistent performance. Over the years, I’ve found that investing in the right tools and adopting proper maintenance routines can significantly extend the life of your installations. One of my favorite go-to tools is a high-quality cordless drill with a set of precision driver bits. It allows me to tighten loose screws and fixtures quickly, preventing wobbly doors or shelves. For frequent inspections, I rely on a digital laser level, which ensures that everything remains perfectly aligned — especially important for floating vanities that can shift over time. Additionally, a flexible nylon brush kit helps me clean hard-to-reach areas, preventing dust buildup that can compromise hinges and hardware.
To assess the state of your storage solutions, I recommend using a stud finder with deep scanning capabilities. It’s perfect for verifying that all anchors and mounting points are secure, particularly in older walls where drywall may have weakened. Periodic checks using these tools help detect potential issues early, saving you from costly repairs or replacements later. Also, investing in sturdy, rust-proof fasteners, such as stainless steel screws and anchors, ensures that your support systems withstand humid environments or heavy loads — especially relevant for bathroom vanities or kitchen built-ins.
Anticipating the Future of Maintenance
As technology advances, smart maintenance solutions are becoming more prevalent. Imagine integrating sensors that monitor the stability of your built-in furniture and notify you when something shifts or loosens. While still emerging, such innovations could revolutionize DIY maintenance routines, making them more proactive rather than reactive. For now, the best practice remains regular inspections and using reliable tools, like the effortless storage solutions guide to keep everything tidy and well-supported.
How do I maintain vanities and built-ins over time?
To keep your vanities and built-ins functioning flawlessly, establish a routine of seasonal check-ups. Tighten fasteners, clear dust from hinges and supports, and look for signs of wear or damage. Utilizing the right maintenance tools not only simplifies this process but also ensures you catch small issues before they become major problems. For particularly challenging projects, consider incorporating preventive reinforcement methods, such as internal steel braces or hidden support rails, which I detail in my installation guides. Remember, a little proactive effort today can save significant time and money tomorrow, keeping your beautiful home features in top shape for years to come. Want to learn more about securing heavy fixtures? Check out vanity installation hacks for expert tips.
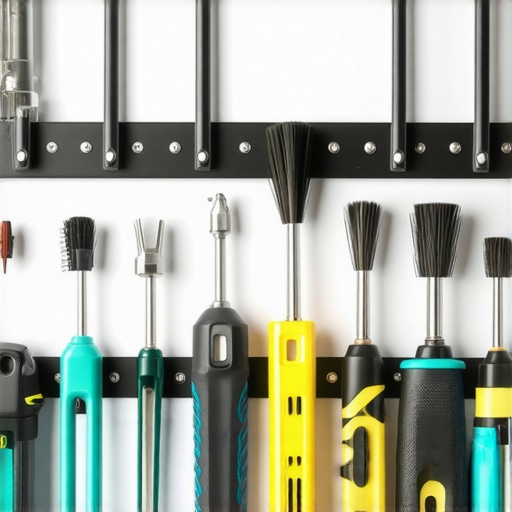
Imagine a sleek workspace with all your essential maintenance tools organized and close at hand—keeping your built-ins in prime condition is easier with the right gear. This image showcases a compact storage system filled with high-quality drills, levels, brushes, and fasteners, emphasizing preparedness and efficiency in ongoing maintenance.
Lessons That Changed How I Approach Built-Ins
One of the toughest lessons I learned was that the most beautiful built-ins can still fail over time without proper internal reinforcement. Early in my DIY journey, I underestimated the power of a well-designed hidden support system, leading to sagging shelves and wobbling cabinets. Now, I prioritize internal steel braces and plywood sub-frames—these hidden supports might seem minor but are game-changers for longevity. Additionally, I once thought that surface materials alone dictated durability, but I discovered that robust internal structures are what truly prevent failures. Lastly, I used to rush installation, neglecting precise measurements and level checks; now, I see that meticulous planning upfront saves tedious fixes later. These realizations have made me confident that high-quality built-ins aren’t just about aesthetics—they’re an investment in lasting stability and function.
Tools That Keep Your Built-Ins Standing Tall
Over years of building and maintaining built-ins, I’ve found that certain tools are indispensable for ensuring durability. A digital laser level has saved me countless times when aligning support rails or verifying even surfaces, preventing future sagging. Heavy-duty impact drivers with a variety of bits make fastening internal supports securely—trust me, a good screw properly anchored can make all the difference. For reinforcing heavy quartz tops or large cabinets, high-quality steel support brackets are vital; I rely on ones that I trust for their strength and longevity. Additionally, a stud finder with deep scanning helps verify wall anchorage points, especially in older homes where drywall might be unreliable. Combining these tools with a routine maintenance schedule—tightening fasteners and inspecting supports—keeps my built-ins in top shape and prevents costly repairs.
Your Next Step in Creating Timeless Built-Ins
Take the insights from this journey and turn them into action. Remember, the secret to long-lasting built-ins lies beyond the surface—internal support systems are their backbone. Implement hidden sub-frames and steel braces in your next project, and you’ll reap the benefits of stability and durability. Don’t forget to equip yourself with the right tools for ongoing maintenance, like levels and impact drivers, to keep everything secure over time. The more you learn and adapt your approach, the more confident you’ll become in creating custom features that truly last. Ready to transform your space with built-ins that stand the test of time? Dive deeper into expert strategies and design tips by exploring our comprehensive resources—your perfect, lasting built-in awaits.