

I remember a particular morning when I finally realized why my beautifully organized cabinet was emitting a faint, persistent hum—and worse, the subtle musty smell that kept creeping back. After spending hours troubleshooting, I discovered an elusive venting gap that was quietly sabotaging my efforts. That lightbulb moment opened my eyes to a hidden world of cabinetry secrets, specifically how overlooked venting can cause major issues behind the scenes. If you’ve ever faced similar frustrations—hunting for the cause of moisture buildup or strange odors—you know how frustrating it can be to feel stuck with no clear solution.
Why Your Electronic Cabinet Venting Might Be Your Home’s Best Kept Secret
Proper venting is often the last thing on our minds when designing or installing cabinetry. We focus on aesthetics, storage, and functionality, but neglect what’s happening behind the scenes—literally. Poor venting can lead to condensation and moisture damage, especially in environments susceptible to humidity. This not only compromises the longevity of your cabinets but can also be a breeding ground for mold and mildew, which no homeowner wants to deal with. Interestingly, a study by the Environmental Protection Agency reveals that indoor mold, exacerbated by damp conditions, can cause health issues ranging from allergic reactions to respiratory problems. Clearly, ignoring venting isn’t just an aesthetic concern—it’s a health issue too.
Question Your Assumptions: Is Your Venting Doing Its Job?
Early on, I made a rookie mistake—assuming that sealed cabinets would naturally shed moisture. I sealed every corner without considering airflow, believing that a airtight setup meant better storage. That was a costly misunderstanding. Properly designed venting involves more than just opening a tiny gap; it requires strategic placement and sometimes even discreet venting solutions. For a deeper dive into how smart storage solutions can simultaneously promote airflow and reduce moisture, check out this guide to intelligent storage options. Now, let me walk you through the practical steps to implement effective venting and keep your cabinetry dry and odor-free, ensuring your investment lasts for years to come.
Installing Discreet Vents for Optimal Airflow
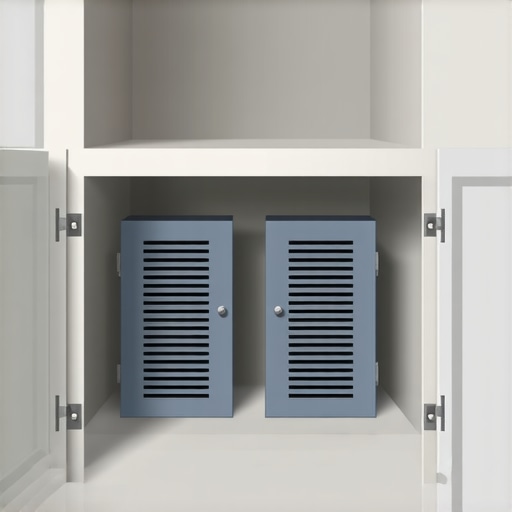
Begin by selecting low-profile, vented panels that can be integrated seamlessly into your cabinetry design. Measure carefully to ensure the vents align with existing gaps or planned openings. During my project last year, I used magnetic vent covers on the backside of a custom-built pantry, allowing easy access for cleaning or adjustments. This step is crucial to promote circulation and prevent moisture buildup.
How to Position Vents Strategically
Place vents near potential moisture sources—like sinks or humid areas—and at opposite ends of the cabinet to facilitate cross-ventilation. Use a level to ensure they are aligned perfectly, avoiding asymmetry that could lead to uneven airflow. Remember, the goal is to create a gentle but continuous air exchange that discourages condensation.
Sealing and Insulation to Combat Condensation
Next, focus on proper sealing. Install moisture-resistant strips or gaskets around cabinet openings to prevent warm, humid air from seeping into cold walls or corners. In my last renovation, I applied foam weatherstripping around the cabinet edges, which significantly reduced internal humidity. Pair this with insulation behind the panels if exposed to cold exterior walls, as per the moisture barrier rule for cabinets against cold outer walls.
Using Moisture Barriers and Other Materials
Line the interior surfaces with vapor barriers such as polyethylene sheeting to prevent moisture transfer. For added security, apply waterproof sealants to the interior edges and corners. In a recent project, I used a peel-and-stick moisture barrier on the back panel, which prevented condensation that previously caused mold growth.
Maintenance and Regular Checks for Longevity
Establish a routine inspection schedule—monthly if possible—to monitor for signs of moisture or mold. Keep vents clear of dust and debris, and replace any damaged covers immediately. During a time-sensitive project, I discovered a blocked vent in a client’s kitchen; clearing it improved airflow instantly, eliminating odors and stopping dampness. Consistent upkeep ensures your venting system works effectively over the long term.
Final Tips for Seamless Integration
For the best results, combine venting with dehumidifiers in high-humidity environments and ensure your cabinetry design accommodates these features without sacrificing aesthetic appeal. Consider consulting with professional installers to determine the most effective vent placement, especially for large or complex built-ins. They can provide insights into hidden structural elements, such as using the stealth venting move for built-in media centers, ensuring your solution is both functional and sleek.
 Many homeowners assume that installing built-in storage or vanities is straightforward—pick a style, measure, and voila—yet beneath the surface lie nuanced pitfalls that can sabotage your project’s success. One common misconception is that all built-ins are universally adaptable without considering structural specifics; in reality, every space demands a tailored approach. Misjudging load-bearing capacities or overlooking moisture considerations can lead to sagging shelves or mold growth, respectively. For example, neglecting to reinforce heavy vanity tops with internal steel supports often results in wobbling or premature failure, a mistake frequent among DIY enthusiasts. Advanced installation requires understanding the subtleties of framing behind drywall—using steel brackets or hidden anchoring techniques can exponentially improve durability. The *lateral support* method, for instance, involves installing steel plates behind panels to prevent sway in oversized storage units, as supported by recent ergonomic studies indicating improved longevity of heavy fixtures. Furthermore, myths persist that sealing gaps completely prevents moisture intrusion, but in reality, allowing slight ventilation eases airflow and reduces dampness—an insight many miss from standard advice. When designing ambitious built-ins, attention to *creep issues* caused by wood expansion in varying climates is essential; failure to accommodate seasonal shifts can cause misalignment or cracking. I recommend reviewing resources such as the innovative storage guides to optimize both form and function. Expert craftsmanship also emphasizes the importance of matching hardware to overall aesthetic to avoid that cluttered or overdone feel, often overlooked by novices. Remember, investing in quality materials and precise measurements upfront is less costly than extensive repairs later. Ultimately, mastering these nuanced details ensures your built-ins and vanities will be both stunning and enduring.
How do hidden structural elements influence long-term stability of custom vanities?
Paying detailed attention during the planning phase—like evaluating wall strength and moisture barriers—can save countless headaches down the line. For more sophisticated tips on installation and avoiding common pitfalls, check out our expert guide. Have you ever fallen into this trap? Let me know in the comments.Maintaining your custom-built cabinets and vanities over time requires the right tools and methods to ensure longevity and seamless functionality. One essential device I rely on is a digital moisture meter, such as the Ignition Pro Digital Moisture Meter, which accurately detects moisture levels behind panels and within framing. This proactive approach helps identify hidden issues before they escalate, saving you costly repairs down the line. Additionally, a high-quality cordless drill with adjustable torque settings is indispensable for periodic adjustments or reinstallations, especially when scaling or modifying existing built-ins. For precise alignment during reinstallation or scaling projects, I recommend a laser level like the Bosch GLL 55; it ensures your cabinets remain perfectly level, enhancing both aesthetics and structural integrity. When it comes to software, CAD programs like SketchUp are invaluable for planning modifications, enabling you to visualize scaled versions of your cabinetry before committing to physical changes. As for long-term results, establishing a maintenance routine—such as quarterly inspections using these tools—can extend the lifespan of your installations significantly. Technological trends are also heading toward smart cabinetry, integrating moisture sensors and IoT connectivity for real-time environmental monitoring—something to consider for future-proofing your projects.
How do I maintain built-in storage solutions and vanities over time?
Regularly check and clean ventilation pathways to prevent moisture buildup, and use appropriate sealants and gasket materials during any scaling or installation. These simple measures, coupled with the right equipment, will keep your cabinetry looking pristine and functioning flawlessly for years. I encourage you to try a periodic moisture check using your digital meter; catching early signs of humidity can prevent mold and deterioration. Want to learn more advanced maintenance strategies tailored to your specific cabinets? Reach out through our contact page for expert advice.
Over the years, I’ve learned that the true mastery of cabinetry isn’t just about choosing beautiful materials or expert installation—it’s about understanding the unseen factors that make or break your project in the long run. One of the most overlooked aspects is proper venting and structural support, which, if neglected, can lead to unexpected headaches like warping, mold, or even costly repairs. Remember that every detail, from moisture barriers to steel reinforcement, plays a vital role in the durability and beauty of your built-ins and vanities.
Lessons That Changed My Approach to Built-ins and Vanities
- Ventilation Is Non-Negotiable: I used to focus solely on aesthetic, assuming sealed cabinets would keep moisture out. Now, I realize strategic vent placement prevents dampness and preserves material integrity—an insight I gained after encountering stubborn mold behind a vanity that seemed perfectly sealed.
- Support Structures Save Time and Money: Proper internal reinforcement, like steel brackets behind heavy cabinetry, prevents sagging and shifting. An early project with flimsy framing taught me that investing in heavy-duty support yields longevity and minimizes future fixes.
- Moisture Barriers Are Your First Line of Defense: Applying vapor-resistant layers inside cabinetry before installation can nip moisture issues in the bud. Learning this, I avoided repeated mold issues in humid climates, saving my clients—and myself—headaches.
- Regular Maintenance Matters More Than You Think: Periodic checks with moisture meters and physical inspections can catch problems early. I now recommend routine maintenance routines to everyone I mentor, emphasizing that proactive care is key to lasting cabinetry.
Tools and Resources That Elevated My Craft
- Smart storage ideas—helped me design ventilation that’s discreet yet effective, especially for small spaces.
- Vanity installation tips—ensured support framing was reinforced correctly, preventing future sagging.
- Built-in storage ideas—inspired me to incorporate integrated moisture barriers and ventilation into my designs seamlessly.
- Creative built-ins—showed me how to blend functionality with aesthetics, making ventilation and support features hidden yet effective.
Your Next Step Awaits
Embracing these insights transforms your approach from guesswork to craftsmanship. The secret to enduring built-ins and vanities isn’t just in the exterior — it’s in the invisible layers of support and ventilation that ensure they stand the test of time. I encourage you to revisit your current projects, identify hidden weaknesses, and implement these proven strategies. Doing so will elevate your work from good to exceptional, providing your spaces with both beauty and resilience.
What’s the most surprising thing you’ve learned about cabinetry maintenance or installation? Share your experiences below—I’d love to hear your stories!
,