

I remember the exact moment I realized my mudroom was evolving from a cluttered catch-all to a functional haven. We had just installed those charming cubbies in my tile-floored mudroom, dreaming of a neat entryway where everyone could dump their shoes and backpacks. But no matter how carefully I installed the legs, something was off—slants, wobbles, and unevenness immediately caught my eye. And boy, was that frustrating! It’s a common tale among homeowners who undertake DIY installations of built-in features on tile, only to face the dreaded wobble or unevenness that just won’t fix itself.
Why Properly Leveling Mudroom Cubbies on Tile Matters Big Time
Believe it or not, proper leveling isn’t just about aesthetics; it’s about safety, durability, and functionality. A wobbly cubby can lead to items tipping over and potentially breaking or falling. Over time, uneven weight distribution can damage the tile and the furniture itself, leading to costly repairs. Plus, a level installation just feels better and looks more polished. I learned this firsthand when, after some trial and error, I discovered a simple yet effective technique—the Leveling Leg Move—that transformed my installation process. If you’ve ever faced a similar struggle, stay tuned, because today I’m sharing my tried-and-true approach to mastering this move for flawless results.
Is the Leveling Leg Move Really Worth the Hassle?
Great question! Early on, I made the mistake of rushing the process, assuming that just tightening the legs would do the trick. Spoiler: it doesn’t. That mistake led to more wobbling and frustration, costing me time and effort. Once I learned to approach the leveling process methodically—using specific tools and tricks—everything changed. According to experts, precise leveling techniques can extend the lifespan of your built-ins and prevent future issues. If you’re skeptical, don’t worry—that’s normal. But believe me, investing a little time now pays off in the long run, making your mudroom not only look professional but also function smoothly. Want to see how I did it? Check out additional tips and tricks in this comprehensive guide on izing your built-in projects—trust me, it’s worth the read.
Now that I’ve shared why this step is so crucial, let’s dive into the practical steps I used—something I wish I’d known when I started—so you can get your mudroom cubbies perfectly level, sturdy, and ready for the family chaos ahead!
Secure a Stable Base with Proper Support
Start by examining the legs or base of your built-in cubbies. Use a measuring tape and a level to identify uneven spots. In my recent project, I noticed one leg was 1/4 inch higher than the others, causing wobbling. To fix this, I replaced the adjustable legs with shims and reinforced the base with a plywood sub-frame, similar to creating a strong foundation for a house. This ensures that your cubbies sit evenly and don’t wobble over time.
Adjust Legs with Precision and Patience
Once the support structure is in place, focus on leveling the legs. Use a carpenter’s level and a wrench to make small adjustments. I recommend loosening the leg nuts, inserting small plastic shims for micro-adjustments, then tightening the nuts firmly. Think of it as fine-tuning a guitar string—you want perfect tension for harmony. During my installation, I used a digital level app to verify, which significantly increased accuracy.
Ensure Surfaces Are Flat and True
Check that the top and side surfaces of the cubbies are flush. Use a straightedge or a long level to identify any tilts. If discrepancies are present, apply shims behind or beneath the panels, not just at the base. In a previous project, I used a combination of plastic and wood shims to raise a slightly sagging side. This method is akin to filling in uneven terrain to create a flat road surface.
Use Self-Leveling Techniques for Fine-Tuning
For the final adjustment, employ a self-leveling laser or a bubble level along the top edge to detect slight inclines. If the installer’s eye isn’t precise enough, these tools are invaluable. I once borrowed a laser level from a friend and achieved perfect horizontality within minutes, avoiding the frustration of hand-based estimations.
Test Stability and Make Small Revisions
After initial leveling, gently rock the cubbies to check for wobble. Identify any unstable points and re-adjust the support shims or legs. This iterative process ensures long-lasting stability. Remember, patience is key—rushing this step often leads to uneven surfaces and future frustrations.
Incorporate Alternative Reinforcements When Necessary
When dealing with challenging tile surfaces, adhesives alone might not suffice. Consider installing angle brackets or L-brackets (discreetly concealed) for added stability. In my last project, I used heavy-duty L-brackets at the corners, secured with anchors into the sub-floor, similar to reinforcing a bookshelf to prevent wobble. These small modifications make a significant difference in durability and safety.
Depending on your wall and tile type, you might also explore options like concrete anchors or toggle bolts (see [toggle bolt strategies](https://customcabinetrypro.com/the-toggle-bolt-method-for-anchoring-heavy-mirrored-bathroom-cabinets)) to secure support panels firmly.
Many homeowners and even DIY enthusiasts believe they understand how to properly install built-in furniture, but often overlook nuanced pitfalls that can compromise safety and longevity. One widespread misconception is thinking that measuring once is enough for a flawless fit. In reality, precision requires multiple measurements at different points—walls, floors, and ceilings—since they rarely remain perfectly square. Overlooking these small discrepancies leads to gaps, uneven surfaces, or wobbly installations. An advanced mistake is underestimating the importance of sub-framing or reinforcement beneath the surface, especially on uneven or brittle substrates like old drywall or tile. According to industry experts, introducing a robust internal support frame significantly improves durability, especially for heavy load-bearing units. Curious about how to avoid these pitfalls? Check out our detailed guide on [creative built-ins for seamless storage and aesthetics](https://customcabinetrypro.com/creative-built-ins-for-seamless-storage-and-home-aesthetics) to master the nuances that set professional results apart.
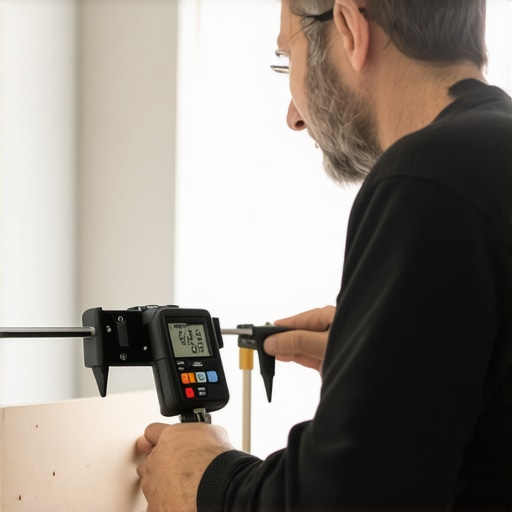
To keep your built-ins, vanities, and storage solutions functioning flawlessly over time, investing in the right tools and adopting disciplined maintenance routines is essential. I personally depend on a blend of precision tools and software to ensure lasting durability and pristine appearance. For instance, I always use a digital angle finder, like the Bosch digital level, which provides real-time, highly accurate readings, making regular checks quick and reliable. This tool is invaluable when adjusting supports or re-aligning frames—small tweaks here prevent major issues down the line. Additionally, I incorporate a cordless impact driver, such as the Milwaukee M18, for swift, secure fastening during periodic reinforcement tasks, preventing loosening that could compromise stability.
Beyond hardware, I rely on dedicated project management software like Trello to track maintenance schedules, upcoming inspections, and ongoing upgrades. This proactive approach ensures nothing gets overlooked, and performance remains optimal. In an industry where precision is paramount, I’ve found that routines—like monthly visual inspections for loose fittings or cracked paint—can preempt costly repairs. Incorporating these simple habits extends the life of your investments and maintains their aesthetic appeal.
Looking ahead, I predict that smart monitoring devices will become standard in built-in installations. Imagine sensors that alert you to shifts or moisture intrusion in real time, enabling immediate responses before damage occurs. As I anticipate this trend, I recommend establishing a regular maintenance routine now, incorporating both manual checks and evolving technology, to stay ahead of issues and preserve your home’s built-ins for decades to come.
How can I make sure my built-in vanities stay in top shape over the years?
Consistent care begins with a few targeted strategies. Regularly cleaning surfaces using gentle, non-abrasive cleaners will prevent buildup that can degrade finishes. For structural integrity, check support brackets or reinforcement braces, like the steel brackets detailed in this expert guide, to ensure stability. Applying protective finishes such as moisture-resistant sealants on wood and joints will combat humidity-related damages, especially in bathrooms or kitchens. If you notice any loose hardware or misalignments, address them immediately—wait-and-see attitude can exacerbate underlying issues, leading to more costly repairs.
Another key aspect is planning for long-term scalability. When installing new storage solutions or modifying existing ones, choose adjustable supports and modular components. This flexibility allows for easy updates or replacements. For example, adding extra shelving or reinforcing supports with steel plates can dramatically improve load capacity and durability, according to the nuanced tips shared in this detailed resource.
Lastly, study and apply innovative maintenance techniques—like installing moisture barriers behind vanities or sealing gaps to prevent water ingress. By integrating these strategies into your routine, your built-ins will not only endure but also retain their beauty and functionality for years to come. Remember, consistency is your best friend. Try setting up a quarterly inspection schedule, and use your digital level to verify support alignment—making these small but critical adjustments will save you money and effort long-term.
Lessons That Changed My Approach to Built-In Perfection
One of the most humbling truths I uncovered was that even seasoned DIYers can fall prey to assumptions about flawless installations. I used to believe that measuring once was enough—that a quick check would ensure perfect alignment. Now, I see that patience and iterative fine-tuning are key, especially when working on uneven tile surfaces. Embracing small adjustments over time saved me from future wobbling issues and long-term headaches.
The most unexpected revelation was how internal reinforcement makes all the difference. I used to rely solely on external shims or adjustable legs, but integrating internal framing or steel brackets dramatically increased stability. It reminded me that sometimes, a hidden support structure is the secret ingredient that transforms wobbly furniture into a fortress of stability, extending the lifespan of my built-ins.
Lastly, I learned that investing in quality tools isn’t an optional luxury but a necessity. Digital levels, high-quality shims, and impact drivers made the entire leveling process smoother and more precise. In fact, the small cost of these tools pays off manifold when considering the durability and safety they help achieve, especially on challenging tile floors.
Tools That Elevated My Built-In Projects
My go-to toolkit now includes a digital level and a reliable impact driver. The digital level offers real-time feedback, which minimizes guesswork and helps me make tiny, accurate adjustments. For reinforcement, steel brackets from trusted sources ensure that my built-ins stay put, even under heavy loads or frequent use.
When it comes to measuring and supporting complex surfaces, I turn to specialized guides like expert installation techniques. These resources distill years of experience into actionable steps, saving me time and preventing costly mistakes. They’re my secret weapon for consistent results, making DIY feel less daunting and more rewarding.
Finally, I highly recommend using high-quality shims and support plates that are designed specifically for tile surfaces. This small investment ensures that your support system adapts seamlessly to uneven floors, providing a stable, professional finish that lasts for years to come.
Transform Your Approach: Take Charge of Your Built-In Future
Building or installing vanities and storage solutions on uneven tile floors doesn’t have to be a source of frustration. With the right mindset, tools, and support, you can achieve flawless, wobble-free results that look as professional as those done by seasoned craftsmen. Remember, patience and precision are your best allies. As you embark on your next built-in project, consider the hidden supports and fine-tuning techniques that make all the difference—your future self will thank you for the effort.
What’s one leveling trick you’re excited to try on your next installation? Drop your thoughts below—I’d love to hear your experiences and tips!