

I stood there, staring at my brand-new vanity, and honestly, I wanted to cry. I had just finished a full weekend of tiling, only to realize my 1920s subfloor had other plans. When I slid the cabinet into place, it didn’t just sit; it wobbled like a table at a cheap diner. I made the classic rookie mistake—I grabbed some scrap wood and jammed it under the corner, thinking I’d hide it with trim later. Fast forward six months: the vanity had shifted, my plumbing started leaking because of the strain, and I had to rip the whole thing out. It was a mess. But that failure taught me the Leveling Move, a technique that doesn’t just mask the slope but actually builds a foundation that lasts. We aren’t just talking about shoving plastic wedges into gaps. We’re talking about a rock-solid installation that makes your bathroom look like it was built by a master craftsman. If you’ve ever felt the frustration of a vanity that won’t stay put, you’re in the right place. We’re going to solve that thunk-clunk once and for all.
The Truth About Why Your Bathroom Floor is Trying to Kill Your Vanity
Most of us assume our floors are flat until we try to put something square on them. In reality, according to the National Association of Home Builders, houses settle and shift over decades, meaning a flat floor is actually quite a rarity in older homes. This slope isn’t just an eyesore; it puts incredible stress on your cabinet joints and can lead to why your vanity plumbing is leaking into the cabinet base over time. When your vanity sits at an angle, the heavy stone top wants to slide, the doors won’t hang straight, and the drawers will eventually bind.
Is a little bit of a tilt really that big of a deal?
You might be thinking, “Can’t I just shim the front and call it a day?” I used to think that, too. The problem is that standard shims often create point loads—concentrated pressure on a tiny area of your floor. This is especially dangerous if you are supporting massive quartz top vanities that weigh hundreds of pounds. If you don’t distribute that weight correctly, you risk cracking your tile or even the vanity frame itself. I’ve seen beautiful installs ruined because someone ignored a 1/4-inch slope.
The Sub-Base Secret That Saves Your Sanity
The real pros don’t just use shims; they use a scribed sub-base or a stealth ledger to create a level platform before the vanity even touches the ground. This is similar to flawless vanity installation tricks used in high-end custom homes. By creating a level perimeter first, you ensure the weight is distributed evenly across the entire footprint of the cabinet. It’s the difference between a vanity that feels perched on the floor and one that feels like it’s part of the architecture. Have you ever tried to install a vanity only to find the floor was slanted in two different directions at once?
Hunt for the Highest Spot on Your Floor
You cannot just drop a cabinet in place and hope for the best. Before you even unpack the vanity, you need to find the high point of your floor. Think of this like the peak of a mountain; every other part of the installation will be built up to meet this specific height. Take a four-foot level and sweep it across the area where the vanity will sit. If you find that the floor drops off toward the shower or the door, that peak is your starting line. I learned this the hard way during a renovation in a century-old farmhouse where the floor had a two-inch dive from left to right. I tried to start at the low end, and by the time I reached the other side, I had to cut into the drywall just to make the cabinet fit. It was a disaster that could have been avoided with five minutes of measuring. Once you find that high spot, mark it on the wall. This becomes your reference for a step-by-step guide to vanity installation for beginners that actually works.
Ditch the Plastic Shims and Grab a Compass
While most DIYers reach for a bag of plastic shims, they often create ‘point loads’ that can eventually crack your tile or cause the vanity frame to rack. Instead, use the scribing method. Place your vanity in its permanent spot, leveled perfectly using temporary blocks. Then, take a simple carpenter’s compass. Set the width of the compass to the largest gap between the vanity base and the floor. Run the point of the compass along the floor while the pencil side marks the base of the vanity. This creates a perfect topographic map of your floor’s imperfections directly on the wood. This technique is one of the most effective vanity installation hacks that save time and money because it eliminates the ‘see-saw’ effect entirely. Once you trim the wood to that line using a jigsaw or a belt sander, the vanity will sit flush against the tile with zero gaps. This is essentially the scribing secret for perfect built-ins on rounded drywall corners applied to your bathroom floor.
The Hidden Cleat That Carries the Load
Even if your floor is now perfectly scribed, you shouldn’t rely on the cabinet floor alone to hold up a heavy stone top. You need a ‘stealth ledger.’ This is a 2×4 or 3/4-inch plywood cleat screwed directly into the wall studs, exactly level with the interior top edge of your vanity’s back rail. Think of this as a shelf for your vanity to sit on. By transferring the weight of the countertop to the wall studs, you prevent the cabinet from bowing or sinking over time if the house continues to settle. This is one of the expert-guide-to-flawless-vanity-installation-tricks-tips that separates an amateur job from a structural one. It is especially vital when you are supporting massive quartz top vanities that can weigh upwards of 200 pounds. When I finally started using ledgers, the ‘singing’ or creaking sounds I used to hear when leaning on the sink completely vanished. You are essentially building a bridge that is anchored into the foundation of the home, rather than just a box sitting on a wobbly floor. Using the leveling trick for mudroom benches on tile logic ensures that even if the tile is slick or uneven, the vanity stays put.Most people think that if the bubble on the spirit level is between the lines, the job is done. But here is the professional truth: a level vanity on a crooked wall is a recipe for a structural nightmare. While we spend so much time obsessing over the slope of the floor, the real enemy of a long-lasting install is the wall itself. I’ve seen homeowners spend hours getting the base perfect, only to find their drawers sticking or doors sagging six months later. This usually happens because the wall behind the vanity is “bowed” or out of plumb. When you screw a rigid cabinet box flat against a curved wall, you are actually forcing the frame to twist. This “racking” is the secret reason why your soft-close hinges are snapping or why those creative storage solutions for vanities suddenly feel clunky and stiff. If the box isn’t square, the hardware cannot function.
What happens when your wall looks like a potato chip?
In high-end custom millwork, we live by the “shim-and-shadow” rule. The Woodwork Institute, in their North American Architectural Woodwork Standards (NAAWS), emphasizes that cabinet backs should never be pulled out of plane to meet an irregular wall surface. If your wall isn’t perfectly straight—and let’s be honest, they never are—you must shim the space between the cabinet back and the wall *before* you drive your mounting screws home. If you don’t, the back rail will bend, the side panels will flare, and your expensive stone top won’t sit flat. This is where the moisture barrier trick for vanities against cold walls becomes double important; you’re not just stopping rot, you’re creating a stable, flat plane for the vanity to live on without the wall pulling it out of alignment.The most common “oops” I see in the field is the “crank it down” mentality. Many DIYers believe that more torque equals more stability. Wrong. Over-tightening mounting screws into studs without shimming the gaps is the fastest way to split a hardwood frame or pop a cabinet joint. I once watched an apprentice crack a beautiful custom face frame because he wanted the back rail to sit “tight” against a deep dip in the drywall. Instead, follow the expert guide to flawless vanity installation tricks: snug is enough. When the cabinet is racked, the top surface is no longer a flat plane. For a heavy quartz or marble top, this is catastrophic. The stone doesn’t bend; it simply sits on the high points, creating stress fractures that can lead to visible cracks years later. This is why supporting massive quartz top vanities requires a perfectly square box, not just a level one. Have you ever fallen into this trap? Let me know in the comments. It’s a mistake that even seasoned pros make when they’re in a rush, but taking those extra ten minutes to check the plumb of your walls transforms a “standard” install into something architectural. If you’re starting from scratch, always revisit a step-by-step guide to vanity installation for beginners to ensure you haven’t missed the foundational prep work before the heavy lifting begins.Once you’ve conquered the nightmare of a crooked floor, you need to ensure all that hard work doesn’t undo itself by next spring. I used to think a standard level and a box of screws were enough, but a year later, I’d find myself adjusting doors that suddenly wouldn’t close. The secret isn’t just in the initial set—it’s in the gear you use and how you combat the inevitable moisture of a bathroom.
The Three Tools I Refuse to Install Without
I’ve wasted too much time squinting at bubble levels that were slightly off because I dropped them once. Now, I never start a project without a self-leveling cross-line laser. I personally use a Bosch green-beam because it remains visible even in brightly lit bathrooms. This tool allows me to project a perfectly level line across all three walls at once, which is a lifesaver when you are trying to coordinate the vanity height with existing tile lines or the scribing secret for perfect built-ins on rounded drywall corners. Another non-negotiable is a dedicated scribing compass with a locking nut. Cheap plastic ones slip, and if your line moves by even 1/16th of an inch, your vanity will wobble. Finally, invest in a set of heavy-duty cabinet claws. These clamps align the face frames of adjacent cabinets perfectly while you screw them together, preventing that annoying ‘lip’ where two units meet. Using these specific vanity installation hacks that save time and money ensures that the ‘bones’ of your setup are professional-grade before the stone top ever arrives.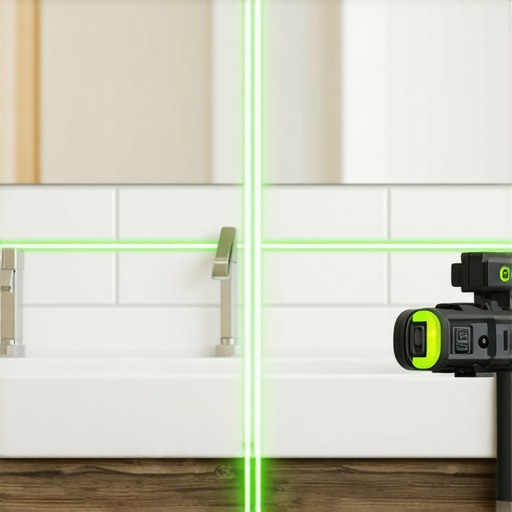
How do I keep my vanity from shifting after a few years?
The number one enemy of a stable vanity is the change in seasonal humidity. According to the Architectural Woodwork Institute (AWI) Quality Standards, wood products perform best when the interior relative humidity is maintained between 25% and 55%. In a bathroom, this is a tall order. To prevent your install from ‘walking’ or shifting, you must use high-quality 100% silicone sealant at the floor-to-cabinet transition and the wall-to-backsplash joint. Silicone acts as a flexible gasket; as the house settles or the wood expands, the silicone stretches instead of cracking. I also highly recommend applying the moisture barrier trick for vanities against cold walls to prevent the back panel from absorbing condensation, which causes the wood to swell and pull away from your mounting screws. If you notice your doors starting to rub, don’t just plane the wood—check your hinges. Often, stop cabinet doors from warping in humid bathrooms by simply adjusting the 3-way screws on your European-style hinges to compensate for minor wood movement.
The Future of Smart Bathroom Foundations
Looking ahead, we are seeing a major shift toward modularity and integrated protection. I predict that within the next five years, high-end vanities will come standard with built-in moisture sensors linked to your phone. We are already seeing top trends in vanity designs you need to know in 2025 focusing on ‘floating’ aesthetics that use heavy-duty steel internal frames rather than traditional plywood boxes. This eliminates floor-leveling issues entirely but raises the stakes for wall-mounting precision. Whether you are adding creative storage solutions for vanities or installing a massive double-sink unit, the move toward metal-reinforced sub-frames is the next frontier. If you want to level up your DIY game right now, stop using wood shims and try the scribing compass method on your next base—it is the single best way to ensure your vanity stays rock-solid for a decade.
The Hardest Lesson I Learned About Shifting Subfloors
After a decade of fighting with uneven subfloors, I’ve realized that the level itself is only half the battle. One major lightbulb moment was discovering that drywall isn’t a structural anchor; it’s a sponge. If you tighten your screws against a hollow spot in the wall without backing it up with shims, the cabinet will eventually ‘oil-can’ or warp. Another hard-learned truth: never trust a floor that ‘looks’ flat. Always assume there is a slope and work from the high point down. Finally, I’ve seen that small gaps today become structural failures tomorrow. Taking the time for vanity installation hacks that save time and money, like pre-drilling and using structural screws, prevents the frame from splitting under the weight of a heavy countertop.
My Personal Toolkit for a Bulletproof Install
I don’t believe in buying every gadget on the shelf, but three items have changed my professional life. First, the Bosch Green-Beam Laser is non-negotiable; it stays visible even in bright rooms where red lasers disappear, making it easy to see if you need to fit a vanity over off-center plumbing pipes while keeping everything straight. Second, a dedicated scribing compass with a locking nut is the only way to get those perfect, gap-free fits on the floor. Lastly, I always keep a bottle of 100% Silicone Sealant. It acts as a flexible gasket that moves with the house, which is vital for preventing the issues discussed in our guide on why your vanity plumbing is leaking into the cabinet base. These aren’t just tools; they are the insurance policy for your hard work.
#IMAGE_PLACEHOLDER_E#
Create a Foundation That Won’t Let You Down
Installing a vanity is about more than just setting a box; it’s about creating a foundation for your morning routine. When you take the time to scribe the base and anchor it properly, you aren’t just doing a DIY project—you’re performing an architectural upgrade. Don’t be intimidated by a crooked floor or a bowed wall. With a bit of patience and the right step-by-step guide to vanity installation for beginners, you can achieve a result that looks like it cost thousands more than it did. Your future self, standing at a rock-solid sink every morning, will thank you for the extra effort you put in today. Have you ever encountered a bathroom floor so slanted it felt like a funhouse? Let me know how you handled the slope in the comments below!