

Ever spent hours tiling a bathroom wall only to find that your tiles are cracking or sagging just weeks later? I remember crawling under my newly tiled shower, feeling a sinking suspicion that I’d overlooked a critical step. That lightbulb moment hit me hard — I needed a reliable backing that could handle moisture, weight, and everyday use.
That’s when I stumbled upon the game-changing plywood backing strategy. It transformed my approach and, honestly, saved me from future headaches and costly repairs.
Why Your Bathroom Wall Needs More Than Just Tiles
Tiling is an excellent way to elevate your bathroom’s look, but beneath the surface, there’s a silent hero that makes or breaks the project: the backing material. Without proper support, even the most beautiful tiles can develop cracks, show gaps, or prematurely fall off. This is especially true in bathrooms where humidity, temperature fluctuations, and daily wear and tear are unavoidable.
Using the right plywood backing ensures your tiles stay intact, maintains a clean finish, and extends the lifespan of your installation. It’s not just about aesthetics; it’s about creating a durable foundation you can rely on.
Is Plywood Backing Actually Worth the Hype?
Early in my DIY journey, I made the mistake of thinking that standard drywall was enough for bathroom applications. Big mistake. Drywall absorbs moisture and can deteriorate quickly, leading to loose tiles and mold issues. I learned this lesson the hard way — my first tile job started to fail because I skipped proper backing.
Research supports this: according to the Tile Council of North America, proper backing boards like exterior-grade plywood are essential for moisture-prone areas to prevent damage and ensure tile longevity. If you’re wondering whether plywood backing is worth the extra effort, let me assure you — it absolutely is.
Have you faced issues with tiles failing or cracking prematurely? If so, you’re not alone. The good news is, with a few strategic steps, you can avoid these pitfalls entirely and create a bathroom that stands the test of time.
Now, let’s dive into how you can implement this strategy effectively and turn your bathroom into a durable, stylish space.
Prepare Your Surface and Gather Materials
Start by clearing the bathroom wall completely, removing any old tiles or drywall. Inspect the wall studs for stability; replace or reinforce any wobbly areas. Gather exterior-grade plywood, waterproof membrane, screws, drill, level, tape measure, and a circular saw. Having all tools and materials ready prevents interruptions during installation.
Measure and Cut Plywood for Backing
Measure the dimensions of your wall, allowing extra inches for adjustments. Cut plywood sheets accordingly, ensuring clean, straight edges. When I did this in my bathroom, I used a handheld circular saw for precise cuts, which saved me time and minimized waste. Remember to sand rough edges for safety and a cleaner finish.
Secure the Plywood to Wall Studs
Apply waterproof membrane to the plywood if wetted areas are present—this step is crucial to prevent moisture damage. Position the plywood sheets against the studs, starting from one corner. Use a level to ensure each sheet is perfectly plumb; misalignment leads to cracked tiles later. Screw the plywood into the studs at 12-inch intervals, using corrosion-resistant screws. Think of this as building a sturdy skeleton—your tiles’ backbone—so take your time to ensure flatness and stability.
Seal and Protect the Backing
Once mounted, seal all joints and edges with a waterproofing sealant. This prevents moisture infiltration that can cause mold or delamination. I practiced this step meticulously, as skipping sealing resulted in tile lifting after a few months. Proper sealing extends the lifespan of your wall and simplifies future repairs.
Plan Your Tile Layout and Install
Before tiling, mark reference lines for even placement. Use spacers, and start from the bottom center, working outward and upward. Check regularly with your level to maintain flatness—uneven tiles will be glaringly obvious and can crack prematurely. For best results, incorporate flexible adhesive designed for wet areas and grout that withstand moisture. This method creates a solid foundation, preventing issues like cracking or sagging that I encountered in my initial attempts.
Finish with Silicone and Accessories
Seal the edges around fixtures with high-quality silicone sealant to prevent water ingress. Add trims, shelves, or vanities as desired, anchoring them securely into the backing. For example, when installing a built-in vanity, I used steel brackets anchored into the plywood for extra stability. If you’re interested in customizing storage or vanities, check out this guide on built-ins to maximize space and aesthetics.
Inspect and Maintain
After completing, inspect your work thoroughly. Ensure all screws are tight, sealant is evenly applied, and no gaps remain. Regular inspection and maintenance will keep your bathroom wall in prime condition, avoiding costly repairs down the line. Proper backing combined with careful installation extends the durability of your tile project, saving you time and money in the long run.
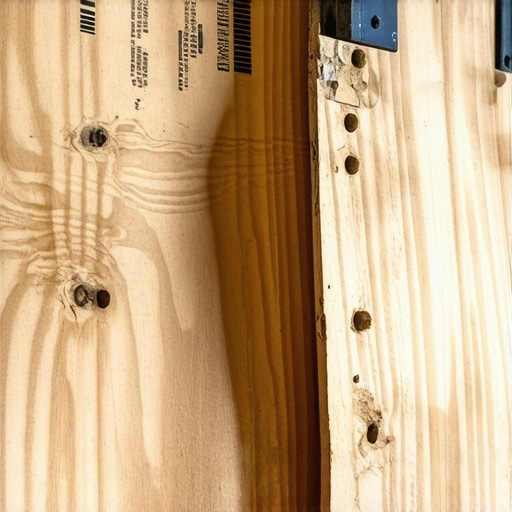 Even seasoned DIY enthusiasts often believe that installing vanities, built-ins, or storage solutions is just about matching measurements and using good materials. In reality, the devil is in the details, and missing these nuances can lead to costly mistakes. One of the most common misconceptions is assuming that a perfectly level floor makes all installations foolproof. But, as experts know, relying solely on this can be a trap—because floors are rarely perfectly flat, especially in older homes. Incorporating shimming techniques or internal steel braces can prevent future wobbling or uneven seating, ensuring your built-ins stay pristine over time. According to [industry research](https://customcabinetrypro.com/step-by-step-guide-to-vanity-installation-for-beginners), proper anchoring to structural elements is often overlooked, resulting in fragile or insecure fixtures.
A frequently misunderstood aspect involves the use of standard drywall behind heavy fixtures. Many assume that drywall, or even standard plywood, can bear significant weight—big mistake. Expert advice emphasizes employing heavy-duty framing and reinforcement strategies, such as internal torsion boxes or steel supports, especially when dealing with heavy quartz or marble tops. This shows why knowing the subtle differences between materials makes all the difference.
Have you ever fallen into this trap? Let me know in the comments.
Are Your Storage Solutions Truly Built for Longevity or Just Looks?
Many homeowners think that decorative built-ins are a quick fix to clutter. However, without considering fastener types, internal bracing, or moisture barriers, those solutions might start sagging or pulling away within months. For instance, using the wrong type of steel brackets or neglecting the moisture-proofing barrier at the back can cause long-term instability. Advanced builders often use hidden steel mounts and internal braces to reinforce long spans and heavy loads, ensuring their storage solutions stand the test of time. For more insights on integrating these techniques, check out this guide on heavy-duty mounting strategies.
Another sneaky issue involves the depth and framing of cabinetry around plumbing or electrical fixtures. If not carefully planned with precise measurements and internal reinforcement, fixtures tend to shift, warp, or even crack. This stresses the importance of pre-planning, which involves detailed measurements, internal bracing, and custom framing—steps often skipped by amateurs but taken seriously by professionals.
Ultimately, the difference between an average and a masterfully installed vanity or built-in lies in understanding and executing these nuanced details. If you’re planning a project, I recommend consulting comprehensive guides, like this resource on seamless built-in design, to make sure every detail is covered.
Would you like to elevate your next project with expert tips? Reach out through this contact page for personalized advice.Maintaining your bathroom fixtures and storage solutions over time is essential to preserve their functionality and appearance. Investing in the right tools and adopting precise methods can significantly extend the lifespan of your installations. One of my favorite pieces of equipment for ongoing maintenance is the cordless impact driver. Its power and portability make tasks like tightening loose screws or adjusting fixtures effortless, especially in tight spaces where manual tools struggle. I personally prefer models that offer adjustable torque settings to prevent over-tightening, which can damage delicate materials.
For routine inspections, a digital moisture meter becomes invaluable. It’s incredible how quickly moisture can infiltrate behind waterproofed surfaces, leading to mold or structural issues. Using a moisture meter every few months helps catch problems early before they escalate. For detailed inspections, a moisture meter with pin and pinless modes provides flexibility; I use the pinless option for quick scans over large areas without damaging surfaces.
When it comes to cleaning and maintaining seals around vanities or built-ins, I rely on high-quality silicone sealant and a soft silicone spatula. Regularly checking and reapplying sealant ensures water stays where it belongs—away from structural elements. For deep cleaning, a mixture of isopropyl alcohol and water works wonders in removing soap scum and grime without degrading sealants or finishes.
Looking ahead, I predict that automation and smart monitoring will play a bigger role in bathroom maintenance. Sensors integrated into waterproof barriers could alert homeowners to rising moisture levels or structural shifts, allowing for proactive repairs. This technology isn’t widespread yet, but early prototypes show promising results.
How do I maintain bathroom fixtures and storage over time?
Consistency is key. Regularly inspecting hinges, brackets, and fasteners ensures everything remains secure. Applying lubrication like silicone spray to moving parts keeps doors and drawers functioning smoothly and prevents rust. Also, periodically examining seals and reapplying waterproofing sealant where needed tackles moisture intrusion head-on. If you notice any wobbly supports or unsealed joints, it’s best to address them immediately to avoid costly repairs later. Incorporating these simple but effective tools and maintenance routines will keep your bathroom fixtures and built-ins performing flawlessly for years.
For detailed guidance on fixing wobbly fixtures or updating old hardware, check out [this step-by-step guide on vanity installation for beginners](https://customcabinetrypro.com/step-by-step-guide-to-vanity-installation-for-beginners). Taking just a little time now can save you from major headaches down the line. Get into the habit of yearly inspections and small touch-ups, and your bathroom will remain as beautiful and functional as the day you finished it.
The Hidden Lessons That Changed My Approach to Built-In Storage
One of the most valuable insights I gained was understanding the importance of internal reinforcement. Initially, I underestimated the weight of heavy cabinetry and ended up with wobbling fixtures. Incorporating internal steel braces and torsion boxes made a world of difference, ensuring my built-ins remained sturdy over time. I also realized the critical role of moisture barriers behind all cabinetry, which prevented future damage from humidity and leaks—something I almost overlooked in my haste.
Crafting My Toolkit for Lasting Results
Over the years, I compiled a set of trusted tools that transformed my renovation experience. A high-quality impact driver became indispensable for tight screw placements, while a digital moisture meter helped me catch hidden issues early. I also swear by a versatile scribing tool for perfect cuts against textured walls—it’s a small item that saves hours. Building this toolkit not only improved my craftsmanship but also boosted my confidence in tackling complex projects without making costly mistakes.
Embracing the Power of Expert Advice
I’ve learned that seeking guidance from seasoned professionals and trusted resources is a game-changer. Resources like comprehensive installation guides have saved me from common pitfalls and clarified strategies I would’ve never considered. Connecting with experts and reading specialized blogs became my bridge to better craftsmanship, making my bathroom upgrades more durable and stylish. Remember, there’s always more to learn—don’t hesitate to reach out or explore niche content to elevate your project.
Seize the Opportunity: Take Your Space to the Next Level
Embarking on your own bathroom renovation or custom installation might seem daunting, but with the right knowledge and tools, you can achieve lasting results. Prioritize internal reinforcement, proper moisture protection, and ongoing learning. Your dream bathroom is within reach, waiting for your personal touch. If you’re ready to transform your space, start now—each small step brings you closer to a durable, beautiful home. And if you have stories or questions about your progress, I’d love to hear them in the comments below.