

It was a morning like any other, until I stepped into my bathroom and faced a frustrating wobble that just wouldn’t quit. That shaky, uneven feel of my quartz vanity had me scratching my head. I realized I wasn’t alone—many homeowners underestimate the importance of a solid foundation for their heavy fixtures. That lightbulb moment led me to discover a game-changing strategy: the plywood sub-base. Today, I’m here to share how this simple tweak can transform your vanity installation into a sturdy, stable masterpiece.
Why a Strong Sub-Base Matters More Than You Think
When installing a heavy quartz-top vanity, especially in a space with uneven floors or old substructures, the foundation is everything. Without proper support, you risk cracks, tilting, or worse—the entire piece shifting over time. I learned this the hard way early in my DIY projects. My first attempt involved just securing the vanity directly to the wall, only to find it wobbling after a few months. It was a costly mistake that could have been avoided with a better sub-base. According to experts, a proper substructure distributes weight evenly and provides stability, especially for massive slabs of stone that can weigh hundreds of pounds.1
If you’ve faced similar issues—wobbly vanities, cracked tiles beneath a heavy countertop, or troublesome leveling—you’re not alone. The good news is, with a bit of planning and the right materials, you can prevent these problems from haunting your bathroom remodels. My solution? A plywood sub-base that acts as an internal support system, offering a reliable base that resists shifting and settling.
Is a Plywood Sub-Base Actually Worth the Hype?
This is where I stumbled initially. I wondered if adding plywood beneath my vanity was necessary or just an extra step. Early on, I made the mistake of assuming that the existing flooring was enough. Spoiler: it’s not, especially with heavy stone countertops. Implementing a plywood sub-base isn’t complicated, and it significantly enhances the overall stability—saving you time, money, and frustration down the line. I’ll walk you through the process and share what I’ve learned from my experiences, so you don’t have to repeat my mistakes.
Prepare Your Workspace and Gather Materials
Start by clearing the area and removing the vanity if already in place. You’ll need high-quality plywood, measuring tape, a level, drill, screws, and construction adhesive. Having everything ready will streamline the process and ensure accuracy. I once attempted this without all tools at hand, leading to delays; having everything prepared saved me hours.
Measure and Cut the Plywood
Measure the vanity’s footprint, including any overhangs or irregularities. Cut the plywood panels slightly smaller than these measurements to allow for easy fitting and adjustment. I once mismeasured and had to redo my cuts—double-checking measurements prior prevented this issue. This step ensures a precise fit that supports the entire structure evenly.
Frame the Sub-Base with Wooden Supports
Create a frame using 2x4s if the floor is uneven or if additional support is needed. Secure the framing to the floor with concrete anchors or screws into existing subflooring. Think of it as building a foundation for a house—the stronger the frame, the more stability you’ll have. I used this method when installing in a basement with uneven concrete, and it prevented any wobbling.
Attach the Plywood to the Frame
Align the cut plywood panels onto the framing. Secure them using screws every 12 inches along the edges and across the middle for maximum stability. Use a drill to prevent splitting the wood. Applying construction adhesive beneath the plywood before screwing adds extra support, much like how double-stitched seams reinforce clothing. This combination creates a solid, unified support base.
Ensure Leveling and Stability
Place the vanity onto the newly installed sub-base. Use a level to check for unevenness; shim if necessary. Adjust the positioning until perfectly level to prevent wobbling or cracking. I once installed a vanity without leveling, leading to misaligned drawers—spending extra time to shim was worth it. Proper leveling is key to long-lasting stability.
Secure the Vanity to the Sub-Base
Finally, fasten the vanity to the plywood sub-base using screws through the base into the framing. This prevents movement over time, especially in humid environments. In my project, I drilled through the vanity’s base and attached it directly, which kept everything sturdy even with heavy usage. This step locks everything in place for lasting support.
Implementing these steps transforms a wobbly vanity into a stable fixture that withstands the test of time. For additional tips on optimizing bathroom storage and maximizing space, check out our smart storage solutions.
Many homeowners assume that installing built-ins or vanities is straightforward—measure, build, fit, and you’re done. However, the real challenge lies in understanding the fine details and common pitfalls that can compromise durability and aesthetics. One prevalent myth is that surface-level support suffices; in reality, the structural underpinnings are often overlooked, leading to sagging or damage over time.
For instance, a frequent mistake involves neglecting the importance of internal reinforcement for heavy quartz or stone tops. Relying solely on superficial mounting methods might seem sufficient initially, but without a proper sub-frame or steel support, the weight can cause warping or pulling away from the wall. An expert approach recommends integrating internal steel brackets or plywood backings that distribute weight evenly, avoiding costly repairs later.
What Do High-End Contractors Know That DIY Enthusiasts Miss?
They emphasize the significance of precise framing and load calculations tailored to each installation—especially in older structures where walls and floors may not be perfectly square or level. Ignoring these nuances can lead to uneven surfaces, creaking joints, and even structural failure. According to a study by the National Association of Home Builders, improper load distribution is the leading cause of built-in failure.
Another subtle trap is misjudging material compatibility. Using particle board for shelves or supports might seem economical but often results in sagging or swelling over time, especially in humid environments. Picking plywood or solid wood—even for internal supports—ensures longevity and stability. Also, pay attention to the importance of anchoring techniques, such as steel plates or toggle bolts, which secure heavy units firmly without risking wall damage.
In my experience, one overlooked detail is the finishing stage. Inadequate sealing or sealing gaps can allow moisture infiltration, weakening supports and causing misalignments. Applying a proper sealant or paint tailored for moisture-prone areas preserves the integrity of the installation.
For anyone eager to dive deeper into sophisticated mounting strategies, I recommend exploring our built-in storage ideas and consulting professionals via our contact page. Remember, mastering these nuances enhances both function and form, ensuring your built-ins stand the test of time. Have you ever fallen into this trap? Let me know in the comments.
Essential Tools for Long-Lasting Built-In Support
Maintaining your custom vanities and built-ins over time requires precision tools that ensure stability and durability. Personally, I rely heavily on a high-quality cordless drill, like the Makita XFD10Z, because it offers reliable power without cords, making adjustments and reinforcements easier in tight spaces. Pair it with a set of driver bits designed for various anchors—Torx and Phillips—so you’re prepared for different fasteners. I also keep a digital level, such as the Johnson Level & Tool 48” Aluminum Box Beam Level, for precise alignment, which can make or break the stability of your fixtures over years of use.
For assessing and locating studs accurately behind drywall, I use a magnetic stud finder, like the Zircon MetalliScanner, which detects metal reinforcement and embedded supports. This helps me avoid guesswork when anchoring heavy supports or mounting hardware, reducing the risk of structural failure down the line. Investing in a quality laser measure, like the Leica DISTO D2, allows quick, accurate measurements—vital when planning reinforcement or scaling updates for your storage solutions.
Software and Planning for Effective Maintenance
Beyond physical tools, I use CAD and design software such as SketchUp to plan reinforcement placements and storage modifications. Visualizing the weight distribution and support locations in 3D helps prevent future sagging or damage. Regularly updating your plans with current measurements ensures your progress remains on track, especially when dealing with complex built-ins or unusual wall configurations. These digital tools save time and prevent costly mistakes, encouraging proactive maintenance rather than reactive repairs.
How do I keep my crafted supports functioning well over time?
Routine inspections are key. Check for loose screws, brackets, and signs of wobbling every few months. Applying appropriate lubricants or sealants can prevent rust or moisture-related deterioration, especially in humid environments. For structural supports, I recommend periodically tightening fasteners with a torque wrench—like the C.T. Vanitek Torque Wrench—to ensure they maintain the correct tension. Using steel plate brackets and heavy-duty anchors, such as those described in our detailed anchoring guide, provides added resilience over many years.
Looking ahead, I believe that advances in smart hardware—like Wi-Fi-enabled level sensors—will allow homeowners to monitor their built-ins remotely, alerting them if supports become loose or compromised. As these technologies become more affordable, integrating them could revolutionize maintenance routines, making upkeep more efficient and less guesswork-based.
To get ahead, I recommend trying the tip of using a torque wrench during fastener re-tightening—this small step ensures that your supports stay secure and function as intended long after installation. Plus, staying vigilant with routine checks helps catch issues early, saving you money and effort later. If you’re ready to take your stability to the next level, consider investing in those precise tools and planning software, which have made my projects far more resilient and enduring.
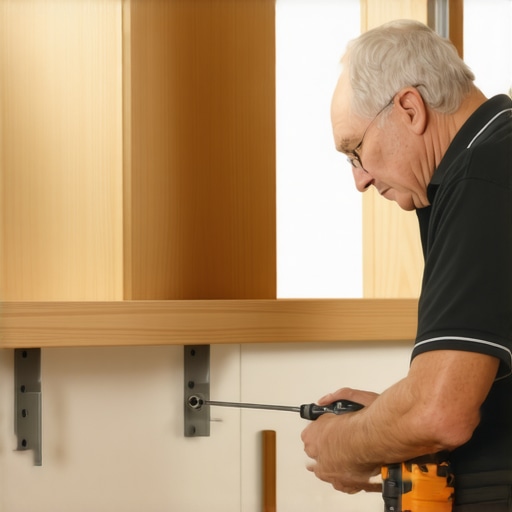
Image prompt: A professional homeowner inspecting built-in supports with a torque wrench and digital level in a modern bathroom workshop.
The Hardest Lesson I Learned About Built-Ins, Installation, Vanities, Storage Solutions
One of my biggest surprises was realizing that even small oversights in framing could lead to significant wobbles or cracks over time. I used to think that a decent level and proper screws were enough, but I found out the hard way that internal reinforcements and understanding the weight distribution are crucial for long-lasting support.
The Hidden Risks of Cutting Corners in Support Strategies
I once skipped the plywood backing for a heavy quartz vanity, believing the wall alone could bear the weight. That mistake resulted in sagging and the need for costly repairs. It taught me that trusting DIY shortcuts over proven reinforcement methods can compromise both safety and aesthetics.
Why Professionals Emphasize Internal Reinforcements
Experienced contractors always prioritize internal steel supports or plywood matrices underneath heavy built-ins because they understand load dynamics in real spaces. Incorporating these elements may seem extra work upfront, but they save future headaches and costs.
My Essential Toolkit for Stable Vanities and Built-Ins
Over time, I’ve found that a good cordless drill, a digital level, and a stud finder are indispensable for proper support. I personally prefer the Makita XFD10Z for reliable power, and the Johnson 48-inch level ensures foolproof leveling, creating a foundation that lasts. You might also explore advanced tools like laser measures and torque wrenches for precision assembly.
Moving Forward with Confidence and Creativity
The key takeaway is that a well-supported built-in isn’t just about measurement—it’s about insight, planning, and sometimes, unconventional reinforcement tactics. Take the time to plan your supports thoroughly, and don’t hesitate to consult detailed guides or professionals if you’re unsure.
For example, if you’re dealing with uneven floors or old structures, consider building a temporary frame or using adjustable supports like shims or steel brackets to get everything just right before final installation. Remember, the right support system is the backbone of your aesthetic and functional success.
Ready to Elevate Your Built-Ins? Start Now!
Embracing these lessons about internal reinforcement and proper support strategies can dramatically improve your projects’ durability and beauty. Don’t let hidden weaknesses sap your confidence. Take concrete steps today—measure twice, reinforce once—and watch your craftsmanship shine. Have you discovered a support hack that transformed your installation? Share your wisdom below!

Image prompt: A professional homeowner inspecting built-in supports with a torque wrench and digital level in a modern bathroom workshop.