

Ever felt that sinking frustration when your carefully installed cabinets don’t sit flush against that stubborn textured plaster wall? I’ve been there myself—trying to fit a sleek new vanity only to realize it gaps unevenly, making the entire room look sloppy. It’s that moment of realization that conventional tools just aren’t cutting it for textured surfaces. That lightbulb moment hit me hard: I needed a better way to scribe those cabinet lines perfectly. Today, I’m here to share how I discovered the secret weapon—The Scribing Tool—and how it transformed my approach, saving me time, headaches, and a second round of re-dos.
Why Traditional Tools Just Can’t Cut It on Textured Walls
Question: Are You Wasting Time and Material Trying to Force Fit Cabinets?
When I first started my renovation projects, I believed that measuring and using a standard saw or chisel would do the trick. Big mistake. I quickly learned that textured plaster walls are unpredictable beasts—no matter how careful you are, gaps and uneven edges crop up. Relying solely on traditional tools often results in sloppy finishes, which can be a nightmare to correct later. Early in my career, I made the mistake of ignoring the importance of precise scribing, leading to noticeable gaps that compromised both appearance and functionality. It’s a common pitfall among DIYers and even some pros who underestimate the nuances of textured surfaces. To truly get your cabinetry to sit flush, you need a tool designed specifically for this challenge—enter The Scribing Tool, a game-changer supported by industry experts who say that adopting purpose-built tools significantly improves the accuracy of custom installations. Want to see how I finally cracked the code? Keep reading, because I’ll walk you through exactly how to master this technique and elevate your craftsmanship.
Start with Accurate Measurements and Marking
During my last project, I used a simple measuring tape to mark the cabinet’s position. To achieve precision, I first determined the desired height by measuring from the floor and marking the wall at multiple points. Using a laser level or a chalk line ensures your markings are straight and level, preventing crooked installations—nothing ruins a sleek look like uneven gaps. This initial step lays the groundwork for a better fit and reduces the need for adjustments later, saving time and materials.
Prepare Your Walls and Accessories
Before drilling, inspect your textured wall for loose plaster or debris. I remember drilling into a wall and realizing the surface was crumbly, which compromised the anchors. To prevent this, I lightly sand the area or apply a bonding primer to create a more stable surface. Select appropriate fasteners—toggle bolts or heavy-duty anchors—especially for heavier cabinets. This readiness ensures your installation is sturdy and safe, especially if you plan to hang substantial storage like built-in units or vanities.
Use a Scribing Technique for an Exact Fit
This is where the magic happens. I recently installed a custom vanity against an uneven wall, and standard measurements weren’t enough. Instead, I employed a scribing process: I held a flexible spacer against the wall and traced its contour onto a template or directly onto the cabinet’s edge. Then, I carefully cut or sanded the cabinet to match the wall’s irregularities. Think of it as molding the cabinet to the wall, instead of forcing the wall to fit the cabinet. This method guarantees a tight, professional seal and minimizes gaps that are tough to conceal later.
Transforming Gaps into Seamless Lines
Once the cabinet is positioned, use a high-quality filler or caulk to conceal small imperfections or gaps. For larger irregularities, consider installing a filler strip or trim designed for textured surfaces. Remember, brute-force adjustments often lead to visible unevenness. Instead, take your time contouring and blending these areas—your finished look will be markedly more polished. If you have complex wall textures, exploring [creative built-ins](https://customcabinetrypro.com/creative-built-ins-for-seamless-storage-and-home-aesthetics) can provide options that work with irregular surfaces while adding style.
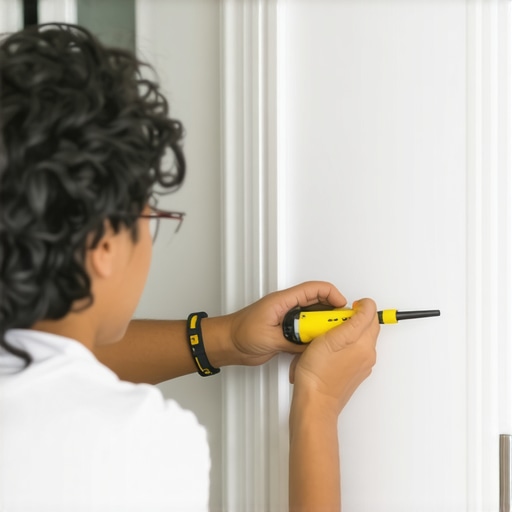
Image showing a person using a flexible scribing tool to trace wall contours onto a cabinet edge for precise cutting, against a textured wall backdrop.
Many homeowners jump into installing vanities or built-ins assuming that standard measurements and generic designs will suffice. However, this oversimplification leads to costly mistakes and unsatisfactory results. The reality is that storage solutions are more nuanced than many realize, and understanding these subtleties can make the difference between a cluttered mess and a sleek, functional space.
One common myth is that larger cabinets or more shelves automatically lead to better organization. In truth, space utilization is a sophisticated art that involves tailoring storage to your specific lifestyle and usage patterns. For example, incorporating adjustable dividers and custom compartments—like those discussed in [creative storage solutions](https://customcabinetrypro.com/creative-storage-solutions-for-vanities-declutter-in-style)—can vastly improve accessibility and prevent clutter from accumulating.
Addressing the advanced aspects, many overlook the importance of wall integrity when installing heavy built-ins. Relying solely on standard anchors without considering the wall material can lead to instability or even detachment over time. Experts emphasize the need for internal reinforcements, especially in older or textured walls, to maintain long-term durability. According to a recent study by the Home Improvement Institute, integrating steel brackets or internal steel ribs during installation significantly reduces wobbling and prolongs the lifespan of built-ins.
A critical mistake is underestimating the complexity of integrating storage within existing architectural features. For instance, forcing a standard vanity into an irregular alcove without proper scribing results in gaps, uneven edges, and an unpolished look. This is where a detailed approach—such as custom scribing for uneven walls—becomes invaluable. Learning the internal tricks of precise measurements and contour matching can save time and prevent the frustration of rework.
For sophistication’s sake, consider the significance of moisture and environmental factors, which most beginners ignore. Climates with high humidity demand sealed or moisture-resistant cabinetry to prevent warping and mold. This nuance is often missed, leading to premature deterioration. Proper material selection and sealing techniques—like moisture-proof bases—are essential, as highlighted in expert guides on bathroom cabinetry.
In summary, adopting an advanced mindset toward storage solutions involves recognizing these subtle yet impactful details: precise wall assessments, strategic reinforcement, custom fitting, and environmental considerations. These steps ensure that your installations are not only functional but also enduring. To explore more about innovative hybrid solutions that maximize space, visit [effortless storage solutions](https://customcabinetrypro.com/effortless-storage-solutions-for-a-tidy-stylish-home). Have you ever fallen into this trap? Let me know in the comments.
Ensuring your cabinetry and built-ins stay functional and beautiful over time requires more than just expert installation; it hinges on proper maintenance and selecting the right tools for ongoing care. From specialized cleaning equipment to durable hardware, I’ve accumulated a set of recommendations that have kept my projects in top shape for years. This practical approach not only prolongs the lifespan of your storage solutions but also makes future updates and repairs more manageable.
Invest in Quality Hand Tools for Routine Care
For daily maintenance, I rely heavily on a precision magnetic screwdriver and a soft microfiber cloth. The screwdriver ensures quick tightening of loose screws—common in high-use areas like cabinet pulls or hinges—preventing sagging or misalignment. The microfiber cloth gently removes dust and fingerprints without scratching delicate surfaces. These simple tools save time and keep your cabinetry looking pristine without invasive procedures.
Use Specialized Cleaners to Preserve Finishes
I recommend avoiding harsh chemical cleaners that can degrade wood finishes or laminate surfaces. Instead, opt for a mild wood cleaner or a solution of distilled water with a drop of gentle dish soap. For stubborn grime, a mixture of vinegar and water applied sparingly works wonders—just ensure to wipe with a damp cloth afterward. Regular cleaning prevents buildup that can lead to scratches or warping, especially in humid environments like bathrooms or kitchens.
Hardware Replacement Tools for Long-Term Upkeep
Over time, hinges, drawer slides, and pulls may need replacement or adjustment. Having an inline rivet gun, a mini pry bar, and a set of replacement hardware—like soft-close hinges or aluminum drawer glides—at your disposal makes these upgrades straightforward. I’ve found that upgrading to soft-close mechanisms not only enhances user experience but also reduces wear and tear. Check out [expert guide to flawless vanity installation tricks and tips](https://customcabinetrypro.com/expert-guide-to-flawless-vanity-installation-tricks-tips) for comprehensive advice on hardware upgrades that last.
Incorporate Climate-Control Strategies
Moisture and temperature fluctuations pose long-term threats to cabinetry. Installing a dehumidifier or climate control vents in storage areas helps prevent warping, mold, and loosening of joints. Regular inspections for signs of moisture damage—such as swelling or discoloration—are vital. For high-moisture zones, consider applying a moisture barrier paint or sealant to interior surfaces. Proper environmental control is a cornerstone of maintenance that ensures your storage remains resilient over the years.
Future Trends and DIY Maintenance
Looking ahead, technological advances like smart sensors could monitor humidity, temperature, and even detect early signs of deterioration, alerting homeowners before issues escalate. I predict that integrating IoT devices with your cabinetry’s environment will become standard practice—making maintenance predictive rather than reactive. Meanwhile, as DIYers, embracing these tools and routines empowers us to extend the life of our investments significantly.
Ready to take your storage solutions to the next level? Try implementing a regular cleaning schedule using a microfiber cloth and mild cleaner, then schedule a hardware check every six months. These small steps, combined with strategic upgrades, will keep your built-ins functioning flawlessly for years. Dive deeper into proper reinforcement techniques by exploring [the internal steel rib move for supporting heavy media consoles](https://customcabinetrypro.com/the-internal-steel-rib-move-for-supporting-heavy-media-consoles), ensuring your investment stands the test of time.
The Hidden Lessons That Shaped My Approach to Textured Walls
One of the most eye-opening realizations was that patience trumps speed. Initially, I rushed through measurements, expecting standard tools to do the job, only to face uneven gaps and frustration. The moment I slowed down, took the time to observe wall contours, and embraced custom scribing techniques, everything changed. This taught me that embracing imperfections with tailored solutions leads to far superior results—which is a mindset I wish I adopted earlier.
Another insight was understanding when to push and when to adapt. There were projects where stubborn resistance made me cling to traditional methods, resulting in rework. Recognizing wall irregularities and adjusting my approach—like incorporating flexible templates rather than forcing a square peg into a round hole—was transformative. This flexibility allowed me to execute a seamless finish and develop a keener eye for unique architectural features.
Finally, investing in the right tools made an undeniable difference. Whether it was a high-quality flexible scribing tool or specialized fasteners for uneven surfaces, the right equipment empowered me to tackle challenges head-on. Supporting my technique with reliable resources created a feedback loop of continuous improvement, making each project smoother and more satisfying than the last.
My Go-To Resources for Expert-Level Storage and Installation Mastery
Over time, I gathered a collection of tools and references that elevate my work. First, the Innovative Storage Solutions Guide provides insights into space-maximizing designs that adapt to irregular surfaces—the core of aesthetic and functional success. For hands-on techniques, the Vanity Installation Tricks is invaluable, offering step-by-step guidance complemented by real-world examples. My toolkit wouldn’t be complete without a set of heavy-duty anchors and a flexible scribing kit that allows me to tailor each piece to the wall’s unique quirks. These resources have become my trusted companions on every project, turning potential headaches into opportunities for craftsmanship.
Your Next Big Step Begins Here
Remember, mastery of textured wall installations isn’t about perfection from the start—it’s about thoughtful adjustments and learning from each experience. By embracing the nuances and leveraging the right tools and resources, you can achieve installations that look professionally done and stand the test of time. Don’t let textured walls intimidate you—see them as an opportunity to hone your skills and create truly customized spaces. Ready to apply these insights to your next project? The transformation awaits—go forth and craft with confidence!
What’s your biggest challenge when installing cabinetry against uneven or textured walls? Share your story below—I’d love to hear how you’re overcoming it!