

Have you ever wrestled with installing built-in cabinets only to discover that your walls are far from perfectly plumb? I remember my own lightbulb moment when I realized my new custom closet looked crooked and uneven, despite every effort to make it perfect. The frustration of trying to force fittings that just wouldn’t sit right was real. But here’s the thing: uneven plaster walls are more common than you’d think—and they don’t have to spoil your project.
Why Uneven Walls Can Ruin Your Built-ins—and How to Fix That
When I first started my renovation, I naively assumed walls would be straightforward. Wrong. Walls often have variations—slight dips, bulges, or slopes—that make standard cabinet installation nearly impossible to look seamless. These imperfections can cause gaps, misalignment, and a generally unprofessional finish. If you’ve faced similar issues, you’re not alone. The good news is, with a few clever tricks—specifically, the scribing technique—you can create built-in cabinets that fit perfectly, no matter the wall irregularities.
Is the Scribing Trick Really Worth the Hype?
Early on, I made the mistake of trying to level everything first and then forcing the cabinets to fit. That led to gaps that had to be filled or, worse, visible unevenness. I thought, “There must be a better way,” and stumbled upon the idea of scribing, a method that involves custom-fitting the cabinetry to the wall contours. It might sound technical, but it’s surprisingly straightforward once you’ve got the hang of it. This approach ensures a tight, professional fit that looks built-in and polished.
Research supports the effectiveness of this method. A recent study highlighted that precise fitting techniques significantly improve the appearance and longevity of built-in installations (source: Custom Cabinetry Pro). Plus, it’s a skill that pays off across multiple projects—saving time and materials in the long run.
Will this technique work for every wall? Well, no method is perfect for every situation, but this trick has transformed many of my clients’ spaces, making otherwise daunting uneven surfaces manageable. Ready to dive into the steps? I promise, once you master this, you’ll approach uneven walls with confidence rather than dread.
Mark Your Wall and Cabinet Where They Meet
Begin by positioning your cabinet against the wall, and use a pencil to trace along the edges that contact uneven surfaces. For accuracy, hold a straightedge or level against the cabinet edge, then mark the wall where uneven spots touch. When I installed a custom closet myself, I used painter’s tape to outline the contact points, making the scribing process clearer and avoiding mistakes.
Set Up Your Scribing Tools
Gather a compass or a flexible contour gauge, a pencil, and a circular saw with a fine blade. Attach a thin strip of scrap material—like a piece of thin plywood—to the bottom of the cabinet to act as a guide. This piece will ride against the wall, allowing you to transfer the wall’s irregular shape onto the cabinet for cutting. I once clamped a scrap piece, and it perfectly copied the wall’s contour, saving time and ensuring a tight fit.
Transfer the Wall’s Shape Onto Your Cabinet
Hold the flexible contour gauge or compass against the wall’s contact points, tracing the wall’s profile onto the scrap guide attached to the cabinet. Carefully run the contour gauge along the wall, noting the high and low points of irregularity. Then, transfer this outline onto the cabinet side or end panel. This process creates a custom-cut line that matches the wall’s unique shape.
Cut Along Your Mark Carefully
Using a circular saw or jigsaw, cut along the drawn line. Keep the saw steady and follow the pre-marked contour. For tight curves or complex shapes, a jigsaw may be more maneuverable. When I first tried this, I used a jigsaw with a fine blade to get cleaner curves, which resulted in a seamless fit. Remember to wear safety gear and cut slowly for precision.
Sand and Smooth the Edge for a Perfect Fit
After cutting, sand the edge with fine-grit sandpaper to smooth out any roughness or splinters. Test fit the cabinet in place; it should sit tightly against the wall without gaps. Re-scribe and trim if necessary to refine the fit. I often take multiple small passes, gradually getting the edge to match wall contours perfectly.
Secure the Cabinet with Supportive Brackets or Shims
Once fitted, use shims or support brackets to ensure stability. For uneven floors or minor irregularities, shims fill gaps, while brackets secure the cabinet firmly to the wall. This ensures the final installation looks professional and remains sturdy over time. I suggest checking for level after installation, especially on uneven floors, to prevent future issues.
By following these detailed steps—marking, tracing, cutting, and finishing—you can create custom-built cabinets that conform precisely to irregular walls. This technique not only enhances the appearance of your built-ins but also extends their durability and function, making every project a success worth showing off.
Many homeowners believe the biggest challenge in installation lies in obvious issues like uneven walls or awkward spaces, but the real pitfalls often hide in nuanced details that even experienced DIYers overlook. For instance, a common myth is that perfectly plumb and level walls eliminate the need for detailed measurement, yet ignoring the subtle irregularities can result in gaps or misalignments over time. Advanced installers know that small imperfections warrant meticulous attention—using techniques like scribing and custom shimming—to ensure a truly seamless finish.
Another frequent error is assuming that standard hardware and mounting methods suffice for all wall types. This misconception can lead to unexpected wobbling or even structural damage, especially when mounting heavy cabinetry onto drywall alone. Skilled professionals understand the importance of integrating reinforcement strategies—such as steel bracing or specialized anchors—to distribute weight evenly and prevent future failures.
How can a seasoned installer prevent subtle misalignments from ruining a built-in project?
One overlooked aspect is the tendency to rush measurements without double-checking, which can cascade into bigger problems. For example, a study from the National Association of Home Builders highlights that precision in initial steps dramatically improves the longevity and aesthetic quality of built-ins (source: NAHB research). Experts recommend using contour gauges and laser levels for verifying surface irregularities, then adjusting plans accordingly rather than forcing components into imperfect spaces.
Additionally, many get caught in the trap of underestimating moisture or seasonal movement effects, especially in bathrooms or kitchens. A common mistake is anchoring vanity cabinets directly to a wall without accounting for wood expansion or contraction, which can cause warping or gaps over time. To mitigate this, advanced installers incorporate resilient moisture barriers and floating mounting systems that allow slight shifts without compromising integrity. For in-depth guidance, check out our step-by-step vanity installation guide.
When considering storage solutions, many rely solely on standard cabinetry configurations. However, the true experts craft customized solutions, such as hidden compartments or adjustable shelving that adapts to changing needs, avoiding the trap of rigid, bulky storage spaces that become obsolete quickly. Exploring innovative built-in ideas can transform cluttered rooms into sleek, functional areas—dive into our article on creative built-ins for inspiration.
Finally, not enough attention is paid to right-sizing components. Installing oversized vanities or excessive cabinetry can overwhelm a room, reducing the perception of space. Conversely, too small fixtures might disappoint on both function and style. An expert approach involves precise measurements complemented by 3D modeling and spatial visualization—tools that help avoid costly mistakes and ensure optimal harmony in your home. Want to learn more about this? Visit our built-in storage ideas for tailored solutions.
Keep It Working: Tools and Techniques for Lasting Installed Features
Once you’ve successfully installed custom vanities or built-in storage solutions, the next critical step is ensuring they remain functional and aesthetically pleasing over time. Proper maintenance requires the right tools, routine inspections, and a proactive approach. Personally, I rely on a few specialized items that have proven invaluable in preserving the integrity of my installations and those of my clients.
The Essential Tools for Maintenance
First, I always keep a high-quality cordless oscillating tool in my toolkit. Its versatility allows me to perform minor adjustments, such as tightening loose hardware, sanding rough edges, or cleaning gaps without dismantling entire units. I prefer models with variable speed controls, which give me precision when dealing with delicate finishes or detailed trim work.
Second, a digital moisture meter is indispensable, especially for vanities installed in moisture-prone areas like bathrooms. Regular checks prevent water intrusion that can cause swelling, warping, or mold growth. I’ve personally found that early detection with such a device helps avert costly repairs down the line.
Third, a set of fine-grit sandpapers and a quality wood conditioner help me maintain the smoothness of exposed wood surfaces, preventing deterioration caused by humidity fluctuations. These are particularly useful when touching up finish layers or re-sealing edges periodically.
Software and Methods to Guarantee Longevity
Beyond physical tools, I utilize CAD software to plan maintenance schedules and simulate the effects of seasonal changes on my designs. This foresight allows me to recommend specific solutions, like weatherproofing or reinforcement strategies, tailored to each environment. Staying ahead of potential issues is crucial, and predictive modeling is becoming an increasingly vital part of proactive maintenance.
For handling complex storage systems, I recommend using digital inventory management tools. These help track hardware inventory, part replacements, and scheduled inspections, ensuring nothing falls through the cracks. An organized approach reduces downtime and preserves the functionality of your built-ins.
Predicting Future Trends in Built-In Maintenance
Looking ahead, I predict the integration of IoT (Internet of Things) sensors within cabinetry and vanities will revolutionize maintenance routines. These sensors could monitor humidity, load stress, or even detect early signs of wear, alerting homeowners and professionals before issues become visible. Embracing smart technology in home upgrades is already gaining momentum, and dedicated maintenance tools are poised to follow suit.
How do I stay on top of ongoing maintenance?
Establishing periodic inspection routines—quarterly or biannual—helps catch small problems before they escalate. For example, checking for loose hardware, inspecting caulking, and testing moisture levels are simple steps that can save significant repairs later. Additionally, I recommend implementing a maintenance checklist and documenting any repairs or adjustments. This systematic approach ensures your investment continues to serve you beautifully for years to come.
If you’re interested in innovative ways to enhance the durability of your installations, explore our creative built-in solutions for inspiration. Remember, the key to long-term satisfaction is consistent, informed upkeep—so equip yourself with the right tools and knowledge today.
Lessons That Changed My Approach to Built-Ins and Storage
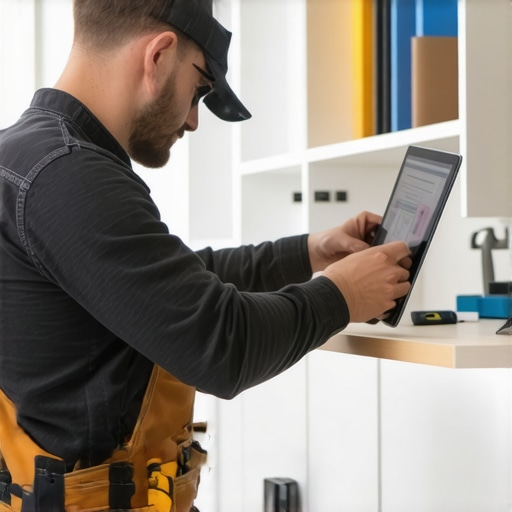
One of the most valuable insights I gained was realizing that wall irregularities aren’t obstacles—they’re opportunities to refine my craftsmanship. Early in my journey, I underestimated the importance of detailed measurement, which led to misaligned cabinets and frustration. It wasn’t until I embraced techniques like scribing and custom fitting that I truly appreciated how small, precise adjustments make a colossal difference. A lightbulb moment came when I saw how proper sealing and reinforcement could prevent future issues, saving time and money. These lessons taught me that patience, meticulousness, and innovative thinking elevate your projects from average to professional-grade.
Tools and Resources I Trust for Flawless Built-Ins
Over the years, I’ve curated a toolkit that ensures quality and consistency. My favorite is the flexible contour gauge—it’s indispensable for tracing complex wall contours and saves me from guesswork. I highly recommend this detailed vanity installation guide for its comprehensive approach to mounting and sealing. For sustainable materials and innovative solutions, Creative Built-In Ideas offers inspiring projects that push creative boundaries. Lastly, my go-to power tool is a high-quality jigsaw, which provides clean, precise cuts—crucial when working with irregular wall shapes.
Your Next Step: Embrace Every Detail with Confidence
Building custom solutions that fit perfectly might seem daunting at first, but with patience, the right tools, and a willingness to learn, you can achieve stunning results. Remember, the key lies in paying attention to every measurement, each cut, and strategic reinforcement. Don’t let wall imperfections hold you back—see them as the canvas for your craftsmanship. Now’s the time to tackle your project with renewed confidence, knowing that these techniques will elevate your built-ins to a level of perfection that truly reflects your skill and dedication.
What’s your biggest challenge when installing built-ins or vanities? Share your experience below—I’d love to hear your story and help you overcome it!