

I still remember the sound—a sickening thud and the sharp crunch of gypsum—at three in the morning. I walked into the hallway to find my modern entryway hook rack lying face-down on the floor, buried under a pile of heavy winter parkas and two overstuffed backpacks. I’d used the supposedly heavy-duty plastic anchors that came in the box, thinking they’d hold up against the daily chaos of a busy household. I was wrong. It’s a classic mistake, and honestly, it’s one I made several times before I finally stopped trusting the hardware store’s promises. If you’ve ever looked at a gaping hole in your wall and wondered why a simple hook couldn’t handle a leather jacket, you’re in the right place. Today, I’m going to show you how to execute the structural cleat move so your entryway gear stays exactly where you put it. We are moving past the quick fixes and diving into [built-in storage ideas to declutter and enhance your home](https://customcabinetrypro.com/built-in-storage-ideas-to-declutter-and-enhance-your-home) that actually last a lifetime.
Stop Relying on Luck and Start Building for Real Weight
Early in my DIY journey, I thought the secret to strength was just a bigger screw. I once tried to mount a massive oak rack using three-inch lags directly into the drywall because I couldn’t find the studs where I wanted the hooks to sit. Within a week, the weight of the wood alone started to pull the top of the rack away from the ceiling, creating a massive lever that eventually crushed the drywall behind it. This is why [effortless storage solutions for a tidy stylish home](https://customcabinetrypro.com/effortless-storage-solutions-for-a-tidy-stylish-home) often fail—they ignore the physics of load-bearing. According to technical data from the Gypsum Association, standard half-inch drywall is not engineered to support high-torque, concentrated loads without direct structural reinforcement. This is where the structural cleat comes in. It’s essentially a hidden backbone that distributes weight across multiple studs, much like [the sub-frame strategy for rock-solid entryway benches](https://customcabinetrypro.com/the-sub-frame-strategy-for-rock-solid-entryway-benches). By anchoring a solid piece of timber or plywood into the framing first, you create a mounting surface that can hold hundreds of pounds without breaking a sweat. Have you ever felt that sinking feeling when a hook starts to wiggle the moment you hang your bag?
Can’t I Just Use Better Drywall Anchors?
It is tempting to reach for those fancy metal toggle bolts and call it a day. But here is the reality: even the strongest anchor is only as strong as the paper and gypsum it’s gripping. When you hang a heavy bag on a hook, it creates a prying motion that wants to pull the top of the hook out and push the bottom into the wall. A structural cleat eliminates this physics problem by creating a rigid bridge. It’s the same logic we use for [the structural cleat strategy for heavy mudroom lockers](https://customcabinetrypro.com/the-structural-cleat-strategy-for-heavy-mudroom-lockers). In this guide, we’re going to walk through the exact measurements and mounting techniques I now use to ensure my entryways are as durable as a commercial locker room.
Build the Backbone with a Plywood Plate
To stop the cycle of sagging racks and crumbling gypsum, you need to think of your wall as a skeleton. The studs are the bones, and your cleat is the muscle that holds everything together. I always reach for 3/4-inch ACX plywood when I’m doing [the plywood plate move for secure entryway bench anchoring](https://customcabinetrypro.com/the-plywood-plate-move-for-secure-entryway-bench-anchoring). Unlike standard pine boards, which are prone to splitting when you drive multiple heavy-duty screws into a small area, plywood’s cross-grain construction grips threads like a vice. I remember a project three years ago where I tried to skip this step for a client’s mudroom. I thought I could just hit the studs through the back of the cabinet. Three months later, the weight of their winter gear had actually pulled the cabinet face-frame forward, a classic case of [why your mudroom bench is pulling away from the wall](https://customcabinetrypro.com/why-your-mudroom-bench-is-pulling-away-from-the-wall). Now, I never install a heavy hook rail without a recessed or surface-mounted plywood ledger.
Why Plywood Beats Solid Pine Every Time
Plywood offers dimensional stability that solid wood just can’t match in high-humidity areas like an entryway. If you are integrating this into a larger project, like [creative built-ins for seamless storage and home aesthetics](https://customcabinetrypro.com/creative-built-ins-for-seamless-storage-and-home-aesthetics), the plywood acts as a bridge. It allows you to place your hooks exactly where you want them, rather than being forced to space them 16 inches apart to match the wall studs. This flexibility is vital when you are trying to maximize every inch of a small foyer.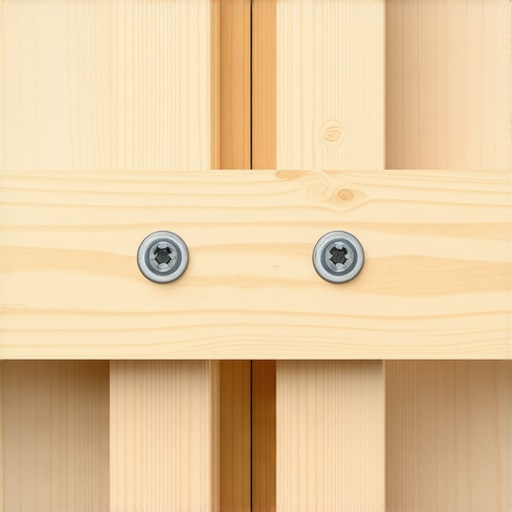
The Three-Step Secure Mount Process
The execution is where most DIYers lose their nerve. Start by locating at least two—ideally three—studs using a high-quality sensor. Once found, I mark their centers and transfer those lines to my plywood cleat. I once rushed this part on a vanity project and ended up with a slanted mess that looked like a funhouse mirror; it taught me that even [vanity installation hacks that save time and money](https://customcabinetrypro.com/vanity-installation-hacks-that-save-time-and-money) require a level baseline. Drive 3-inch GRK structural screws through the cleat and deep into the framing. You aren’t just looking for a snug fit; you want the cleat to feel like it’s part of the house. This is the same principle I use in the [expert guide to flawless vanity installation tricks tips](https://customcabinetrypro.com/expert-guide-to-flawless-vanity-installation-tricks-tips) to ensure heavy stone tops don’t crush the cabinetry below.
Reinforce the Corners for Maximum Torque
When you hang a heavy backpack, it doesn’t just pull down; it pulls out. To combat this leverage, I often use [6 heavy-duty L-brackets for reinforcing custom built-in units](https://customcabinetrypro.com/6-heavy-duty-l-brackets-for-reinforcing-custom-built-in-units-2) if the cleat is hidden inside a cabinet or cubby. If the cleat is exposed, I prefer to countersink my screws and plug them for a seamless look. By using [the structural cleat strategy for heavy mudroom lockers](https://customcabinetrypro.com/the-structural-cleat-strategy-for-heavy-mudroom-lockers), you create a mounting surface that can withstand the daily abuse of a family of five. It turns a decorative hook into a structural anchor point that won’t budge, even if someone decides to use the coat rack as a climbing wall.
Stop Trusting the Hardware Store’s Pack-in Screws
Everyone tells you to use the screws that come in the box, but in my experience, those are usually the first things that fail under real-world pressure. They are often made of soft zinc and lack the shear strength to handle what I call dynamic leverage—the extra force applied when someone leans on a hook or pulls on a drawer. According to the Architectural Woodwork Institute (AWI) Quality Standards, structural fasteners for premium-grade cabinetry must engage the framing by at least 1.5 inches to guarantee long-term stability. If you’re using those flimsy 1-inch screws that came with your heavy-duty kit, you’re essentially building on sand. This is a common trap in [creative storage solutions for vanities to declutter in style](https://customcabinetrypro.com/creative-storage-solutions-for-vanities-declutter-in-style) where the weight of grooming tools and products adds up faster than you’d think.
Why Does Your Perfectly Level Vanity Still Have Uneven Gaps?
The most frustrating nuance of high-end installation is realizing that level does not always mean correct. You can have a cabinet perfectly level according to the bubble, but if the wall behind it has a slight bow, the entire face frame will twist as you tighten the mounting screws. This torque is exactly how [how to fix uneven gaps in custom built-in doors](https://customcabinetrypro.com/how-to-fix-uneven-gaps-in-custom-built-in-doors) becomes a nightmare. To avoid this, I always use [the scribing hack for fitting vanities against out-of-plumb walls](https://customcabinetrypro.com/the-scribing-hack-for-fitting-vanities-against-out-of-plumb-walls). By shaving the cabinet to match the wall’s specific personality, you ensure the box stays square, which is the only way your doors and drawers will ever stay aligned long-term.
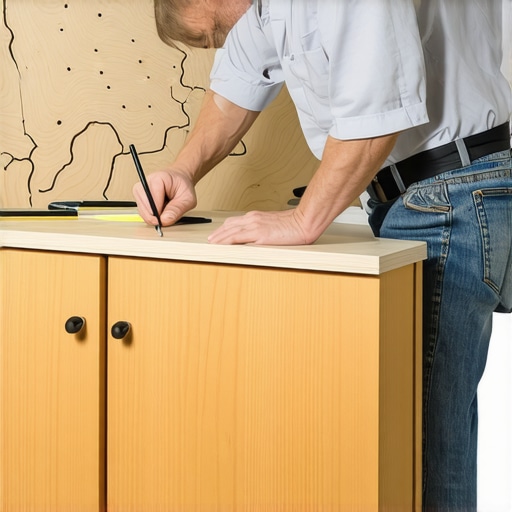
Don’t Let Your Quartz Countertop Crush Your Cabinetry
One of the biggest oops factors I see today involves the massive trend of heavy stone surfaces. People love the look of 3cm quartz, but they forget that a double-vanity slab can weigh over 300 pounds. If you haven’t reinforced the internal vertical supports, you’ll eventually notice [why your heavy quartz vanity is cracking the cabinet frame](https://customcabinetrypro.com/why-your-heavy-quartz-vanity-is-cracking-the-cabinet-frame). The point-loading at the corners can literally shear the staples or screws right out of the side panels. For floating units, this is even more critical; you need [6 heavy-duty wall fixes for massive quartz top vanities](https://customcabinetrypro.com/6-heavy-duty-wall-fixes-for-massive-quartz-top-vanities-3) to transfer that load directly into the wall studs rather than relying on the cabinet box’s structural integrity alone. Learning [how to support quartz counters on custom floating vanities](https://customcabinetrypro.com/how-to-support-quartz-counters-on-custom-floating-vanities) is the difference between a bathroom that looks great for a month and one that lasts a generation. Have you ever fallen into this trap of trusting the box to hold more than it was meant to? Let me know in the comments.
Invest in the Tools That Don’t Lie to You
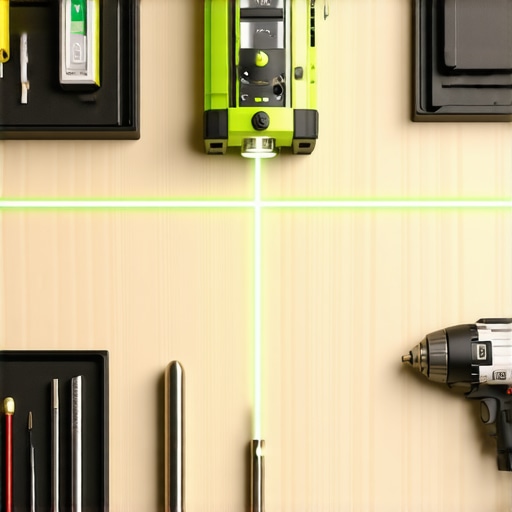
If you want to move past the ‘weekend warrior’ phase, you have to stop relying on a five-dollar plastic level. I personally swear by a self-leveling cross-line laser, like the Bosch GLL series, because it allows me to see the entire ‘plane’ of a wall at once. This is the only way to effectively execute the scribing trick for cabinets against uneven masonry or to ensure your heights are consistent across a ten-foot span of creative built-ins for seamless storage and home aesthetics. Another non-negotiable in my kit is a high-torque impact driver with a dedicated depth setter. Why? Because over-driving a screw by even an eighth of an inch can split the internal framing of a cabinet, leading to why your built-in face frames are separating from the wall. Precision isn’t just about how it looks on day one; it’s about ensuring the structural integrity remains intact through a decade of heavy use.
How do I maintain my custom storage systems over the next decade?
The biggest threat to your hard work isn’t weight—it’s the change of seasons. Wood is a living material that breathes. During the humid summer months, your drawer fronts might start to rub; by winter, you might see gaps. To combat this, I recommend a ‘hardware audit’ every six months. Take a screwdriver and give every hinge and drawer slide screw a quarter-turn. According to technical specifications from Blum’s Dynamic Load Capacity testing, hardware performance is significantly compromised if mounting screws lose even 10% of their torque. Keeping these tight prevents the dreaded ‘sag’ and ensures you won’t need to look up why your soft close drawers are slamming and the tension fix three years down the line. If you notice your doors aren’t sitting flush, don’t wait—use the integrated adjustment screws on your European hinges to bring them back to square before the wood takes a permanent ‘set’ in a warped position.
The Future of Built-ins is Getting Smarter
Looking ahead, I see a massive shift toward integrated tech. We are moving beyond simple shelves and into top trends in vanity designs you need to know in 2025, which include built-in wireless charging pads and moisture-sensing ventilation. Imagine a vanity that automatically kicks on a toe-kick fan if the humidity inside the cabinet exceeds 60%. This isn’t science fiction; it’s the next step in preventing why your laundry room cabinets are warping. By incorporating the stealth venting move for built-in media centers 2 now, you are future-proofing your home for the next wave of smart-home integration. I’m already starting to specify recessed channels for COB LED strips in every closet project to avoid the ‘dark cave’ syndrome of traditional deep shelving.
My biggest piece of advice for your next project? Don’t just build for the space you have—build for the weight you haven’t bought yet. If you’re currently planning a bathroom upgrade, I challenge you to try the vanity installation hacks that save time and money by adding a 3/4-inch plywood backer behind your drywall before the final paint. It’s a small ‘pro move’ that makes maximizing space innovative built-in solutions for small rooms much easier when you don’t have to hunt for studs through a finished wall. Your future self will thank you when you decide to swap that standard mirror for a heavy, lighted medicine cabinet.
Hard-Earned Lessons from a Decade of Stripped Screws and Sagging Shelves
I’ve learned the hard way that a beautiful entryway is useless if it’s fragile. One of my biggest lightbulb moments was realizing that dynamic weight—the force of a child jumping to grab their bag or a pet snagging a coat—is three times more destructive than static weight. If you aren’t over-engineering for those moments of sudden torque, you’re setting yourself up for a repair job. I also found that maximize your space with custom vanities expert design tips often boils down to how well you manage the interface between wood and wall. Another revelation? Never skip the moisture check. Even in an entryway, damp winter coats can cause wood to move over time, which is why I often apply the same logic found in 7 moisture barriers for vanities in high humidity bathrooms to protect my structural cleats from seasonal swelling.
#IMAGE_PLACEHOLDER_E#
The Gear That Never Fails My Entryway Builds
If you want professional results, you have to look past the bargain bin at the hardware store. I personally recommend GRK R4 Multi-Purpose screws; their self-tapping heads and high shear strength mean they won’t snap when the hooks are fully loaded. For precision, I never start a build without the scribing tool for cabinets against textured plaster walls 2, as it is the only way to ensure your cleat sits perfectly flush against a wonky wall. I also rely on the Architectural Woodwork Institute (AWI) standards as my benchmark for load-bearing requirements, ensuring every hook I install can handle the rigors of real life. These tools are the foundation for creating innovative storage solutions to transform your bathroom and mudroom alike.
Transform Your Hallway into a Fortress of Organization
Building something that lasts a lifetime isn’t about perfection; it’s about the preparation you put into the parts no one ever sees. When you take the time to mount that structural cleat and choose the right fasteners, you aren’t just hanging hooks—you’re creating peace of mind. As you look toward top trends in vanity designs you need to know in 2025, remember that durability is the ultimate luxury. Go ahead, clear the clutter, and build something rock-solid. Your storage solutions should be as enduring as the home they serve. What is the heaviest, most awkward item you have ever tried to hang on a wall hook? Let me know in the comments below!