

Picture this: I’m in my closet, attempting to hang a new, heavy-duty wardrobe rod. It’s a sturdy piece, designed to hold more than just a few shirts. I tighten the brackets, and suddenly—crack! One side gives way. The rod teeters perilously, and I realize I’ve been tackling this all wrong. It was a lightbulb moment that led me down a path to a surprisingly simple yet effective solution: The T-Bracket Strategy for Heavy Wardrobe Rods.
Why Heavy-Duty Storage Deserves Clever Support
Cluttered closets, awkwardly installed shelves, and heavy wardrobe rods can all become sources of frustration. I used to poke around in my closet, struggling to find space and worrying about the safety of my hanging clothes and fixtures. The problem is, traditional brackets often can’t handle the weight, especially when you’re dealing with bulkier or thicker rods. Over time, this can cause damage to drywall, make the entire setup shaky, and even lead to real safety hazards. Believe me, I’ve been there—wishing for a more reliable way to support my heavy wardrobe rods and keep everything securely in place.
That’s when I discovered the concept of the T-Bracket—an innovative support that provides extra stability, especially for those heavier loads. If you’ve ever faced the sinking feeling of a sagging closet rod or the hassle of frequent repairs, then I promise this strategy is worth a try. It’s not just about hanging clothes; it’s about creating a safe, durable storage solution that lasts.
Is Reinforcing Your Closet Support Really Necessary?
Early on, I made a mistake that many newcomers do—assuming that standard brackets could handle the load. Turns out, most of those brackets aren’t designed for heavy use. According to expert tips from professional guides, using improper mounting hardware can cause your fixtures to weaken over time, leading to sagging or worst-case scenarios, like falling wardrobe rods. My first attempt felt sturdy at first, but within months, signs of strain appeared. That’s when I realized the importance of proper reinforcement—enter the T-Bracket solution.
In this post, I’ll walk you through how to implement this simple yet powerful fix. We’ll cover everything from selecting the right brackets to installation tips that will make your wardrobe support as reliable as a neighbor you can trust. Ready to turn your cluttered closet into a fortress of support? Let’s get started, and you’ll soon see why this approach is a game-changer for heavy wardrobe rods and beyond.
Secure Your Support with Proper Brackets
Start by selecting the right T-brackets designed for heavy-duty use. I remember rummaging through my toolbox last weekend, pulling out a set of industrial-grade T-brackets. These are like the steel beams for your wardrobe—solid and unyielding. Attach the brackets to the wall studs using high-quality lag bolts, not just drywall anchors, to ensure they can bear the weight. Using a stud finder to locate the studs is critical; I once installed brackets over an empty space, leading to sagging within months. Always confirm your wall’s structure before drilling.
Mark and Measure Precisely
Accurate marking is the backbone of a sturdy installation. I used a level to draw a straight line across the wall where the rod will sit, making sure everything was perfectly aligned. Measure the length of your wardrobe rod and mark the exact spots for brackets on both ends, leaving a slight margin for adjustment. A careful approach prevents uneven hanging and future sagging, which I’ve experienced firsthand when rushing measurements last time.
Prepare the Wall for Heavy Loads
Wall reinforcement is paramount. I drilled pilot holes into the wall studs for the lag bolts, avoiding the frustration of splitting the wood or missing the stud entirely. For drywall-only walls, I recommend adding a plywood backing plate—think of it as a plywood sandwich that distributes load evenly. This was a game-changer when I installed a particularly heavy rod in my garage, preventing any wobble or pull-out. Visit this guide for detailed wall reinforcement techniques.
Install the T-Brackets Correctly
With the wall prepared, mount the T-brackets onto the wall, ensuring they’re level and tightly secured. I used a cordless drill with a socket attachment, tightening each bolt until the brackets felt like they were part of the wall. Remember, the stability of your wardrobe rod depends on this step—any looseness translates to sagging or dangerous falls later on. I once overlooked tightening a bracket fully; the rod gradually sagged, causing my shirts to bunch. Never underestimate the importance of torque here.
Enhance Support with Cross Bracing
For added stability, especially for longer or heavier rods, install cross braces or support brackets midway along the length. I used L-brackets beneath the rod for extra reinforcement, considering the load and length. This approach is akin to scaffolding under a bridge—providing additional support where stress is highest. It takes just a few minutes but prolongs the lifespan of your hanging solution dramatically.
Use Support Blocks and Internal Reinforcement
For maximum stability, especially if you’re supporting multiple layers or heavy fabrics, add internal reinforcement like plywood blocks behind the brackets. I slipped small wood pieces into the wall cavity at mounting points, anchoring with long screws. This creates a sturdy internal brace that prevents any wobbling or wall pulling. If you suspect your wall is weak, consider this extra step; it’s simple but effective.
Double-Check and Test Before Loading
Finally, test your installation. Gently push or pull on the rod, observing for movement or creaks. Load the rod gradually with a few heavy items, like jeans or jackets, monitoring for any signs of stress. I learned this the hard way when I hurriedly loaded my freshly reinforced rod—initially stable, then slightly sagging under pressure. Better to catch issues early than after clothes have fallen. For comprehensive support strategies, explore expert reinforcement tips that I keep handy for all my heavy-duty installations.When it comes to installing vanities and built-ins, many assume that straightforward measurements and standard hardware will suffice. However, this oversimplification often masks nuanced pitfalls that lead to long-term issues. Contrary to popular belief, a vanity isn’t just about aesthetics—its structural integrity hinges on hidden details that even seasoned DIYers can overlook. For example, the myth that drywall anchors are enough for heavy fixtures is widespread, but experts strongly advise using wall studs and internal reinforcement techniques to avoid sagging or detachment over time. Another common mistake is neglecting the unique material properties of walls, especially in older homes with uneven surfaces, which can cause gaps or misalignments if not properly scribed or shimmed. This is where advanced installation hacks, such as utilizing steel braces or internal framing, prove invaluable, as detailed in our comprehensive vanity installation guide. Additionally, many underestimate how climate variations affect built-ins; humidity can warp wood or cause expansion, emphasizing the importance of waterproofing strategies and moisture barriers—crucial tips covered in depth here. Are you aware of the subtle nuances that can make or break your project? For instance, did you know that failing to account for wall imperfections can lead to gaps even with meticulous measurements? The key is to recognize these hidden patterns and implement expert-approved solutions to ensure longevity and stability. Remember, installing a vanity or built-in isn’t just about fitting furniture—it’s about engineering a durable, seamless addition that enhances your space. For a deeper dive into expert techniques, explore our vanity installation tips and learn how small adjustments can prevent costly mistakes. Have you ever fallen into this trap? Let me know in the comments.
Keep It Running: Essential Tools for Durable Installation
Maintaining the integrity of your vanities and built-ins over time relies heavily on the right tools and techniques. Personally, I swear by a high-quality cordless drill with adjustable torque settings because it allows precision when securing brackets or installing internal reinforcements, preventing over-tightening that can damage delicate materials. A magnetic bits holder has saved me from juggling tiny screws during complex installations, particularly when working in tight or awkward spaces. Additionally, a laser level ensures that every element—be it a vanity or storage shelf—is perfectly aligned, reducing the risk of uneven wear or tilting over the years.
For cutting and shaping materials, I rely on a fine-tooth handsaw or a fine reciprocating saw if I need quick adjustments on-site. When it comes to fastening heavy fixtures, I opt for steel anchors—specifically, the heavy-duty toggle bolts detailed in this expert guide. These provide reliable support against the pull of long-term use, ensuring that your fixtures stay secure even as weight shifts or the environment fluctuates.
To diagnose potential issues down the line, I recommend using a stud finder that can detect not only studs but also wiring and pipes. This helps prevent accidental damage or instability when reinforcing internal supports. For moisture-sensitive areas, a moisture meter helps identify any potential water damage points that could compromise your walls or fixtures over time.
What does the future hold for maintenance tools in this niche?
Looking ahead, I predict smart sensors integrated into wall supports and brackets will become the norm, providing real-time data on load, humidity, and structural stress. Such innovations could notify you immediately if your installation starts to weaken, allowing preemptive repairs before any significant damage occurs. Embracing these advancements can ensure your vanities and built-ins remain both functional and beautiful for decades.
For a solid starting point, try upgrading to a laser level and high-quality toggle bolts for your next project—these small tweaks can significantly extend the lifespan of your installations. Want to learn more about securing heavy fixtures? Check out this detailed guide on wall anchors.
How do I maintain vanities and built-ins over time?
Regular inspection and timely reinforcement are key. Periodically check for wobbling or loosened hardware, especially after significant seasonal changes. Use a level to verify that surfaces stay true, and tighten any loose screws or bolts promptly. Keep your support structures clean and free of dust or debris that can hide early signs of wear. It’s also wise to consult professional guidance if you notice cracks or shifts—adopting a proactive maintenance routine ensures your investment continues to serve you well for years to come.
Lessons the Hard Way: What I Would Do Differently
One of the most valuable insights I’ve gained is the significance of internal reinforcement beyond just external brackets. Early on, I underestimated how much weight internal support—like steel braces or hidden framing—could carry, leading to wobbling or sagging over time. Now, I realize that meticulous wall prep, including plywood backing and steel support strips, is crucial for durability, especially on older or uneven walls. This experience taught me that investing time in hidden reinforcement techniques prevents future headaches and preserves the aesthetic integrity of your installations.
Tools and Resources that Elevate the Game
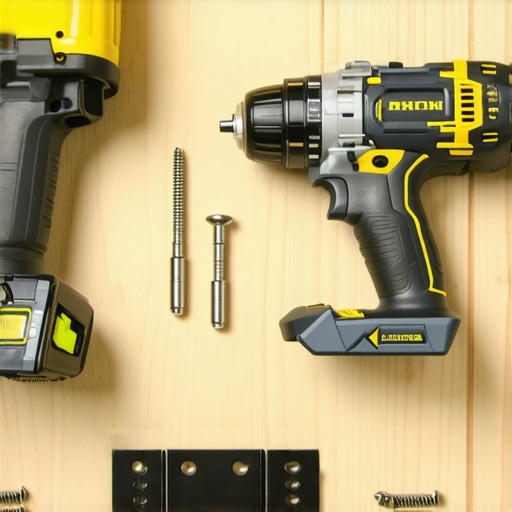
Having the right tools makes all the difference. I rely heavily on a quality cordless drill with adjustable torque, a laser level for perfect alignment, and a stud finder that detects wiring and pipes. For additional support, I trust heavy-duty wall anchors and internal steel brackets, which I’ve used to reinforce everything from vanities to large built-in units. Moreover, exploring expert guides like vanity installation tips has given me confidence in tackling complex projects safely and efficiently. These resources combined create a toolkit that ensures robustness and longevity in my installations.
Embracing Change and Building Confidence
Taking the leap to reinforce and upgrade your support system for vanities or built-ins can feel daunting, but the results are worth every effort. I encourage you to start small—perhaps with internal steel supports or cross braces—and gradually build up your skillset. Remember, every project is an opportunity to learn and improve. By embracing these techniques, you not only safeguard your investment but also gain the confidence to experiment with advanced support solutions, making your home both stylish and secure. If you’re ready to elevate your installation game, explore our comprehensive step-by-step guide to vanity installation and transform your space into a masterpiece of strength and design.