

Ever had that sinking feeling when you open your bathroom cabinet and see a small puddle gathering at the base? I remember the exact moment I realized my vanity was subtly leaking, and it hit me that water damage wasn’t just a cosmetic issue—it was a ticking time bomb for mold and rot. That lightbulb moment pushed me to find a reliable fix, because honestly, who wants to replace their entire vanity or spend a fortune on repairs?
Why Waterproofing Your Vanity Base Matters More Than You Think
Waterproofing isn’t just for the bathroom walls or shower tiles. Your vanity base, especially if it’s wooden or MDF, is vulnerable to moisture seeping in through small leaks or high humidity. Over time, this can cause warping, mold growth, and even structural instability. A quick fix gone wrong can lead to recurring problems, costs, and a frustrating cycle of repairs. I learned this the hard way, making the mistake early on of ignoring small leaks and assuming they’d fix themselves. That was a mistake, and I don’t want you to make the same.
Question: Is a Waterproof Base Fix Truly Worth the Hype?
At first, I was skeptical—thought it was just an overhyped product for DIY enthusiasts. But after experiencing a minor leak turn into a major mold problem, I realized that waterproofing the base was non-negotiable. It’s a simple step that offers peace of mind, preventing hidden water damage that can be disastrous over time. And trust me, I wish I’d taken this preventative approach from the start. To learn more about how to safeguard your vanity, check out my favorite tips on home protection.
By understanding the importance of a waterproof base fix, you’re already on the right track. Now, let’s dive into how to do it right—step by step—to keep your bathroom beautiful and safe for years to come. Have you ever faced this problem? If so, you’re not alone, and help is just a few clicks away.
Prepare Your Workspace and Gather Materials
Start by clearing out the area under your vanity to access the base easily. Gather essential supplies: waterproof membrane or sealant, masking tape, a putty knife, a clean rag, and safety gloves. Remember, proper preparation ensures a smooth application and long-term durability.
Inspect and Clean the Vanity Base Thoroughly
Examine the base for any existing damage or water stains. Use a damp cloth to remove dust, dirt, and loose debris. This step is similar to cleaning a surface before painting—you want a smooth, clean area for the waterproofing layer to adhere properly. I once skipped this step, only to find the sealant peeling off weeks later, leading to wasted effort.
Apply the Waterproof Barrier
Sealant Method
For wooden or MDF bases, use a high-quality waterproof sealant. Apply generously with a putty knife or brush, ensuring coverage in corners and joints. It’s like giving your vanity a weatherproof coat—think of it as your armor against moisture. Don’t forget to cover any seams or gaps where water can seep through.
Membrane Layer
If you opt for a membrane, cut it to size and carefully tape it along seams and edges. Press firmly to eliminate air bubbles, which can diminish the barrier’s effectiveness. I once used a waterproof membrane that was tricky to align but, after some patience, created a flawless shield that prevented leaks for years.
Seal Around Plumbing Penetrations
Identify any pipes or fixtures passing through the base. Use a specialized sealant designed for plumbing to caulk around these openings. This step is crucial—think of it as sealing the joints in your house to prevent drafts. During my project, I missed sealing one hole, and water eventually seeped in, compromising the base again.
Add a Protective Top Layer
Once the sealant or membrane is in place, consider adding a waterproof paint or varnish over the entire surface for extra protection. This creates a barrier against high humidity and occasional splashes. I once painted my vanities with a waterproof finish, and it made a noticeable difference in resisting moisture over time.
Inspect and Maintain Regularly
After installation, routinely check for signs of wear, cracks, or peeling. Reapply sealant or touch up the waterproof layer as needed. Think of it as your preventive maintenance—much cheaper and easier than repairing water damage later. A casual inspection saved me from expensive repairs when I caught a tiny crack early.
By following these detailed steps, you establish a robust waterproof barrier that shields your vanity from moisture-related issues. Proper execution now saves your time, effort, and money in the long run, keeping your bathroom both beautiful and functional.
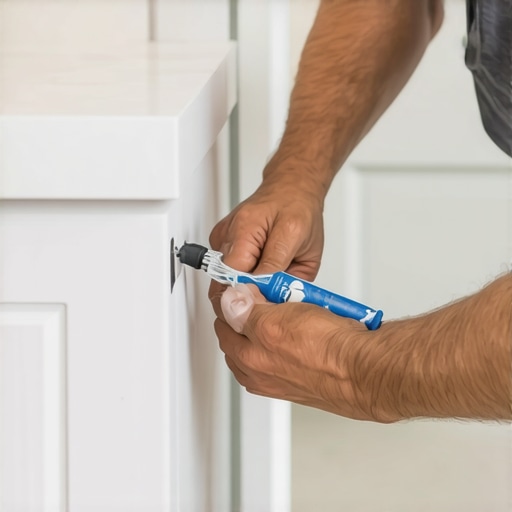 When tackling vanity installations or built-in storage solutions, many DIYers often overlook critical nuances that can make or break the project. One widespread myth is that all materials behave similarly when sealed or fixed; in reality, understanding the specific structural properties of your materials—like MDF versus plywood—is crucial to prevent long-term issues. For instance, MDF, while easy to work with, is more susceptible to moisture than plywood, which emphasizes the importance of selecting the right substrate for bathroom environments. Additionally, many assume that generic fasteners suffice for heavy built-ins, but the truth is that neglecting specialized anchors or steel supports can lead to catastrophic failure over time. For advanced applications, such as wall-mounted vanities supporting heavy quartz tops, the use of internal steel reinforcements becomes essential, as highlighted in expert guides on mounting heavy countertops efficiently.
Why do so many install their vanities incorrectly despite detailed guides?
Common pitfalls include misjudging the wall structure or underestimating load-bearing requirements. If your walls are hollow or drywall-only, standard anchors won’t cut it, increasing the risk of wobbling or detachment. Properly supporting heavier structures often involves hidden reinforcements like steel brackets or internal framing, which many forget to incorporate. Overlooking these elements not only jeopardizes safety but also affects the longevity of your installation. According to industry professionals, integrating internal steel stiffeners and using heavy-duty anchors significantly enhances stability—see [expert guide to flawless vanity installation](https://customcabinetrypro.com/expert-guide-to-flawless-vanity-installation-tricks-tips) for detailed strategies.
Another common mistake is ignoring the importance of precise leveling and plumb lines. Even small misalignments can cause uneven surfaces or gaps, especially in built-in units where aesthetics matter. Advanced installers often use laser levels and scribing techniques to ensure perfect fit against uneven walls, a step that beginners sometimes skip due to perceived complexity. Nevertheless, this meticulous approach pays off by preventing issues like water pooling or joint gaps that can harbor mold or compromise structural integrity.
One subtle nuance is the thermal expansion of materials, often overlooked in the planning stage. For example, quartz or granite countertops expand and contract with temperature changes, so installing them without proper expansion gaps can cause cracks or warping over time. Experts recommend incorporating flexible sealants and expansion joints, especially in climates with significant temperature fluctuations.
Finally, don’t forget that the installation process extends beyond just securing the unit. Thoughtful planning around wiring, plumbing, and ventilation ensures functionality and safety. For complex setups, consulting detailed step-by-step guides helps avoid costly rework, as seen in tutorials on [vanity installation](https://customcabinetrypro.com/step-by-step-guide-to-vanity-installation-for-beginners). Have you ever fallen into this trap? Let me know in the comments and share your experiences—your insights might save others from similar pitfalls.
Tools I Recommend for Durable Bathroom Cabinets
Maintaining your vanity and ensuring long-term functionality requires more than just good materials; it hinges on using the right equipment and techniques. I personally swear by a high-quality cordless oscillating multi-tool, like the Milwaukee M18 Fuel Oscillating Tool, because of its versatility in cutting, sanding, and scraping tight spots during upgrades or repairs. Its precision helps me avoid damaging surrounding surfaces, especially when fitting new fittings or removing old sealants. Additionally, a digital laser level, such as the Bosch Cross Line Laser Level, has become indispensable for ensuring perfect alignment of built-in units and wall-mounted vanities, saving time and preventing uneven gaps that can cause water issues over time.
For plumbing adjustments, a quality basin wrench is crucial—this tool allows access to hard-to-reach fittings behind the vanity without much hassle. I recommend the Ridgid 31110 Basin Wrench because of its sturdy handle and adjustable jaw, which makes tightening or loosening fittings more manageable. When working with waterproof seals or membranes, I use a high-quality silicone gun, like the Makita XGC01Z Cordless Caulking Gun, which offers smooth application and less messy finishes. This consistency is vital for creating an effective moisture barrier that lasts through humid conditions.
Digital Tools to Enhance Installation Precision
Beyond hand tools, digital measurements are game-changers. I rely on Android-based smartphone apps like RoomScan Pro for quick room dimensioning, or the Bosch GLM 50 C Laser Distance Measure, which can provide highly accurate measurements up to 165 feet. These tools help me determine the exact placement for built-ins, maximizing space and ensuring level, flush installations. Software like SketchUp can be used for planning custom vanities online, visualizing the entire project before swinging a hammer, thereby reducing costly errors.
Of course, safety should never be overlooked. Goggles, dust masks, and gloves safeguard against debris, especially when drilling or using power tools. For example, when installing heavy countertops or reinforcing built-in units, I always wear impact-rated goggles and thick gloves to prevent injuries. Proper preparation before every project ensures not only a smoother process but also long-lasting results that prevent future repairs, saving you both time and expense.
How do I maintain my tools and storage solutions over time?
Regular cleaning and lubrication of power tools guarantee peak performance, while keeping tools in a dedicated, organized storage system, like heavy-duty wall racks or labeled containers, prevents damage. Using protective cases for delicate equipment extends their lifespan—and, for stored materials like waterproof membranes or sealants, proper climate-controlled storage prevents degradation. In the future, I predict smarter, IoT-enabled tool storage systems will become more common, alerting homeowners when maintenance is needed or tools are due for replacement. In the meantime, establishing a routine for cleaning and inspecting your equipment ensures they’ll serve you well for many projects to come. You might want to try adding a corrosion-resistant spray like WD-40 after cleaning your power tools—a small step that makes a big difference in longevity.
Lessons from the Trenches: Hard-Earned Wisdom About Vanities and Built-Ins
One of the most valuable lessons I learned was never to underestimate the importance of attention to detail, especially in areas prone to moisture. Something as simple as not sealing a corner or failing to reinforce a wall can lead to costly repairs down the line. I also realized that choosing materials suited for humid environments—like marine-grade plywood or corrosion-resistant fasteners—makes all the difference in the longevity of your installation. And perhaps most surprisingly, I discovered that patience and thorough inspection during each step save time and money, preventing water damage before it even begins.
Tools and Resources That Keep My Projects on Point
Over years of work, I’ve found that having the right tools transforms a good job into a great one. I swear by a high-quality laser measuring device like the Bosch GLM 50 C for precise placement, and a durable cordless caulking gun such as the Makita XGC01Z to ensure consistent waterproof seals. For materials, I rely on waterproof membranes from trusted brands—they’re the backbone of peace of mind. When planning complex layouts, software like SketchUp helps me visualize before cutting, reducing errors and material waste. Trust me, investing in these tools and resources pays dividends in durability and satisfaction.
Your Next Move: Building Confidence and Creativity
Now that you have the insights and tools, it’s your turn to bring your renovation dreams to life. Remember, meticulous prep and choosing the right materials set the foundation for success. Don’t shy away from experimenting with innovative storage ideas or custom touches—your perfect vanity or built-in isn’t just a dream but an achievable reality. Dive into your project with confidence and knowing that each careful step will result in a stunning, moisture-resistant space that stands strong for years. Ready to transform your bathroom? Share your plans below and let’s inspire each other to create beautiful, functional spaces that last!