I remember the day I leaned against a towering stack of cluttered supplies in my laundry room, realizing that my attempt at saving space had turned into a storage nightmare. That lightbulb moment made me rethink everything about how I approach built-in storage solutions. If you’ve ever felt overwhelmed by chaotic cabinets or wasted corners, you’re not alone. The good news? There are innovative options out there that could revolutionize your home in 2025.
Why Small Changes in Storage Make a Big Difference
Over the years, I’ve learned that the secret to a tidy home isn’t just about buying new furniture but about smartly integrating storage that works for your space. The right built-ins can hide clutter, maximize every inch, and even add aesthetic value. According to a recent study by the National Association of Realtors, homes with well-designed storage see a 20% increase in perceived value — and that’s a game changer when planning a makeover.
Is the Latest Storage Trend Just Hype?
I used to think all these space-saving tricks were just marketing fluff until I made a classic mistake early on: rushing into installation without research. I overlooked the importance of tailored solutions that fit my home’s unique layout, which led to costly rework. Now, I take a more strategic approach, exploring guides like the step-by-step guide to vanity installation and consulting experts to ensure seamless integration. If you’ve faced similar challenges, you’re in the right place. The following sections will help you navigate the top solutions for 2025, ensuring your home stays stylish, functional, and clutter-free.
Plan Before You Install
Start with precise measurements of your space using a tape measure, including height, width, and depth, to ensure the built-in fits perfectly. Sketch a layout on graph paper or use digital tools for accuracy. I recall sitting on my garage floor one weekend, carefully measuring my bathroom nook, realizing I needed to account for uneven walls—something I overlooked in my initial plans. This step prevents costly mistakes later.
Select Materials That Match Your Style
Choose sturdy, moisture-resistant materials like plywood or MDF with water-resistant finishes, especially for bathrooms and kitchens. Match the color and style to existing décor for seamless integration. When I built my closet shelf, I opted for a sleek laminate surface that matched the cabinetry, making the finished piece look intentional and professional.
Acquire the Right Tools
Gather a circular saw, drill, screwdrivers, level, tape measure, and safety gear. Using sharp blades and quality drill bits speeds up the process and ensures cleaner cuts. I remember struggling initially with dull blades during my DIY shelves, leading to splintered edges—upgrading my tools made a world of difference.
Build the Frame for Your Built-In
Construct the frame using your chosen wood, following your measurements. Use a level to ensure vertical and horizontal alignment. Secure the frame with screws, adding corner braces for extra stability. I once built a quick frame without checking level, resulting in a wonky cabinet; I had to redo it, emphasizing the importance of double-checking before fixing everything in place.
Attach the Built-In Securely
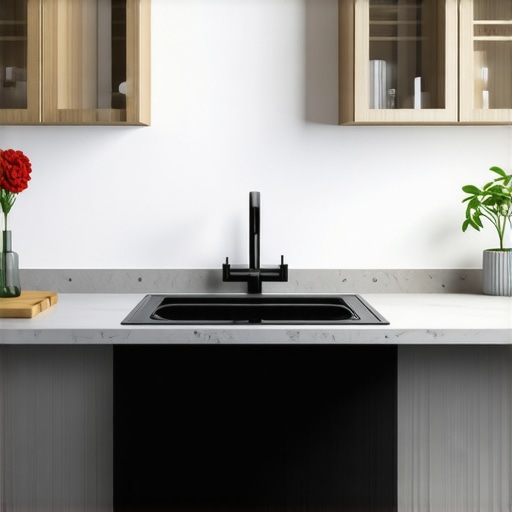
Position the frame against the wall, ensuring flushness, then anchor it using wall anchors or bolts suitable for your wall type. Ensure no electrical wires or plumbing are in the way by inspecting behind the wall. During my installation in the laundry room, I discovered a protruding pipe, compelling me to adjust my plans slightly for safety and structural integrity. Consulting the expert tips can simplify this process.
Finish with Doors, Shelves, and Details
Attach doors or panels, either pre-finished or painted to match your décor. Install shelves at adjustable heights for maximum flexibility. Use clamps and a level to ensure everything aligns correctly. I once hurried to install shelves without proper supports and ended up with saggy surfaces—taking the time to reinforce and level ensures longevity and aesthetic appeal. For inspiration, see the latest trends.
Seal and Finalize for Seamless Look
Finish the installation with caulk along edges for a custom look and to seal gaps. Paint or stain the surfaces to match your home’s style. I learned this the hard way when gaps around my built-in became dust traps—proper sealing prevents future headaches and maintains cleanliness. For additional ideas, visit creative built-in options.
Many homeowners believe that a straightforward measurement and assembly process suffices for successful built-in installations, but the reality is more nuanced. A common myth is that ‘one-size-fits-all’ solutions work universally; however, each space’s unique quirks demand tailored approaches. Overlooking these nuances can lead to misalignments, unstable fixtures, or gaps that compromise both function and aesthetics. For instance, assuming standard wall thicknesses without accounting for variances can cause mounting issues, a mistake I’ve personally encountered when my drywall was thicker than anticipated, leading to insecure anchors. Consulting expert resources like the installation tips can save you from such pitfalls. Advanced installers often focus on wall compatibility, especially in older homes where studs may be irregularly spaced or walls are uneven, making precise framing essential. Installing without confirming electrical or plumbing obstructions can also result in delays or hazards—a classic trap for DIYers eager to complete projects quickly. Recognizing these hidden factors ensures stability and a seamless finish. An often-overlooked detail is the importance of climate considerations; for example, humidity levels can affect wood expansion or contraction, impacting the longevity of your built-in. Research shows that improper material selection based on environmental factors may cause warping or mold growth later, a subtle yet significant mistake. To learn more about choosing resilient materials, visit storage solutions designed for durability. Have you ever fallen into this trap? Let me know in the comments. By digging deeper into these nuances, homeowners can avoid costly rework and achieve professional results that stand the test of time, transforming spaces into functional works of art.
Ensuring your built-in storage and vanities stay functional and visually appealing over time requires the right tools and diligent maintenance. I personally rely on a few key equipment and techniques that have proven effective, making the ongoing care process straightforward and reliable. One essential tool I recommend is a high-quality cordless drill with variable speed settings and a set of precision screwdriver bits. This allows me to tighten or replace hardware without overdriving screws, preserving the integrity of delicate materials. For measuring, I prefer a laser distance meter; its accuracy and ease of use, compared to traditional tape measures, save time and ensure consistent sizing during adjustments or future modifications.
The importance of maintaining proper conditions can’t be overstated. Regularly checking for signs of humidity or temperature fluctuations — particularly in bathrooms or kitchens — can prevent warping or mold growth in wooden components. Installing a dehumidifier or ensuring proper ventilation helps mitigate these issues, extending the lifespan of your storage fixtures. Additionally, I make it a habit to periodically inspect hinges, handles, and sliding mechanisms, lubricating them with a silicone-based spray to keep everything operating smoothly and quietly. This proactive approach prevents small issues from escalating into costly repairs.
In terms of software or planning tools, I use digital design programs like SketchUp to visualize modifications or expansions down the line. This foresight allows me to plan for scalability, ensuring my systems can adapt as my needs evolve. For instance, considering future add-ons like custom shelving or hidden compartments ensures your investment remains functional in the long term. Looking ahead, I predict that integrating IoT-enabled smart storage solutions will become more commonplace, allowing homeowners to monitor and manage their storage environments remotely.
How do I maintain built-ins to keep them looking and functioning their best?
Maintaining your built-ins requires a combination of regular cleaning, gentle upkeep, and strategic upgrades. Use soft, damp cloths for cleaning surfaces to avoid scratches, and avoid harsh chemicals that can degrade finishes. Applying a light coat of furniture wax or sealant annually can revive the surface and provide additional protection. For moving parts, like drawer slides or hinges, a weekly lubrication with a silicone spray ensures fluid operation and prolongs component life. If you notice any loose fasteners, tighten them promptly before they cause misalignment or damage. For comprehensive guidance, consider consulting resources such as the step-by-step guidance designed for homeowners who want to keep their fixtures in top shape.
As technology advances, new tools like ultrasonic cleaning devices are emerging, which can safely remove dirt and grime from complex components without disassembly. Embracing such innovations can simplify maintenance routines and ensure your storage solutions remain pristine. Don’t hesitate to try out these advanced techniques to keep your investments performing beautifully for years to come.
Lessons I Wish I Learned Sooner About Built-In Storage
One of the most valuable insights I’ve gained is never to underestimate the power of precise measurements. Small miscalculations can turn a sleek built-in into a crooked eyesore. Also, tailoring storage solutions to the unique quirks of your space—like uneven walls or existing plumbing—is crucial for a seamless finish. Lastly, I realized that investing time in research and consulting expert resources, such as the installation tips, can save you from costly reworks and frustration.
Tools and Resources That Make a Difference
Over the years, I’ve come to rely on a few trusted tools and guides. A laser distance meter has transformed my measuring accuracy, making the layout process faster and more reliable. For planning and visualization, I use design software like SketchUp, which helps anticipate how new storage will fit into existing spaces. Books such as the ultimate guide on vanities and built-ins have provided me with practical tips and inspired creative ideas. Additionally, staying connected with professionals through consultation services ensures I’m always kept updated on the latest trends and techniques.
Your Next Step Toward a Clutter-Free Space
Embrace the opportunity to transform your home by starting small but thinking big. Whether it’s a tricky corner in your bathroom or an awkward nook in your living room, the right built-in storage can revolutionize your space. Remember, every successful project begins with a plan and a willingness to learn from both mistakes and expert advice. With patience, proper tools, and inspired ideas, you can create elegant, functional storage that elevates your home’s style and efficiency. Ready to get started? Your perfect built-in is waiting—don’t hesitate to make it a reality today.
Have you ever faced unexpected challenges during installation or wondered how to optimize a tight corner? Share your experiences below—I’d love to hear your story!
,
Related Posts
Smart Storage Solutions & Built-in Cabinets for Space Efficiency in 2024
My Journey into Space-Saving Elegance: Discovering the Power of Built-in…
Stop the Sag: 3 Hinge Fixes for Heavy 2026 Custom Cabinets
I remember the first time I installed a massive, custom-built…
Smart Built-in Cabinets: Efficient Installation & Storage Solutions
I remember the exact moment I realized how much clutter…