There was a moment in my DIY journey that I won’t forget—standing in a sea of mismatched shelves and cluttered cabinets, feeling overwhelmed and frustrated. I realized then that no matter how beautiful my space was, it just didn’t feel functional. A lightbulb went off: I needed smarter storage, and I needed it now. Since that day, I’ve been obsessed with finding the most effective ways to incorporate built-in storage and custom vanities that truly maximize space and style.
The Power of Seamless Storage in Modern Homes
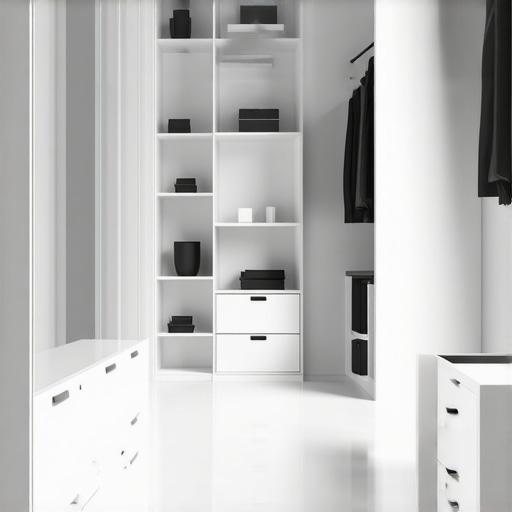
Today, I want to share what I’ve learned about transforming chaotic spaces into organized retreats, all through carefully planned built-in storage solutions and expert installation tips. Whether you’re tackling a small bathroom, a cluttered bedroom, or a forgotten corner of your living room, the right solutions can make all the difference. The goal is not only to declutter but to weave functionality seamlessly into your home’s aesthetic—without sacrificing style or comfort.
Is Custom Built-ins Really Worth the Effort?
One common doubt I hear is whether investing in custom built-ins is truly worthwhile. To be honest, I made my share of mistakes early on, rushing into DIY projects without proper planning or professional help, which led to uneven installations and wasted money. But over time, I discovered that careful planning, alongside reliable expert installation tips, can save a lot of headache and ensure the final result exceeds expectations. According to industry research, homes with professionally installed built-in storage see a significant increase in functionality and overall value (Houzz, 2023). So, yes—done right, the benefits far outweigh the effort.
If you’ve ever felt that your space could use more efficient storage but aren’t sure where to start, you’re not alone. That’s exactly what I’ll help you with today. From choosing the right materials to understanding smart installation techniques, this guide aims to make your renovation journey smoother and more rewarding. Ready to turn clutter into class? Let’s dive into the secrets of expert installation and design that truly elevate your home’s potential.
Lay Out Your Space Precisely
Before diving into construction, take meticulous measurements of your area. I remember fooling around with a tape measure in my small bathroom, sketching out potential configurations on grid paper. This step acts like a blueprint for your project, ensuring everything fits seamlessly. Use painter’s tape to outline the planned built-in or vanity footprint directly on the wall; this visual aids in refining dimensions and layout before actual installation. By doing this, you prevent costly mistakes and discover what looks most functional and aesthetically pleasing in real space. For detailed measurement techniques, consider referencing this comprehensive vanity installation guide.Even experienced homeowners and DIY enthusiasts often fall prey to misconceptions about built-in features and storage installations. One pervasive myth is that custom solutions always cost a fortune or require professional help for every step. While hiring experts is beneficial for precision and durability, many advanced DIYers overlook innovative techniques that can save money and still deliver top-notch results. For example, focusing solely on aesthetics without considering functional accessibility can result in storage that looks great but is impractical for daily use.
One trap to watch out for is neglecting precise measurements—assuming standard dimensions will fit all spaces. This oversight often leads to unnecessary modifications or even reinstallation. As I learned through my own projects, investing in meticulous planning and using tools like laser levels and custom templates can greatly increase installation accuracy. Remember, the secret isn’t just in building but in precise execution.
Another nuanced mistake involves underestimating the importance of ventilation and moisture control, especially when installing storage in humid environments like bathrooms or basements. Properly integrated ventilation not only prolongs the lifespan of your built-ins but also prevents mold growth and material damage. Experts highlight that overlooking these details can negate the aesthetic benefits of your renovation.
A common misconception among DIYers is that all materials are equally suitable. However, choosing the wrong type of wood or composite for your environment can lead to warping, cracking, or premature wear. For instance, engineered woods might seem cost-effective but may not withstand moist conditions, whereas moisture-resistant plywood offers durability.
Furthermore, advanced homeowners often overlook the importance of integrating smart storage solutions that adapt to evolving needs. Features like hidden compartments or modular units can be game-changers, providing flexibility without sacrificing style. To ensure longevity and functionality, consider consulting resources like this guide on expert installation tips.
In summary, mastering built-in storage solutions involves understanding nuanced details—surveying your space accurately, selecting suitable materials, incorporating proper ventilation, and planning for adaptability. Recognizing these often-overlooked factors can elevate your project from good to exceptional. Have you ever fallen into this trap? Let me know in the comments.
Maintaining your custom storage solutions and vanities is crucial to preserving their beauty and functionality over time. Personally, I rely on a combination of specialized tools and techniques that ensure my installations remain pristine and adapt to changing needs. One tool I swear by is a high-quality cordless drill with adjustable torque settings—it’s essential for tightening or re-tightening hardware without causing damage. For precision, a digital caliper allows me to verify measurements for new accessories or adjustments, preventing fitting issues that can ruin the seamless look of built-in storage.
Regular cleaning is also fundamental; I use microfiber cloths paired with gentle, pH-balanced cleaners to avoid damaging the finish. To tackle more stubborn grime or soap scum, a soft-bristled brush proves effective, especially around intricate moldings or joints. For inspection and minor repairs, a multi-tool with various attachments helps me address issues like loose hinges or cracking caulking swiftly, saving time and money.
How do I maintain built-ins and vanities over time?
Scheduling periodic inspections—at least twice a year—allows me to catch early signs of wear, such as loose hardware or affected finishes. Applying a quality furniture polish or restorative oil enhances wood surfaces, keeping them looking vibrant and resisting moisture damage. Preventive measures, like installing dehumidifiers in humid environments or using vented cabinetry, extend the lifespan of your storage. Recognizing that technology is advancing, I predict that smart maintenance systems—like IoT-connected sensors monitoring humidity or structural integrity—will become the norm, making upkeep even more effortless in the future.
If you’re serious about long-term durability, I recommend experimenting with a few advanced techniques I’ve adopted, such as using a calibrated laser level for perfect alignment during adjustments. This small step can make a significant difference, ensuring your built-ins stay perfectly installed for years. For detailed guidance, check out this expert resource on installation and maintenance tips.
Don’t wait until components loosen or surfaces degrade—make regular upkeep a priority. Try incorporating some of these tools and techniques into your routine today, and you’ll enjoy flawless functionality and aesthetic appeal for years to come!
My Hidden Pitfalls Before I Discovered the Art of Seamless Storage
One of the toughest lessons I learned was the importance of patience. Rushing into a project without thorough planning often led to mismatched measurements and frustrating rework. I also underestimated the power of choosing durable, moisture-resistant materials early on—trust me, a small mistake in material selection can turn costly fast. Additionally, I once overlooked the value of integrating ventilation in humid areas, which caused my cabinets to warp over time. These blunders taught me that success in built-in storage hinges on meticulous planning, quality materials, and attention to environmental factors.
Tools and Resources That Changed My Approach
Over the years, I’ve come to rely on a few key tools that make installation and maintenance much smoother. A reliable laser level is indispensable for ensuring perfect alignment—don’t underestimate its power. I also swear by a high-quality cordless drill with adjustable torque for safe, precise assembly. For materials, I recommend exploring moisture-resistant plywood, which I use for almost all humid environments to ensure longevity. For design inspiration and detailed guides, this resource on installation techniques became a game-changer in my process. Investing in these tools and references saved me time, money, and stress, making the journey much more rewarding.
Embrace Your Creative Power: Your Space Awaits Transformation
Designing your own built-in storage and vanities isn’t just about functionality; it’s a chance to infuse your personality into your home. Remember, every misstep is a stepping stone toward mastery—every scratch or measurement mishap teaches resilience. Your unique space is a blank canvas waiting for your vision, and with careful planning, innovative tools, and the right resources, you’re empowered to create beautiful, practical solutions. So, go ahead—take that first measured step, trust your instincts, and transform chaos into calm. After all, the biggest reward is a home that truly works for you. Have you ever faced a stubborn storage challenge? Share your story below and let’s grow together in our home improvement adventures.
One Reply to “Top Storage Solutions & Built-ins: Expert Installation Tips”
Leave a Reply
Related Posts
Top Storage Solutions & Built-ins for Seamless Organization in 2025
I vividly remember the moment I realized my cluttered living…

Top Storage Solutions & Built-in Ideas to Maximize Your Space – 16:07
My Journey to a Clutter-Free Home: Discovering the Power of…
Smart Storage Solutions & Built-in Installation for Modern Homes
My Journey to a Clutter-Free Modern Home BeginsWhen I first…
Reading through this post resonated with my own experience of tackling storage chaos in my home. I particularly appreciated the emphasis on meticulous planning and the importance of precise measurements—those are lessons I learned the hard way early on! Investing in a good laser level really made a difference in my projects, ensuring everything aligned correctly without endless rework. Also, I found that choosing moisture-resistant materials in humid areas like my basement preserved the integrity of my built-ins over time. One thing I’ve realized is that incorporating smart features like hidden compartments or modular elements can really adapt to changing storage needs, especially in smaller spaces. It got me thinking about how technology, such as IoT sensors, might further streamline maintenance in future home upgrades. Has anyone experimented with these smart solutions yet? Would love to hear your thoughts or experiences on integrating tech for long-term storage management.