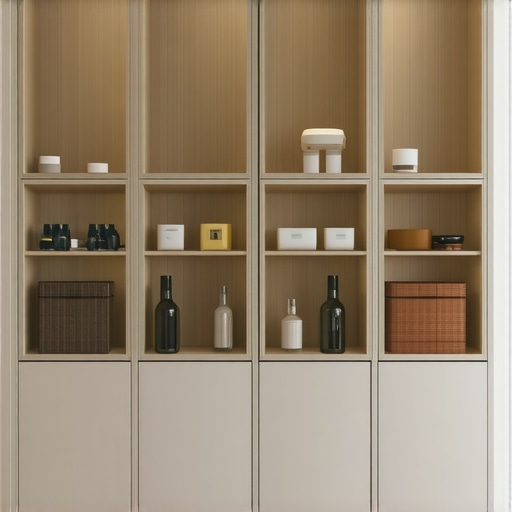
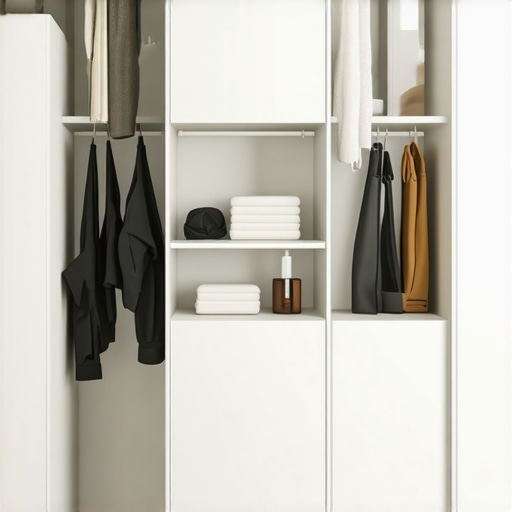
Ever opened a closet or bathroom vanity and felt that sinking frustration when you realize everything’s a jumbled mess? I’ve been there, desperately trying to find that one thing amidst the chaos, only to give up and shove it back in. That lightbulb moment hit me hard: functional, stylish storage isn’t just a luxury—it’s a necessity. And the good news? With the right top storage solutions and built-ins, expertly installed, you can banish clutter and reclaim your space. Today, I’ll share how you can do just that, without the headache and chaos of trial-and-error.
Why Proper Storage Matters More Than Ever in 2025
In 2025, our homes are more than just places to rest. They’ve become multi-functional hubs—offices, gyms, classrooms, you name it. The challenge? Creating storage that’s not only smart but seamless. I used to think, “I’ll just buy more shelves,” but that often led to cluttered chaos and wasted space. It wasn’t until I invested in custom-built solutions, tailored to my home’s unique layout, that everything changed. Expert installation makes all the difference—ensuring each piece fits perfectly and functions flawlessly. According to recent industry insights, smart storage can increase usable space by up to 30%, transforming your home from cluttered to calm. That’s a game-changer.
Have You Faced This Problem?
If you’ve ever felt overwhelmed by disorganized spaces or worried that DIY solutions won’t stand the test of time, you’re not alone. I made the mistake of rushing into a DIY vanity install early on, only to realize I’d overlooked crucial measurements and support details. It’s a common mistake, but one that can be easily avoided with expert guidance. Choosing the right installation approach is key, and I’ll walk you through how to get it right, step-by-step.
So, are you ready to finally conquer your clutter and enjoy sleek, efficient storage? Let’s dive into the practical tips and expert tricks that will make your built-in projects a success. From understanding the latest trends in vanity design to mastering the installation process, I’ve got you covered. Curious about current trends? Check out top vanity design trends in 2025 to get inspired. Ready to transform your home? Let’s get started!
Measure Twice, Cut Once
My first real experience with installing a custom vanity taught me a crucial lesson: precision matters. I grabbed my tape measure, but in my haste, I overlooked the importance of measuring multiple times. When I finally started cutting the cabinetry, I realized my mistake—the vanity didn’t fit seamlessly. To avoid this, always double-check your measurements and consider using a level to ensure your surfaces are perfectly flat. For detailed guidance, check out this step-by-step installation guide.
Prepare Your Space and Tools
Think of installation like assembling a complex puzzle—it’s all about having the right pieces and tools at hand. Clear your workspace of clutter, set up a sturdy workbench, and gather essential tools: a drill, level, stud finder, screwdriver, and safety gear. When I installed my built-in storage last summer, I laid out all my tools beforehand to streamline the process. This preparation prevents frustrating trips to the hardware store mid-project and keeps you focused.
Anchoring for Stability
Imagine a house of cards—without a solid foundation, everything collapses. The same applies to built-in storage and vanities. Use a stud finder to locate wall studs, and anchor your units securely to these points. I once installed a floating shelf without anchoring into studs, which led to it wobbling dangerously after a few days. Proper anchoring ensures your storage remains sturdy and safe. For detailed anchoring techniques, explore expert installation tips.
Level Up for a Flawless Finish
Nothing screams amateur like uneven shelves or misaligned cabinetry. Use a high-quality level during installation to ensure everything lines up perfectly. I learned this the hard way when my vanity doors were slightly crooked—an easy fix with a quick recheck of the level. Take your time to make adjustments as you go, and don’t rush the process. For tips on achieving perfect alignment, see installation hacks.
Seal and Finish for Longevity
Think of sealing like applying a protective coat to a masterpiece—without it, your work is vulnerable. After installing your built-in storage or vanity, use appropriate sealants or paint to protect against moisture and wear. I once skipped sealing mine, and water damage quickly compromised the finish. Proper sealing extends the life of your investment and keeps everything looking pristine. For finishing techniques, visit expert guides.
Final Inspection and Adjustments
Once everything is installed, step back and scrutinize your work. Check for wobbling, misalignment, or gaps. A thorough inspection saved me from discovering a wobbly shelf after I had finished. Make necessary adjustments with your tools, and ensure all hardware is tight. This final step guarantees your storage solutions are as functional as they are stylish.
Installing built-in storage and vanities in 2025 isn’t just about aesthetics; it’s about creating a space that works for you. With careful measurement, preparation, anchoring, leveling, sealing, and inspection, you’ll achieve professional results every time.
Many homeowners believe that installing built-in storage solutions or vanities is a straightforward process that anyone can tackle with basic DIY skills. However, this misconception can lead to costly mistakes and subpar results. Let’s dig deeper into what most people get wrong about these projects, and how understanding the nuances can save you time, money, and frustration.
Why Rushing the Measurement Stage Can Backfire
One prevalent myth is that quick measurements are enough. In reality, even a minor oversight can throw off the entire installation, leading to gaps, misalignment, or units that don’t fit. Experts emphasize measuring multiple times, accounting for wall irregularities, and verifying the space at different points. Skipping this step is a trap many fall into, resulting in a project that looks amateurish and requires rework. For detailed guidance, check out this step-by-step guide.
Misunderstanding the Importance of Wall Support and Anchoring
A common mistake is assuming that simply attaching cabinetry to drywall is sufficient. In fact, most built-in units require anchoring into wall studs or reinforced backing to ensure stability. Not doing so risks wobbling, damage, or even accidents. The misconception stems from underestimating the load these units bear and the importance of structural support. Remember, using a stud finder and proper hardware is non-negotiable for a safe, durable installation. Learn more about anchoring techniques here.
Assuming All Storage Solutions Are Created Equal
Another myth is that any storage solution will do the job. But the reality is that custom-built units are often far more effective, especially in challenging spaces or for specific needs. Off-the-shelf options might seem convenient, but they can lead to wasted space and frustration. Custom solutions, designed with expert input, can maximize every inch and integrate seamlessly into your home aesthetic. For inspiration, visit innovative storage ideas.
What Advanced Homeowners Should Know About Installation Precision
For those already comfortable with basic DIY, understanding the importance of precision becomes even more critical. Small deviations in levelness, alignment, or support can compromise the entire project’s integrity. Use high-quality tools, double-check every step, and consider professional assistance for complex parts. This isn’t about doubt—it’s about achieving a flawless finish that lasts. According to industry experts, meticulous installation can increase the lifespan of your built-ins and maintain their aesthetic appeal over time. Dive into advanced installation tips for more insights.
Have you ever fallen into this trap? Let me know in the comments how you handled your built-in storage or vanity project, and what lessons you learned along the way!
Once you’ve successfully installed your custom vanity or built-in storage, the journey doesn’t end there. Regular maintenance ensures that your investment continues to function flawlessly and looks stunning for years to come. I personally rely on a few specialized tools and methods that make upkeep straightforward and effective, even in busy households.
How do I keep my built-in storage working smoothly over time?
First, I recommend using a high-quality microfiber cloth and a gentle cleaner like a mixture of mild soap and water to clean surfaces regularly. Avoid abrasive cleaners that can scratch finishes. For hinges and sliding mechanisms, a silicone-based lubricant, such as 3-IN-ONE Multi-Purpose Oil, works wonders. I apply it with a precision oiler, which I find provides better control and prevents over-lubrication, reducing dust attraction and buildup.
To monitor for potential issues early, I use a digital level and a small stud finder periodically—especially if you notice any misalignments or wobbling. These tools help me catch problems before they escalate, saving time and money. The trend in maintenance is shifting towards smart solutions; in the future, I predict integrated sensor systems that notify you of loose fittings or humidity-induced warping, which would be game-changing for long-term upkeep.
Tools I recommend for ongoing care
My go-to maintenance toolkit includes a microfiber cloth for dust, a soft brush for crevices, and a precision oiler for lubricating hinges. I also keep a small multi-tool kit handy for minor adjustments, like tightening screws or realigning panels. For cleaning and polishing, I prefer natural, non-abrasive products like mineral oil or beeswax, which help preserve wood finishes without harsh chemicals.
Investing in quality hardware, such as soft-close hinges and sturdy drawer slides, significantly reduces maintenance needs. Regularly inspecting these components and replacing worn parts promptly prolongs the lifespan of your storage solutions. For detailed guidance, check out this expert guide.
Why consistent upkeep is worth it
In my experience, a little routine maintenance extends the life of your built-ins and keeps them looking pristine. It also prevents minor issues from turning into costly repairs. As technology advances, future trends point toward smart, self-monitoring storage systems that alert homeowners to maintenance needs before problems arise. Implementing simple tools now, like lubricants and inspection devices, prepares your home for these innovations.
So, I challenge you to pick one maintenance tip—perhaps applying a silicone lubricant to hinges or scheduling monthly dusting—and make it part of your routine. Keeping your storage solutions in top shape not only preserves their beauty but ensures you continue enjoying a clutter-free, stylish home for years to come.
The Hardest Lesson I Learned About Built-In Storage
One of my biggest lightbulb moments was realizing that rushing through measurements can turn a sleek vanity into a frustrating project. I once skipped triple-checking my dimensions, only to find that the cabinet didn’t fit quite right—an embarrassing and costly mistake. Now, I always measure at least three times and use a level to ensure everything lines up perfectly. That simple step saves countless headaches and keeps my projects looking professional.
My Essential Toolkit for Seamless Storage Installations
Over the years, I’ve come to trust a handful of tools that make storage projects smoother: a high-quality tape measure for accuracy, a digital level for perfect alignment, and a sturdy stud finder to anchor units securely. I also rely on a small, precise screwdriver for tweaking hardware and a good drill with different bits for versatility. These tools have become my go-to companions, enabling me to achieve flawless results in every built-in project. For detailed recommendations, I often visit this contact page.
Now It’s Your Turn to Make a Change
Creating custom storage in your home isn’t just about looks—it’s about making your space work better for you. Whether you’re upgrading your bathroom vanity or adding clever built-ins, taking the time to plan and install properly will pay off in the long run. Imagine opening your closet or bathroom and feeling that sense of calm and order—that’s the power of expert-installed storage solutions. Don’t wait to start transforming your home into a clutter-free sanctuary. Your perfect space is just a careful measurement and a few tools away!
One Reply to “Top Storage Solutions & Built-ins: Expert Installation Tips in 2025”
Leave a Reply
Related Posts
Smart Storage Solutions & Built-ins: Expert Installation Tips Today
Ever opened a closet or a bathroom cabinet and felt…

Smart Storage Solutions & Built-ins for Seamless Home Organization
Discovering the Power of Built-ins: My Personal ExperienceAs someone who…
Top Storage Solutions & Built-ins for Modern Homes
Ever opened a bathroom or bedroom drawer and felt the…
This post really hits home for me; I’ve learned firsthand how crucial precise measurements are, especially in tight spaces like bathrooms or closets. I once hurried through the measuring step for a built-in shelf, thinking it would save time, only to find it didn’t fit after all the work was done. That was a real frustration! Since then, I make it a rule to measure at least three times and use a high-quality level to double-check my work. It’s amazing how small details like these can make a huge difference in the final look and functionality.
I’m curious, does anyone have recommendations for tools that help streamline this process? I’ve heard about laser distance measurers but never tried one. Do they really make a noticeable difference over traditional tape measures? Would love to hear about others’ experiences or any tips for DIYers to improve accuracy without spending too much on fancy tools.