Have you ever spent hours trying to install a vanity, only to end up frustrated, with parts leftover and nothing looking quite right? I remember a recent project where I thought, “There has to be a smarter way,” especially after a shaky DIY attempt that left me questioning my skills. It was a lightbulb moment—realizing that with the right tips, installing top vanities and storage solutions can be straightforward and even enjoyable.
Why This Year Is the Perfect Time to Upgrade Your Vanity and Storage
There’s no denying it—home improvement trends in 2025 emphasize sleek design and functional efficiency. According to industry reports, homeowners prioritize seamless organization and quick installation methods, aiming to transform their spaces without the headaches of traditional approaches. This shift isn’t just about aesthetics; it’s about creating a home that works for you effortlessly. But here’s the thing: many people hesitate, fearing that new storage solutions and vanities are complicated, costly, or require professional help.
Is Installing New Vanities Actually Worth the Hype?
This is a common skepticism I’ve encountered—and honestly, I used to share it. My early attempts were riddled with mistakes, like misalignments and wasted materials. An early blunder involved underestimating the importance of measuring, which led to a vanity that just didn’t fit. Over time, I learned that planning and choosing the right solutions make all the difference. As expert guides emphasize, contemporary vanity installation strategies focus on simplicity and precision, making it accessible even for DIYers. Curious about how to avoid my mistakes and streamline your process? Well, I’ve gathered all the expert tips and tricks to save you time, money, and frustration. Ready to transform your space? Let’s dive into the essentials of effortless installation.
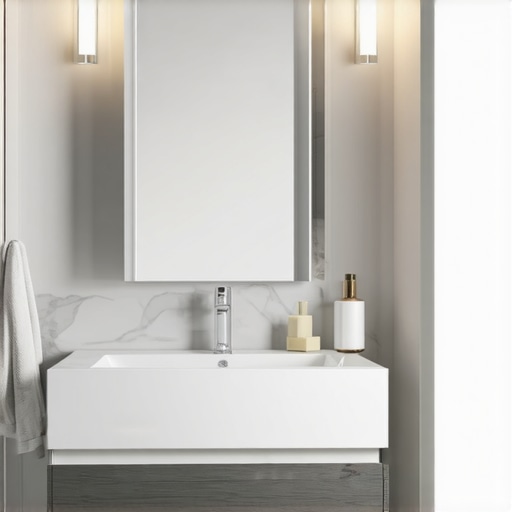
Prepare Your Space and Tools
Before diving into installation, clear the area and gather all necessary tools like a level, measuring tape, drill, screws, and a stud finder. Once, I spent an afternoon fumbling around without proper tools, which led to misaligned cabinets. That day taught me the importance of proper preparation, ensuring a smooth process and professional results. To avoid setbacks, double-check your supplies and plan your workspace.
Measure Precisely and Mark the Layout
Accurate measurements are vital. Measure the space where the vanity will sit, considering height, width, and depth. Use a pencil and level to mark the wall where brackets or mounting points will go. I once installed a vanity that was slightly off because I didn’t account for uneven walls. Using a laser level or chalk line can help create an exact guide, preventing installation errors. For detailed measurement strategies, visit this comprehensive guide.
Use an Analogy to Visualize Your Measurements
Think of measuring like drawing the blueprint for a puzzle—every piece must fit precisely, or the whole picture breaks apart. Carefully plotting each dimension ensures your vanity and storage solutions align perfectly, making the final look seamless.
Secure the Vanity to the Wall
Mount the vanity using wall brackets or mounting strips. Locate studs with a stud finder for maximum stability and drill into these points. Once, I mistakenly drilled into drywall, which held the vanity loosely. That experience showed me why framing was so crucial. Confirm your measurements and stud locations before drilling, and use a level to verify the fixture is perfectly straight. Proper anchoring prevents future wobbling and damage, helping your installation last.
Connect Plumbing and Fixtures
Wrapping up, connect the plumbing carefully—turn off water, attach supply lines, and secure drainpipes. I recommend having a bucket ready for any leaks during testing. If you’re not confident, consulting a professional or referencing install hacks can save headaches. Proper connection ensures your vanity functions reliably and looks pristine.
Finish with Storage and Aesthetic Touches
Lastly, add storage components like shelves, drawers, or built-in organizers. Installing these after the main vanity saves you from accidental damage and makes adjustments easier. I once installed a sleek shelf above my vanity, which transformed the space without additional renovation. Use spacers or templates for uniformity, and consider smart storage ideas that maximize your space and style.
Many homeowners believe that installing vanities and built-in storage is as simple as following basic instructions or watching a quick video. However, in my experience, this oversimplification often leads to costly mistakes and aesthetic compromises. One prevalent myth is that all vanities are universally compatible with any space, but the truth is, overlooking precise measurements and wall conditions can cause misalignments and uneven finishes. For example, assuming standard wall dimensions without checking for obstructions can result in cabinets that don’t fit or look awkward. Additionally, there’s a misconception that DIY installation requires only basic tools and skills. While simplified guides help, advanced nuances like load-bearing considerations and plumbing alignment demand expert attention. A common mistake I see is neglecting to reinforce wall anchors when mounting heavy vanities, risking future wobbling or even falls. To avoid this, it’s vital to understand the importance of locating studs correctly and using appropriate fasteners, which can be more nuanced than a simple drill and screws approach.
Have you ever fallen into this trap? Let me know in the comments.
For savvy homeowners seeking truly seamless and durable installations, consulting resources like [effortless storage solutions](https://customcabinetrypro.com/effortless-storage-solutions-for-a-tidy-stylish-home) or expert guides can make all the difference. Remember, the difference between a good and a great vanity installation often comes down to attention to these subtle details, which are frequently overlooked. Overestimating how much planning is needed can lead to unfinished finishes or costly corrections down the line. For those looking to master these nuances, investing time in understanding load distribution, wall integrity, and plumbing flexibility is crucial. Additionally, being aware of common myths ensures you allocate your effort effectively, avoiding unnecessary expenses or rework.
A key advanced mistake to avoid is rushing the measurement phase. Using outdated or improper tools like a standard tape measure instead of a laser level or chalk line can result in skewed alignments that compromise the entire project. Remember, accurate measurements aren’t just about length—they include wall plumbness, uneven floors, and existing fixtures, which can significantly impact your final look. For detailed insights, check out [installation hacks that save time and money](https://customcabinetrypro.com/vanity-installation-hacks-that-save-time-and-money) to ensure you’re not missing out on the subtle, yet vital, aspects of professional installation.
Tools I Recommend for Hassle-Free Maintenance
Maintaining your vanities and storage solutions over time requires precision and reliability. I personally rely on a high-quality cordless drill, like the DeWalt DCD791D2, because its brushless motor delivers consistent power and longevity, making adjusting or tightening components effortless. For measuring, I prefer a Bosch GLL3-330CG 360-Degree Green Laser Level; it ensures perfect alignment even on uneven walls, preventing those frustrating misfits that can ruin your project. A durable microfiber cloth and gentle cleaners are also vital for keeping surfaces pristine without scratches.
The Power of Proper Planning and Routine Checks
Long-term results hinge on regular inspections. Schedule biannual assessments to tighten loose fixtures, check for water leaks, and verify that slides and hinges operate smoothly. Using a stainless steel level for quick verification can save you hours, especially when dealing with built-in cabinetry. Over time, dirt and grime can cause components to seize or wear prematurely; a combination of mild soap and a soft brush can restore functionality without damaging finishes.
How do I maintain my vanity and storage solutions over time?
Consistent, deliberate upkeep is key. This includes inspecting hardware for corrosion, replacing worn seals on plumbing, and reapplying protective finishes if necessary. Investing in a proper cleaning regimen ensures your investment remains sleek and functional. Additionally, consider upgrading the hardware periodically—new soft-close hinges or stylish handles can refresh the look and feel, extending the lifespan of your installation. Remember, a proactive approach prevents minor issues from turning into costly repairs, and using reliable tools makes this routine maintenance straightforward and effective. Predicting trends, I see smart sensors and IoT-connected fixtures becoming standard, offering remote diagnostics and automated alerts, which will significantly simplify maintenance in the future. For now, I recommend trying out a routine check using a laser level—it’s a game-changer for detecting subtle misalignments before they escalate.
What I Wish I Knew Before Starting
One of the most valuable lessons I learned is the importance of verifying wall conditions before beginning installation. Assuming walls are perfectly plumb and level often led to misaligned vanities. Taking the extra step to check for wall imperfections upfront saved me hours of adjustments later. A second insight was realizing that measuring isn’t a one-and-done task—periodic re-measurements throughout the process ensure everything stays precise. Lastly, I discovered that embracing patience and meticulous planning dramatically reduces errors and frustration, transforming a daunting project into an enjoyable achievement.
My Go-To Tools for Flawless Results
Over time, I’ve assembled a toolkit that makes vanity and storage installation much smoother. The DeWalt DCD791D2 cordless drill provides reliable power and ease of use. The Bosch GLL3-330CG laser level is indispensable for aligning cabinets, especially on uneven walls. For measurements, a high-quality tape measure combined with a digital stud finder like the Bosch D-Tect 120 helps locate optimal anchor points. Reliable tools not only save time but also contribute to professional-looking, durable finishes, making this toolkit an investment I highly recommend.
Build Confidence: You’ve Got This!
Installing vanities and built-in storage solutions might seem intimidating at first, but with careful planning and the right tools, you can achieve stunning results. Remember, every expert was once a beginner, and each project provides invaluable experience. Armed with the insights from this guide and a can-do attitude, your home upgrade journey can be both rewarding and fun. Don’t hesitate to reach out for assistance or consult resources like smart storage ideas to keep your project on track. Now is the perfect time to transform your space and enjoy the satisfaction of a job well done!
Related Posts

Trust Smart Vanities & Built-in Cabinets for Seamless Home Upgrades in 2025
I remember the moment I realized my bathroom was a…
Smart Vanities & Built-in Cabinets: Efficient Installation Ideas for 2025
My Journey to a Modern Bathroom Upgrade: Embracing Smart Vanities…

Expert Guide to Vanities & Built-in Cabinets Installation in 2025
My First Encounter with Vanity and Built-in Cabinets: A Personal…