

I’ll never forget the first time I installed a particle board vanity in my own bathroom. It looked perfect—sleek, modern, and budget-friendly. But within months, I watched in dismay as the corners started to swell, the doors warped, and finally, the entire thing collapsed under its own weight. Talk about a lightbulb moment! I realized I was falling into a common trap, and I knew many others probably were, too.
That experience sparked my deep dive into the world of vanity materials and reinforcement techniques. Today, I want to share with you a solution that transformed my approach and saved countless vanities from a premature demise: the ingenious use of plywood reinforcement. If you’re tired of replacing particle board vanities every few years, keep reading.
The Hidden Flaw in Particle Board Vanities
Particle board, while affordable and easy to work with, has a notorious weakness: it doesn’t handle moisture well. Bathrooms are humid environments, and over time, moisture seeps into the material, causing it to swell, weaken, and eventually fail. Many DIYers or even pros overlook this critical aspect when installing vanities. I’ve learned the hard way that relying solely on particle board is a gamble, especially for heavy or built-in units. To avoid personal frustrations and costly repairs, I’ve adopted a better strategy.
Is Reinforcement Really Worth It?
Initially, I wondered if spending extra time and money on reinforcement was justified. I’ve come to realize that with the right approach, reinforcement isn’t just worthwhile—it’s essential. Incorporating plywood sub-frames or backing sheets offers incredible strength, moisture resistance, and longevity. According to experts like those at Custom Cabinetry Pro, plywood reinforcement is a game-changer for heavy or high-moisture applications, ensuring your vanity stays sturdy for years to come.
If you’ve ever faced the sinking feeling of a wobbly, sagging vanity, or worse, a complete failure, then you’ll appreciate the value of this fix. Are you currently battling issues with particle board vanities? Or perhaps you’re planning a bathroom upgrade and want it to last? If so, you’ll want to pay close attention to the upcoming solutions that combine best practices from my personal experience and industry standards.
Now, let’s move beyond the problems to the practical steps you can take to reinforce your vanity the right way. Trust me, once you see how simple yet effective these methods are, you’ll wonder why you didn’t do it sooner.
Preparing Your Workspace for Reinforcement
Start by clearing your bathroom area and removing existing vanity hardware. Protect your floor with a drop cloth or old towels, especially because you’ll be working with tools and materials that can create dust and debris. I once neglected this step and ended up with a layer of sawdust on my newly cleaned tile—lesson learned! Gathering all necessary tools—such as a drill, screws, plywood sheets, wood glue, and a saw—before starting will streamline the process.
Measuring and Planning Your Reinforcement
Accurate measurements are crucial. Measure the length, width, and depth of your vanity’s interior and exterior to determine the size of plywood sheets needed. Think of this like building a backbone; your plywood acts as the skeletal support for the particle board. I cut mine slightly oversize initially, then fine-tuned the fit during assembly to ensure snugness without forcing anything. The goal is to create a sturdy frame that evenly distributes weight and resists moisture.
Cutting and Preparing the Plywood
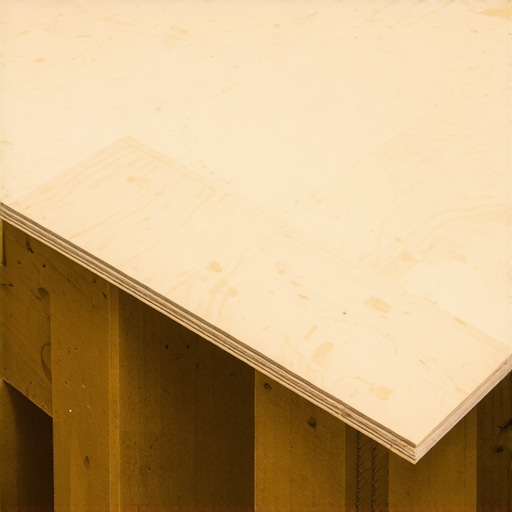
Use a handsaw or circular saw to cut plywood sheets into panels matching your measurements. Opt for high-quality, moisture-resistant plywood—marine-grade if possible—as it offers added durability in humid environments. When I cut my first panel, I kept the waste piece to reinforce corners or be used as shims later. Sand all edges smooth to prevent splinters and ensure tight joints.
Securing the Plywood to the Vanity Frame
Apply a generous bead of wood glue along the edges where panels will meet. Clamp the plywood pieces in place or use weights to hold them temporarily. Drill pilot holes before inserting screws—this prevents splitting—and fasten the panels securely to the existing frame. Think of this step like stitching a supportive band around the vanity: it binds everything together for extra strength. I remember having a sticky moment when I drilled too close to the edge and split a panel; slow and steady wins here.
Adding Additional Support for Heavy Countertops
If your vanity will support a heavy quartz or stone top, install extra horizontal braces beneath the plywood reinforcement. Use 2x4s or plywood strips attached with screws at strategic points—especially near where the sink or heavy hardware rests. I once added an extra cross-brace in the middle of my vanity, which prevented sagging even after installing a hefty marble top.
Sealing and Finishing for Moisture Resistance
Seal all plywood surfaces with a waterproof polyurethane or clear acrylic finish to prevent moisture absorption. Apply at least two coats, sanding lightly between layers. This step is vital in a bathroom setting, as moisture is relentless. I sprayed a few coats, which created a glossy barrier that lasted over two years without issues.
Reinstalling Vanity Components and Final Checks
Once the reinforcement is complete, reattach hardware, adjust doors or drawers, and ensure the unit sits even. Check for wobbling—if present, add shims to uneven legs or support points. Remember, a solid vanity not only lasts longer but also feels more stable during daily use. After my reinforcement, I noticed my drawers closed more securely, and I didn’t worry about weight-induced warping anymore.
By following these precise measures, you transform a fragile particle board vanity into a resilient, moisture-resistant fixture that can handle years of humid bathroom conditions. For more detailed strategies on custom enhancements, consider exploring design tips for 2025 and innovative storage ideas that complement your reinforcement efforts.
 When it comes to designing or upgrading bathroom vanities and storage spaces, many people fall prey to myths that can lead to costly mistakes. One widespread misconception is that choosing high-quality materials alone guarantees long-term durability. While material quality is important, the nuanced installation techniques and reinforcement strategies play an equally crucial role in ensuring longevity, especially in humid environments. For instance, neglecting to incorporate proper moisture-resistant reinforcements, like those discussed in my previous sections about plywood reinforcement, often results in premature failure despite quality materials.
Another false belief is that minimal or no customization can achieve optimal storage. Many assume off-the-shelf solutions are sufficient, but tailored built-ins dramatically improve space utilization and aesthetics. Customization allows for precise measurements and integration with existing architecture, reducing clutter and enhancing functionality. Explore innovative built-in storage ideas to see how bespoke solutions outperform generic options every time.
People also often overlook the importance of proper installation alignment and support. Without attention to detail—such as installing appropriate internal steel supports or using hidden cleats—built-ins can sag or shift over time. For example, the common mistake of relying solely on drywall anchors for heavy installations can be disastrous. Instead, integrating robust support systems, like steel support strategies detailed in sub-frame techniques, ensures stability and safety.
Why Does Flawless Installation Require More Than Just Hardware?
Many assume that attaching a vanity or built-in cabinet is straightforward—screw, level, done. However, advanced installation involves understanding load distribution, moisture barriers, and structural reinforcement. Overlooking these aspects can cause sagging, misalignment, or even structural damage. A study published in the Journal of Building Engineering emphasizes that meticulous support planning reduces failure rates for heavy fixtures, especially in older or damaged walls. Incorporating hidden steel plates or specialized anchors can make all the difference in the durability and appearance of your installation.
Have you ever fallen into this trap? Let me know in the comments. Remember, mastering these nuances elevates your projects from average to expert—so take the time to plan, reinforce, and customize properly. For more insight into seamless and durable storage solutions, explore design tips for 2025 and other advanced strategies that ensure your built-ins last a lifetime.
Choosing the Right Tools for Long-Lasting Installations
To ensure your vanities and built-ins stay durable and functional over time, investing in high-quality, precise tools is essential. I personally rely on a professional-grade cordless drill, such as the DeWalt DCD991P2, which offers a powerful motor and variable speed control. Its ergonomic design reduces fatigue during extended projects, and its brushless motor ensures longevity. Additionally, a digital angle finder, like the Klein Tools Digital Angle Gauge, helps maintain perfect alignment during installation, preventing issues like sagging or misfit after years of use. Using these tools allows me to achieve seamless finishes and ensures that every component withstands daily wear and moist bathroom conditions.
Implementing Maintenance Routines for Long-Term Results
Maintaining your vanities and built-ins involves regular inspection and cleaning. I recommend quarterly checks for loose hardware, worn seals, or signs of moisture infiltration. Applying a high-quality waterproof sealant, such as Varathane Exterior Polyurethane, to plywood reinforcements and exposed surfaces creates a resilient barrier against humidity. Also, keep the hardware tight—over time, screws can loosen from bathroom vibrations. A quick tighten with a cordless screwdriver keeps everything secure. Incorporating a moisture detector, like the Eve MoistureSmart Sensor, into your routine alerts you to hidden leaks or rising humidity levels that could jeopardize your investments.
How do I maintain built-ins and vanities without hassle?
Strategic planning for ongoing care is key to long-term satisfaction. Keep a maintenance log to track inspections, sealant reapplications, and hardware adjustments. Regularly clean surfaces with non-abrasive cleaners that won’t damage finishes—simply using a damp microfiber cloth paired with a mild soap does the job. For built-ins supporting heavy countertops, periodically check support brackets and reinforcement canes to ensure they remain secure, especially after any remodeling or wall repairs. As trends evolve towards crafted precision and integrated support systems, staying vigilant with simple maintenance can double the lifespan of your custom installations.
The Future of Vanity Maintenance and Scaling Tips
Looking ahead, automation and smart monitoring are poised to revolutionize how we maintain home fixtures. Imagine receiving app notifications when humidity levels approach damaging thresholds or when hardware needs tightening. Integrating IoT-enabled sensors into your built-in systems could soon provide peace of mind, especially for those with extensive or high-end installations. To prepare for this evolution, start incorporating durable reinforcement strategies now, such as plywood reinforcement hacks and waterproof sealing. Experiment with storing and organizing your tools using custom solutions like those discussed in creative storage ideas. These practices position you ahead in maintaining and scaling your bathroom upgrades seamlessly.
Conclusion — Start Reinforcing Your Investment Today
Don’t wait for issues to develop—proactive maintenance paired with the right tools ensures your vanities and built-ins remain impeccable for years. Try integrating a moisture detector sensor into your routine or upgrading your toolkit with a precision angle finder to enhance installation accuracy. Remember, the small investment today pays off with long-lasting, beautiful results tomorrow. For comprehensive guidance on endless storage optimization, explore design tips for 2025 and bring your bathroom projects to the next level.
What I Didn’t Expect: Reinforcement Made All the Difference
One of the biggest surprises was realizing that even high-quality plywood, when properly installed, could outlast the entire particle board vanity. It was an eye-opening moment that taught me the importance of support and moisture resistance over just material choice. This insight reshaped my entire approach to bathroom upgrades and emphasized that reinforcement isn’t an optional detail—it’s essential for durability.
Tools and Techniques That Changed My Game
Investing in a good cordless drill and a moisture-resistant plywood was transformative. These tools, combined with precise measurement and sealing, turned a stressful project into an empowering experience. If you’re considering a bathroom rebuild, my tip is to prioritize quality tools; they save time and ensure a professional finish that lasts for years.
Embracing the Power of Prevention
The most valuable lesson was understanding that proactive reinforcement prevents costly repairs down the line. By sealing plywood surfaces and adding extra supports for heavy countertops, I avoided sagging, warping, or worse. Building with longevity in mind isn’t just about heavy-duty support—it’s about embracing a mindset that values quality and foresight over quick fixes.
Curated Dive Into Expert Resources
For more advanced reinforcement strategies, I highly recommend exploring the plywood sub-frame strategy. It’s helped me solidify my installations, especially when supporting heavy stone or quartz tops. Additionally, innovative storage ideas have provided creative ways to maximize space while maintaining structural integrity. These trusted sources have become my go-to for ensuring my projects stand the test of time.
Step Into Your Next Project Confidently
The journey of reinforcing vanities taught me that patience and attention to detail can dramatically extend the lifespan of your bathroom fixtures. Whether you’re planning a small renovation or a complete overhaul, I encourage you to embrace these lessons. Reinforcement is more than a technical step—it’s a way to invest in peace of mind and lasting beauty. Ready to elevate your bathroom? Share your plans or questions below and let’s build something that lasts.