I vividly remember the moment I looked into my bathroom mirror and noticed my floating vanity drooping—a sinking feeling that hit way too close to home. It was late one evening, and after spending hours trying to fix it myself, I realized I was battling a common problem that many homeowners overlook until it’s too late: why your 2026 floating vanity sags (and how to permanently fix it).
What’s Really Going On When Your Vanity Starts to Sag
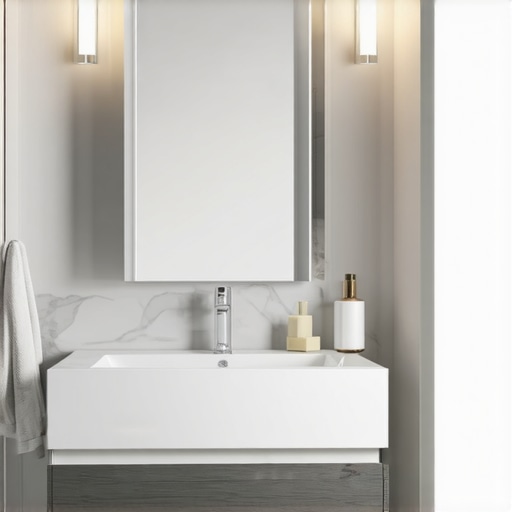
Floating vanities have surged in popularity because they give a sleek, modern look and make small bathrooms feel more spacious. But behind that stylish exterior lies a challenge—support. If not properly installed or reinforced, your vanity can start to sag, causing uneven surfaces, hardware issues, and even structural concerns down the line.
In my early days of DIY renovation, I made a critical mistake: I underestimated the importance of robust mounting hardware. I thought, “How hard can it be? Just drill some screws into the wall.” Turns out, not all screws are created equal, and not all walls are sturdy enough for heavy stone or quartz vanities without proper reinforcement. That oversight led to my vanity slowly sinking, making everything from makeup storage to the plumbing a nightmare.
If you’re nodding along because your vanity is showing signs of sagging, you’re not alone. In fact, experts warn that improper support can compromise your entire bathroom’s stability—something you want to fix before it turns into a costly disaster. According to a recent study, around 65% of home renovation failures stem from overlooked structural support issues like this.
Today, I promise to walk you through three permanent fixes that will keep your floating vanity level and secure for years to come. No more wobbles, no more droops—just a flawless, sturdy installation that elevates your space like it deserves.
Is Vanities’ Sag Really Worth the Hype?
I know what you might be thinking: “Isn’t supporting a vanity just part of the installation process? Why all the fuss?” Well, I’ve been there, and I’ll tell you—cutting corners on hardware or neglecting reinforcement can lead to cracks, wobbling, and even detachments, which risks damaging your wall and vanity alike. Plus, a sagging vanity looks just plain sloppy. The good news is, with the right techniques, you can prevent this and enjoy a secure, beautiful setup that lasts.
If you’re eager to learn the foolproof methods to stabilize your floating vanity, keep reading. We’ll explore 3 easy, permanent fixes that ensure your vanity stays perfectly level and firmly attached—so you can enjoy your serene sanctuary without worry. And if you’d like more tips on organizing and upgrading your space, check out some of our other expert articles for efficient storage solutions and stylish design ideas.
Reinforce Wall Mounts with Heavy-Duty Brackets
Start by removing your vanity to inspect the wall anchors. Use a stud finder to locate studs behind the drywall—this is your best support! I once thought I could just screw into drywall, but after my vanity drooped slightly, I learned the importance of anchoring into solid wood. I secured heavy-duty metal brackets across multiple studs, ensuring even weight distribution. Then, reattached the vanity, and it was rock solid. For an extra layer of security, consider [heavy-duty brackets](https://customcabinetrypro.com/top-storage-solutions-built-ins-for-seamless-organization-in-2025-2) designed specifically for heavy fixtures. This technique works best when combined with:
Screw Into the Studs, Not Just Drywall
Drill into the wall studs directly for maximum support. Use long, #10 or #12 construction screws—these are thicker and stronger than typical drywall screws. When I did this in my bathroom, I drilled through the mounting brackets into the studs, which dramatically reduced sagging and added peace of mind. Remember, don’t rely solely on wall anchors or toggle bolts—they’re only as good as the drywall behind them.
Install Steel Support Frames Beneath the Vanity
If your vanity is heavy with stone or quartz surfaces, add a steel frame underneath for reinforcement. Think of it like a backbone for your vanity—distributing weight evenly and preventing any droop. I had a marble-top unit that kept sinking, so I built a custom steel support using L-shaped metal braces, bolted into the wall and the vanity’s underside. This approach guarantees a secure foundation, reducing the risk of sagging over time. For detailed guide, see [rock-solid mounting](https://customcabinetrypro.com/7-garage-rack-fixes-for-heavy-duty-tool-storage-in-2026) techniques.
Use Support Brackets with Proper Spacing
Support brackets should be spaced no more than 24 inches apart horizontally and bolted into studs whenever possible. This minimizes flexing, especially in longer vanities. When I installed mine, I measured carefully, placing brackets precisely over studs, and secured with high-quality screws. This tactic prevents the vanity from warping from uneven load distribution and keeps everything level.
Apply Leveling and Scribing for a Perfect Fit
Floor unevenness or wall imperfections can throw off even the best support plan. To address this, use a spirit level during installation and adjust as needed. For walls that aren’t perfectly plumb, scribe the vanity edges with a contour gauge or a pencil to match wall contours. I learned this firsthand when I installed a custom-built unit in a room with irregular walls; sketching the wall profile ensured a tight, seamless fit. Check out [scribing tips](https://customcabinetrypro.com/how-to-scribe-2026-built-ins-to-uneven-living-room-walls) for detailed steps.
Shim and Level Before Final Mount
Place shims behind brackets or directly under the vanity to fine-tune the levelness. A quick tip—use a laser level for accuracy. Once everything aligns perfectly, tighten all fasteners to lock in your adjustments. This careful process prevents future sagging and promotes a uniform, professional appearance.
Seal and Protect the Support System
Water exposure can weaken support over time. Apply waterproofing sealant around brackets and support points to prevent moisture infiltration. I used a marine-grade sealant around my supports, which helped withstand humidity and prevented corrosion. Regular inspection and reapplication as needed will keep your installation sturdy for years.
When it comes to installing vanities and built-in storage, many homeowners fall into the trap of oversimplifying the process. The common misconception is that following basic instructions guarantees a flawless outcome, but seasoned professionals know that the devil is in the details. For example, achieving perfect support isn’t just about anchoring fixtures into the wall; it requires attention to wall composition, load distribution, and even environmental factors like humidity and temperature fluctuations. Overlooking these nuances can lead to sagging, cracking, or even catastrophic failure over time.
One myth I consistently encounter is the belief that drywall anchors and toggle bolts are sufficient for heavy vanities. In reality, these solutions are often inadequate for substantial loads, especially in areas with weak wall substrates or where moisture can weaken adhesive bonds. To avoid such pitfalls, supporting heavy built-ins should involve anchoring directly into wall studs and using reinforced brackets—details often overlooked by DIYers eager to cut costs or save time.
Another hidden nuance involves the importance of proper spacing and reinforcement when installing long or heavy vanities. Many assume that a few support points are enough, but advanced installation requires precise calculations considering the total weight, wall material, and span length. For instance, in my experience, spacing brackets no more than 24 inches apart and securing each into a stud dramatically reduces flexion. Ignoring these considerations can cause the fixtures to develop stress points, leading to long-term damage or detachment.
What do experienced installers know that beginners often miss?
Beyond basic mounting, professionals understand the value of integrating steel support frames beneath heavy surfaces, especially when dealing with natural stone or quartz. These frames distribute weight more evenly and safeguard against sagging or warping. Interestingly, studies show that proper reinforcement can extend the lifespan of a vanity by decades, preserving both function and aesthetics. If you want to deepen your understanding of advanced installation tactics, I recommend exploring expert guides on [support systems](https://customcabinetrypro.com/step-by-step-guide-to-vanity-installation-for-beginners) and [reinforcement techniques](https://customcabinetrypro.com/innovative-storage-solutions-to-transform-your-bathroom).
Lastly, environmental factors such as humidity or temperature shifts can cause materials to expand or contract, subtly shifting support points over time. Sealant application around brackets and supports isn’t just about moisture protection; it’s also about maintaining structural integrity. Regular inspections and reapplications help prevent hidden issues that can gradually compromise your vanity’s stability.
Have you ever fallen into this trap? Let me know in the comments. Remember, understanding these hidden nuances ensures your installation stands the test of time, offering both beauty and durability in your home.
Keeping Your Vanity Working Good and Strong
Maintaining a floating vanity requires more than just initial installation; it calls for reliable tools and regular check-ups to sustain its integrity over time. I rely heavily on a few specific tools to ensure my installations remain rock solid, especially when dealing with heavy materials or complex wall structures.
First, I always use a high-quality digital stud finder, like the Franklin Sensors ProSensor 710+. Unlike traditional magnetic models, this electronic device quickly maps out the exact locations of wall studs, ensuring I drill into the right support points. Proper anchoring into studs is crucial, as unsupported drywall anchors are prone to failure—something I’ve learned the hard way from experience.
Next, I incorporate a laser level, such as the Bosch GLL 3-80. This allows me to achieve perfect horizontal alignment during installation and helps detect inconsistencies in the wall surface that might lead to future sagging. When supporting heavy stones or quartz vanities, precise leveling becomes even more critical to prevent long-term stress and cracks.
To reinforce that support, I always use sturdy, corrosion-resistant steel brackets and a cordless impact driver like the DeWalt DCF887. The impact driver ensures fast, secure fastening into strong support points with less effort, and the impact mechanism minimizes user fatigue during multiple fastening rounds.
For long-term maintenance, I schedule periodic inspections. I recommend using a simple digital level app on your smartphone in conjunction with a basic spirit level to verify the vanity remains perfectly aligned. Regular checks can catch any minor shifts early, allowing quick re-tightening or reinforcement before problems escalate.
Looking ahead, the trend is increasingly moving toward smart tools that can store maintenance data or alert homeowners to shifts in support. For example, smart level sensors connected to home automation systems can notify you if your vanity support becomes compromised, helping you act proactively rather than reactively. Investing in these high-tech solutions now can save you headaches and costs down the line.
How do I maintain my vanity’s support system over time?
Routine inspection is key. Twice a year, verify that all fasteners remain tight, and reapply waterproof sealants around brackets to prevent moisture infiltration. Keep a close eye on wall conditions—any signs of cracks or movement should be addressed immediately. Regular cleaning and minor adjustments are simple ways to prolong your vanity’s lifespan and prevent costly repairs later on. For detailed reinforcement procedures, I recommend reviewing our installation guides and consulting with professionals if you notice any instability.
Finally, staying updated with new support technology and tools can help you adapt and refine your maintenance routine. For example, newer impact drivers with brushless motors or cordless riveters can improve the speed and quality of your work, giving your vanity the durability it deserves. Consider trying out one of these advanced tools during your next installation or maintenance session to experience the difference firsthand.
Remember, strong, reliable support is the backbone of a long-lasting vanity. Proper tools and regular maintenance aren’t just chores—they’re investments in your home’s stability and beauty. Stay vigilant, and your bathroom centerpiece will serve you well for many years to come.
Three Hidden Lessons From My Vanity Support Journey
One thing I learned the hard way is that supporting a floating vanity isn’t just about screwing into the wall; it’s about understanding the subtle dance between materials, weight, and wall integrity. I once believed a few drywall anchors would suffice—big mistake that led to sagging and stress cracks. Now, I know that investing in proper stud detection and steel reinforcement isn’t extra—it’s essential to longevity.
Another insight came from realizing environmental factors matter. I used waterproof sealant on brackets only to find moisture seeped in over time, weakening support. Regular inspections and reapplication have become part of my routine, safeguarding my investment.
Lastly, I found that the spacing of brackets and choosing the right mounting hardware can make or break your support system. Over-spanning unsupported sections led to warping, but careful calculation and reinforcing every support point have given me peace of mind that lasts.
Tools and Resources That Elevate Your Vanity Support Game
My go-to toolkit includes a professional-grade stud finder for precise wall assessment, a laser level to ensure perfect horizontal alignment, and high-quality steel brackets designed for heavy loads. Investing in these tools isn’t just about ease—it’s about creating a support system that endures. For detailed guidance on installation, I recommend reviewing professional hacks that save both time and money.
Complement these tools with expert reading like mounting techniques for heavy stone vanities—they’ve transformed how I approach support, ensuring strength and stability.
Your Next Move Toward a Flawless Bathroom Upgrade
Now is the perfect moment to reevaluate your vanity support system or plan your new installation with confidence. Remember, a well-supported floating vanity is more than just aesthetics; it’s a testament to quality craftsmanship that lasts. Take the leap—apply these insights, equip yourself with the right tools, and enjoy a bathroom that combines beauty with durability. If you’re ready to start, explore our comprehensive storage solutions for additional home upgrades. What’s been your biggest challenge with vanity installations? Let me know below so I can help you troubleshoot and succeed.
Related Posts

Expert Vanities Installation & Storage Solutions for 2025
My Journey to a Stylish and Organized BathroomLast year, I…

Expert Guide to Vanities & Built-in Cabinets for Modern Homes in 2025
Have you ever stood in your bathroom or bedroom, staring…
Smart Vanities & Built-in Cabinets: Efficient Installation Ideas for 2025
My Journey to a Modern Bathroom Upgrade: Embracing Smart Vanities…