

I stood there, coffee mug in hand, staring at what I thought was my office masterpiece: an eight-foot expanse of seamless, stained mahogany. It was the crowning jewel of my efforts in maximizing space with innovative built-in solutions. But as the morning sunlight hit the front edge, I saw it—a distinct, heartbreaking curve right where my keyboard sat. My ‘seamless’ design was literally cracking under the pressure of its own weight. I’d spent weeks planning the perfect layout, only to realize I’d ignored the basic laws of physics. My pens were starting to roll toward the center of the desk like tiny, plastic lemmings. It wasn’t just an eyesore; it was a structural SOS. I’ve been in your shoes, squinting at a desk edge and wondering if it’s just my eyes playing tricks on me. Spoiler alert: it’s usually not. Today, I’m going to show you how to rescue that sagging surface before it tears itself away from the wall.
Why Your Beautiful Built-in Desk is Slowly Dropping in the Middle
It’s a common tragedy in the DIY and custom cabinetry world. We want that clean, airy, floating look, so we instinctively skimp on vertical support. I made the classic mistake of assuming that heavy-duty wall cleats and 3/4-inch plywood were enough to defy gravity over a long span. They aren’t. Most wood species have a very specific limit to how far they can stretch before they begin to deflect under a load. According to data from the USDA Forest Products Laboratory, wood undergoes ‘creep’—a permanent deformation caused by long-term stress—even if the weight isn’t technically exceeding the breaking point. If you’re seeing a dip, it’s often because the span is too wide for the material thickness you chose. It is the exact same reason particle board shelves sag so much faster than plywood. When I built that first desk, I was so focused on the aesthetic that I ignored the ‘Sagulator’ math. I thought I was being clever by hiding my supports, but I was just building a future headache. If you don’t act, you risk seeing your custom built-ins pull away from the wall entirely.
Will a middle leg actually get in your way?
This is the biggest pushback I get from neighbors and clients alike. They worry that adding a support post will turn their sleek workspace into an obstacle course for their office chair. I get it. I used to be a ‘no-legs-allowed’ purist. But here’s the reality: a sagging desk is more than just a visual bummer; it can lead to cracked joints and ruined monitors. If you’re tired of your workspace feeling like a half-pipe, you have to choose between a strategic support or a total collapse. Have you noticed a slight dip in your desktop lately, or are you still in the ‘denial’ phase like I was? While some people prefer internal steel supports for long floating desks to keep that open look, for most of us, a well-placed middle leg is the fastest, most reliable, and most budget-friendly cure. Let’s look at how to install one so it looks like an intentional design choice rather than an emergency splint.
Resetting the Level Before You Reinforce
Before you even think about screwing a leg into the floor, you have to undo the damage gravity has already done. Think of it like setting a broken bone; you can’t just put a cast on it while it’s crooked. I remember a job where a client’s bathroom vanity was bowing so badly that the drawers wouldn’t close—it’s a nightmare similar to why your integrated waste bin is sagging after years of use. I tried to just shove a shim under it, but the wood had developed ‘memory.’ To fix this, you need to gently ‘jack’ the desk up past the level point. Use a car jack with a soft wood block on top to protect the finish, and raise the center about an eighth of an inch higher than perfectly level. This accounts for the slight ‘settle’ that happens once you remove the jack. If you skip this, your support will just keep the sag frozen in time rather than fixing it. This is a crucial step when you want to maximize your space with custom vanities or expansive work surfaces.
Choose the Support That Doesn’t Kill Your Legroom
You have two main paths here: the visible leg or the hidden spine. If you want to keep that open feel, you should look into an internal steel support for long floating desks. These are often flat steel plates or C-channels that you router into the underside of the desk. They act like a bridge girder, providing immense stiffness without taking up a single inch of floor space. I once spent three days routing out the underside of a white oak desk to hide a 1/2-inch thick steel bar. It was a dusty, miserable mess, but the result was a desk that could hold a car engine without budging. It was a night-and-day difference compared to the flimsy way most people follow a step-by-step guide to vanity installation without considering weight.
Applying the Steel Stiffener Strategy
If you’re not up for heavy-duty metalwork, a center support leg is your best friend. But don’t just buy a cheap, hollow leg and call it a day. You want something with an adjustable foot. Floors are almost never perfectly level—especially in older homes—so having that threaded adjustment is the difference between a rock-solid desk and one that rattles every time you type. This is the exact same logic used when using steel stiffeners for extra long living room bookshelves. You are essentially creating a new load path that bypasses the weak point of the span. Imagine your desk span like a suspension bridge; without a middle tower, the cables (or in this case, the wood fibers) have to do all the work. Over time, those fibers stretch in what I call the ‘hammock effect.’
Ensuring the Support Stays Put
The biggest mistake I see is people just resting the desk on a leg without anchoring it properly. If you bump that leg with your office chair, it flies out, and the desk slams back down. You need to secure the top of the leg to the underside of the desk and, if possible, the bottom to the floor or a hidden base. When I was working on a project involving the hidden sub-frame move for supporting massive quartz top vanities, we realized that lateral stability is just as important as vertical support. If your desk is on a slick hardwood floor, a small dab of clear silicone on the bottom of the leg’s foot will keep it from wandering without causing permanent damage to your flooring. This simple friction trick has saved more than a few ‘floating’ installations from a catastrophic shift.Most DIYers think that if a cabinet is heavy, they just need more screws. But there’s a point of diminishing returns where you’re actually perforating the stud and weakening the connection. I see people drive ten lag bolts into a single stud and wonder why your built-in cabinets are pulling away from the ceiling and the fix is usually less about the number of screws and more about the placement. In my experience, two well-placed 3.5-inch screws at the top and bottom of a cabinet rail are far superior to a shotgun blast of hardware. When you over-fasten, you don’t allow for the natural seasonal expansion of the wood, which is how you end up with stop cabinet doors from warping in humid bathrooms or joints that pop like firecrackers in the winter. Use an expert guide to flawless vanity installation tricks tips to learn how to leave room for movement while maintaining a death-grip on the wall.
Why Solid Wood Might Be Your Bathroom’s Worst Enemy
Here is the contrarian truth: solid wood isn’t always the ‘premium’ choice for every scenario. While it looks great, it’s remarkably unstable in high-moisture environments. High-quality MDF with a moisture-resistant core or multi-layered birch plywood is often a smarter choice when you want to maximize your space with custom vanities. The Architectural Woodwork Institute (AWI) notes in their ‘Quality Standards’ that engineered cores provide superior dimensional stability compared to solid lumber in fluctuating climates. If you insist on solid oak in a small, steamy bathroom without a massive exhaust fan, you’re essentially building a sponge that will eventually tear itself apart at the seams.
Could your plumbing be the reason your vanity keeps tilting?
Most homeowners assume a tilting vanity is a floor issue. While the leveling move for vanities on slanted bathroom floors is a common necessity, the ‘oops’ factor usually lies in the pipes. I once worked on a high-end remodel where the vanity kept creeping forward. It turned out the hot water line had zero ‘play’ in it; every time the water got hot, the pipe expanded and physically shoved the back of the cabinet forward. It was a slow-motion car crash. This is why vanity installation hacks that save time and money always include checking for plumbing clearance before you anchor everything down. You also have to be extremely careful with weight; if you’re supporting heavy quartz counters on standard wood vanities, your frame might be compressing under the load, making it look like the floor is the problem when it’s actually structural fatigue. Have you ever fallen into one of these ‘hidden’ traps where the house seemed to fight your installation? Let me know in the comments.
The Two Tools That Keep My Built-ins From Sagging Years Later
I never walk onto a job site without my FLIR C5 thermal camera. Why? Because it’s the only way to spot a pinhole leak behind a vanity before it rots your base. When we talk about longevity, it isn’t just about the initial install; it’s about monitoring the environment. If you want to avoid why your vanity plumbing is leaking into the cabinet base 3, you have to be proactive. Another essential is a high-end laser level like the Bosch GLL3-330CG. I use it every six months on my own eight-foot desk to check for that ‘creep’ we discussed earlier. Wood is a living material, and even with the internal steel support for long floating desks, seasonal shifts happen. The Kitchen Cabinet Manufacturers Association (KCMA), under the ANSI/KCMA A161.1 standard, mandates that wall cabinets must withstand 200 pounds, but in my experience, real-life loads—like a stack of heavy law books or a solid stone countertop—test those limits daily. If you aren’t checking your levels, you’re just waiting for a joint to pop. 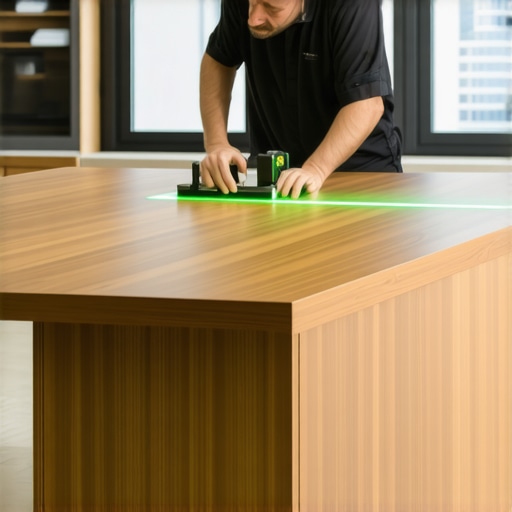
How do I maintain my custom built-ins without a full renovation?
Maintenance is usually the last thing on a DIYer’s mind, but it’s the difference between a ten-year piece and a fifty-year piece. Every spring, I go through and tighten the hinge plates. It sounds tedious, but heavy use causes micro-vibrations that back screws out of their holes. This is exactly why cabinet doors sag and the three-hinge solution is such a game-changer for larger units. You should also be looking at your seals. In high-moisture areas, your silicone will eventually fail. If you don’t re-caulk the junction where the wood meets the tile, you’re inviting rot. For those of you who used creative storage solutions for vanities declutter in style, make sure you aren’t overloading pull-out trays beyond their rated capacity—usually 75 to 100 lbs for standard slides.
Forget Wood: Why Carbon Fiber is the Future of Built-ins
I predict that within the next decade, we are going to see a massive shift away from heavy steel plates toward carbon fiber reinforced polymers (CFRP) in home cabinetry. We’re already seeing this in high-end architectural millwork. Carbon fiber offers a strength-to-weight ratio that makes steel look like wet cardboard. Imagine a ten-foot floating shelf that is only an inch thick but can support a literal library of books without a single support leg. Until that becomes affordable for the average homeowner, we have to stick to our stop cabinet doors from warping in humid bathrooms 2 tactics and heavy-duty hardware. If you’re working in an older home with questionable framing, knowing the secret to mounting-heavy floating vanities on old lath and plaster will save you more time and money than any high-tech material ever could. I challenge you to grab a level this weekend and check your longest span; if you find a dip, try the ‘shim and jack’ trick I mentioned before you let it go another month.
The Hard Truth About My Failed Projects
Looking back at that first curved mahogany desk, I realized I fell for three common myths that almost cost me the entire installation. First, I thought thickness equaled strength; it doesn’t. A thick board of a soft wood like pine will still bow faster than a thinner piece of reinforced plywood. Second, I assumed that once I leveled a desk, it stayed level. In reality, wood is a hydraulic sponge that moves with the seasons. If you don’t account for this, you’ll eventually need to know why your built-in cabinets are pulling away from the ceiling and the fix before the whole unit shifts. Finally, I learned that ‘hidden’ supports are only worth it if they actually work. If a steel bracket is too thin, it just becomes a very expensive, hidden spring that bounces every time you type. Use an expert guide to flawless vanity installation tricks tips to ensure your supports are beefy enough for the real-world weight of monitors, books, and coffee mugs.
My Go-To Gear for Leveling
When I am working on maximizing space with innovative built-in solutions, I rely on a few specific resources to keep things straight. I always double-check my spans against the ‘Sagulator’—an online calculator based on USDA wood data. For physical tools, the Bosch GLL3-330CG Laser Level is non-negotiable for finding the high spots in a floor. If I’m dealing with moisture-heavy areas, I refer to the Architectural Woodwork Institute (AWI) standards to pick the right engineered core. I also highly recommend looking into creative storage solutions for vanities declutter in style to ensure your internal organization doesn’t add unnecessary dead weight to a floating structure. These resources take the guesswork out of the build and move you from ‘hoping it holds’ to ‘knowing it stands.’
Your Turn to Beat Gravity
Repairing or reinforcing a built-in isn’t just about preserving a piece of furniture; it is about reclaiming the functionality of your home. Whether you choose to install a discreet middle leg or go the distance with internal steel stiffeners, taking action now prevents a total structural failure later. You have the tools, the math, and the strategy to fix that dip for good. There is a special kind of satisfaction in sitting down at a desk that is perfectly flat and rock-solid. Go grab your level, check your longest spans, and start maximizing space with innovative built-in solutions that actually stand the test of time. Have you ever heard a loud, mysterious ‘crack’ in the middle of the night and realized your desk was finally giving up? Let me know in the comments below.