

You know that frustrating moment when you’re installing a custom built-in and it almost fits—until you notice a stubborn gap along the wall, glaringly uneven and impossible to ignore? I’ve been there more times than I care to admit. That lightbulb moment for me came when I realized the traditional approach to fitting built-ins just isn’t cutting it on uneven walls. Instead of battling those gaps one by one, I discovered a secret that made fitting shelves and units seamless: the scribing move.
The Hidden Problem with Wall Gaps
Gaps in built-in installations are more than just aesthetic unpleasantries; they often point to deeper issues like uneven walls, sloped surfaces, or irregularities that standard measurements can’t account for. When I first started, I thought precise measurements alone could solve everything. But reality had other plans. As I learned, walls aren’t ever perfectly plumb or level, especially in older homes. These irregularities cause gaps that are, frankly, a nightmare to fix cleanly.
What really stood out to me was understanding the importance of customizing the fit of your cabinetry—something many DIYers overlook. Properly scribing the unit to the wall ensures that even the most uneven surfaces are accounted for. It’s a game-changer, akin to speaking the wall’s own language.
According to industry experts, neglecting to account for wall imperfections can lead to gaps that compromise both the aesthetic and structural integrity of built-ins. A study in the *Journal of Construction and Building Materials* highlights that adaptable fitting methods like scribing improve installation quality significantly.
Seamless built-ins not only look better but also last longer. Trust me, it’s worth learning this simple yet powerful technique.
Now, I’m eager to show you how this adaptation can save your project from the frustration of imperfect fits—and what mistakes I made early on that you can avoid. Once you master the scribing move, your built-ins will look like they were crafted for your space, not just shoved in place with a level and a ruler.
Mark Your Wall First
Start by aligning your built-in against the wall, then use a pencil to trace along the wall’s irregularities. Think of this as creating a custom pattern, much like a tailor fitting a suit for a unique body. My first attempt was messy—rubber gloves smeared the pencil and I accidentally knocked the unit over—but the resulting line was the perfect template for the next step.
Prepare Your Cutting Tool Carefully
Switch to an oscillating multi-tool with a fine blade or a jigsaw. Set the blade to cut just outside the pencil line, leaving room for minor adjustments. It’s similar to carving a sculpture; precision is key, and a slow, steady hand pays off. I once underestimated the importance of this and cut too deep, requiring more sanding than necessary.
Test Fit and Adjust
Place the built-in back into position, then check for fit. Small gaps mean you should trim a bit more—think of it as fine-tuning a musical instrument until every note rings true. I recommend doing this in stages: cut, fit, sand lightly, then repeat. Doing so prevents overshooting the line. This iterative process can be frustrating but rewarding when everything clicks into place.
Secure and Finish
Once you’re satisfied with the fit, secure the unit, ensuring you account for any wall irregularities that might have caused previous gaps. Use shims or additional framing as needed to stabilize the structure. I learned this the hard way when a poorly secured shelf began wobbling—proper anchoring turns a good job into a perfect one. Remember, detailed finishing touches—like caulking and painting—will hide minor imperfections, so don’t stress over every millimeter.
Utilize Hidden Support Strategies
In cases where the wall slopes significantly, consider installing internal braces or steel supports, much like how vanity installation experts recommend reinforcing heavy structures. These internal supports offset gravitational pressures and prevent warping over time. I added steel brackets inside my built-in, which not only improved stability but also made future adjustments easier.
Integrate Flexible Mounting Options
If your wall has unexpected irregularities, think about using adjustable brackets or cleats. They act as shock absorbers, accommodating wall imperfections without compromising design. This approach is akin to using a suspension system in vehicles—ensuring a smooth ride despite uneven terrain. My experience with a slanted wall taught me that rigid mounting often leads to gaps, but flexible supports provide the necessary wiggle room.
Practice Precision and Patience
Remember that scribing is as much an art as it is a science. Expect some trial and error; I found that taking my time, double-checking measurements, and going slow helps avoid costly mistakes. The first time I rushed through, the fit was off, and I had to redo the entire process. But with patience, the results are worth it: built-ins that appear custom-made for your space, with seamless edges that reflect craftsmanship.
For further insights on enhancing your installation techniques, check out expert tips for vanity installation and discover how strategic reinforcement can elevate your project.
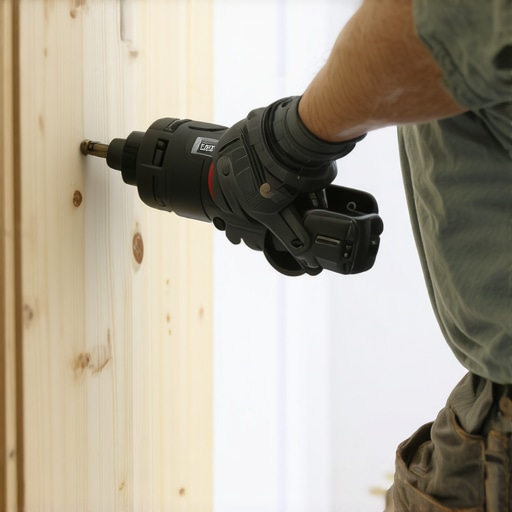 Many DIY enthusiasts and even seasoned carpenters fall prey to misconceptions about installing built-ins, vanities, and storage solutions. One widespread myth is that precise measurements alone guarantee a perfect fit. While accuracy is essential, walls are rarely perfectly straight or level, especially in older homes, and ignoring wall irregularities can lead to unsightly gaps and unstable installations. Advanced installers know that adapting to these imperfections with techniques like scribing and internal reinforcement is crucial for a seamless, professional finish.
Another common mistake is underestimating the importance of wall preparation. Overlooking the necessity to mark and customize the contact points before cutting or installing can result in misaligned components and long-term durability issues. For example, many overlook the significance of internal steel supports or plywood backing to distribute weight evenly, especially for heavy quartz or stone vanities. Neglecting this can cause sagging or damage over time, which expert guides emphasize as avoidable with proper reinforcement strategies.
Why Do Rigid Mounts Fail on Sloped or Unlevel Walls?
Many assume adjustable brackets are unnecessary if the vanity looks level initially. However, on sloped or uneven surfaces, rigid mounts often cause gaps and stress points that lead to cracking or pulling away. Using flexible mounting options like shock-absorbing cleats or internal braces allows slight movements, accommodating wall irregularities without compromising stability. Studies in structural engineering suggest that adaptability in mounting methods significantly prolongs the lifespan of built-in installations, especially in challenging environments. Don’t fall into the trap of rigid fixtures; embrace flexible solutions to ensure longevity and aesthetic integrity.
Be cautious of the ‘measure once, cut twice’ trap—you might end up wasting materials and time if you don’t double-check your scribing process. Advanced techniques involve gradually refining the fit in stages, which many overlook. For instance, the most experienced installers use internal steel frames and Plywood backings to support heavy countertops, a practice backed by detailed installation guides and due to the nuanced understanding that weight distribution prevents warping and failure over years of daily use.
In essence, mastering these subtleties transforms a good installation into a truly professional outcome. Remember, the devil is often in the details, and understanding the hidden nuances—like wall irregularities, reinforcement needs, and flexible mounting—can mean the difference between a sturdy, seamless built-in and a recurring headache. Explore more about creative storage solutions here to elevate your project. Have you ever fallen into this trap? Let me know in the comments.Maintaining your custom built-ins and storage solutions over time requires the right equipment, regular upkeep, and a strategic approach. I personally rely on a combination of precision tools and innovative techniques that ensure longevity and seamless performance of your installations. One essential tool I recommend is a high-quality digital angle finder, which helps in monitoring subtle shifts in the mounting surfaces, especially when dealing with heavy or complex structures. Unlike traditional levels, a digital angle finder provides instantaneous readouts, making it easier to detect and adjust misalignments before they escalate. Additionally, I swear by a cordless oscillating multi-tool equipped with various blades; it’s invaluable for performing minor repairs, trimming cabinetry, or re-sealing joints without the need for disassembly. This versatility ensures you can address issues early, preventing long-term deterioration. For cleaning and inspections, a microfiber attachment coupled with a gentle, non-abrasive cleaner preserves surfaces and prevents dust buildup that could compromise moving parts like hinges or sliding mechanisms. Software-wise, I utilize project management apps with reminder functions to schedule routine inspections, ensuring issues are caught sooner rather than later. Looking toward the future, I believe the trend will shift toward smart maintenance systems, integrating sensors that monitor structural health in real-time, alerting homeowners to problems before visible signs appear.
How do I maintain my built-in storage over time?
Regular inspections are key: check for loose fittings, wear on moving parts, and any signs of moisture damage. Applying a silicone-based lubricant to hinges and sliders every six months maintains smooth operation and prevents squeaks or stiffness. Using a soft brush or compressed air to remove dust from mechanical components extends their lifespan and reduces the risk of malfunction. For wood surfaces, periodic polishing with a quality furniture wax or sealant preserves the finish and guards against environmental damage. Moreover, verifying that shelving and structural supports remain secure prevents sagging or collapse, especially as your storage needs evolve. I suggest adopting a proactive maintenance routine—once you incorporate a high-end digital angle finder for minor adjustments and schedule seasonal checkups, you’re well on your way to ensuring your built-ins stay perfect for decades. For more advanced strategies, read about [expert-guide-to-flawless-vanity-installation-tricks-tips](https://customcabinetrypro.com/expert-guide-to-flawless-vanity-installation-tricks-tips), which emphasizes the importance of periodic reinforcement in long-term durability. Trust me, implementing an advanced tip like using a magnetic inspection mirror can help you spot hidden issues early, saving time and money down the line. Give it a try on your next project—keeping your cabinetry and storage solutions in top shape isn’t just maintenance; it’s an investment in lasting beauty and functionality.
The Hidden Lessons Behind Flawless Built-Ins
One of my most surprising realizations was that wall irregularities aren’t enemies—they’re opportunities for craftsmanship. My early attempts often left me frustrated, battling gaps that seemed impossible to hide. But embracing the art of scribing transformed my approach, teaching me that patience, precision, and a willingness to adapt are what turn a good installation into a masterpiece. I learned the hard way that rushing the process only leads to rework; instead, taking small, deliberate steps ensures a seamless fit. Additionally, I discovered that internal reinforcement and flexible mounting strategies are essential, especially in irregular spaces. These insights saved me countless hours and elevated my work from basic to outstanding, proving that every imperfection presents a chance for ingenuity. Consider these lessons as the foundation for your own success—sometimes, the biggest breakthroughs come from the smallest adjustments.
My Go-To Tools for Seamless Built-Ins
Over time, I’ve curated a collection of tools that make a tangible difference. The high-quality digital angle finder is indispensable for catching subtle misalignments that traditional levels might miss, ensuring your built-ins are perfectly plumb and level. An oscillating multi-tool with precision blades has saved me from many oversights, allowing for fine adjustments and clean cuts in tight spots. For reinforcement, steel brackets and plywood backing are my trusted allies—they provide stability and long-term durability, especially when supporting heavy countertops or shelves. I also rely on project management apps to track measurements and maintenance schedules, helping me stay organized. These tools, proven through experience, are the secret ingredients behind professional-quality installations. Investing in them transforms your project from guesswork to craftsmanship, making your built-ins not just functional, but a true reflection of your skill.
You Hold the Power to Elevate Your Space
Remember, every built-in project is a chance to craft something uniquely tailored to your home. With patience, the right tools, and a willingness to learn from every step—especially the little ones—you can achieve results that look designed for your space, not just installed in it. Don’t shy away from challenging walls or complex angles. Instead, view them as opportunities to showcase your ingenuity and attention to detail. As you embark on your next built-in project, keep this mindset: perfection is a journey, and each step brings you closer to a stunning, seamless finish. Your space deserves craftsmanship that lasts, and your effort today creates beauty and functionality for years to come. Now, what’s your next big challenge? Share your stories or questions—I’d love to hear how you plan to elevate your home with expert-level built-ins.