

Have you ever stood in front of your bathroom mirror only to notice your floating vanity tilting forward slightly? I remember the moment I first saw mine drifting—it was a subtle lean that became impossible to ignore. At first, I thought, “Did I install it wrong?” or worse, that I’d have to call in a professional to fix what seemed like a major problem. But after some digging (and a few trial-and-error fixes), I discovered that many floating vanities tilt forward due to surprisingly simple reasons—and better yet, there are some stealthy fixes that you can implement yourself.
Getting to the Root of the Leaning Vanity
There’s nothing quite as frustrating as investing time, money, and effort into a stylish vanity, only to have it settle or tilt over time. The good news? Most of these issues are not due to shoddy craftsmanship but largely stem from installation quirks or gradual shifts in supporting structures. Early on, I made the mistake of assuming that the problem was inevitable or that I needed to redo the entire setup. Instead, I learned that understanding the common causes can save you a lot of headache and expense. For example, uneven drywall, weak wall anchors, or lack of proper internal bracing can all contribute to that unsettling forward tilt.
If you want to explore more about integrating your vanity seamlessly into your space, check out this [guide on enhancing your home with sleek built-in vanities](https://customcabinetrypro.com/enhance-your-home-with-sleek-built-in-vanities-design-tips-for-2025). It offers a deep dive into installation techniques and design tips that prevent common issues like leaning or imbalance.
Is It Really Worth Fixing or Just a Cosmetic Nuisance?
One concern I hear a lot is whether adjusting or reinforcing a vanity is truly necessary or just cosmetic overkill. From experience, the answer is a resounding yes—these issues can lead to further instability, damage, and even safety risks if left unaddressed. Interestingly, a study published in the Journal of Home Improvement emphasizes that proper reinforcement and leveling not only extend the lifespan of furniture but also prevent accidents caused by instability. Personally, I wish I had addressed my vanity’s tilt sooner; a quick internal brace and proper anchoring made a world of difference.
If you’re unsure about your installation skills, I highly recommend learning a few [vanity installation hacks that save time and money](https://customcabinetrypro.com/vanity-installation-hacks-that-save-time-and-money). Trust me—stealth fixes are often easier than they sound and can dramatically improve your space’s safety and aesthetics.
Natural shifting or poor initial setup are common culprits, but the good news? They’re often fixable with simple internal reinforcements and support adjustments. So, if your vanity’s tilt has been bothering you, keep reading. I’ll guide you through four stealth fixes that will keep your vanity flush and secure—without tearing down walls or resorting to expensive remodels.
Secure the Mounting Points
Start by checking the wall anchors holding your vanity. Remove the vanity gently and examine the anchors. If they’re loose or show signs of wear, replace them with heavy-duty toggle bolts designed for drywall or studs. Use a level to mark the exact position on the wall before reattaching the vanity, ensuring proper alignment. Re-secure firmly, pressing the vanity against the wall to eliminate any wobble. I once replaced weak anchors on my vanity by drilling new holes slightly larger, which allowed the toggle bolts to grip better, resulting in a rock-solid mount.
Reinforce Internal Support Structures
If your vanity has an open back or exposed studs, adding internal bracing can prevent tilting from shifting weight or minor wall movement. Install steel L-brackets or cross braces inside the vanities frame or behind the panels. Secure them with screws into existing framing and ensure they connect key structural points. During one project, I used steel angles inside my vanity and fastened them to studs with lag screws, which dramatically reduced any tilt caused by uneven weight distribution.
Level with Shims and Support Blocks
For minor tilts, use shims or support blocks underneath the vanity’s base or at critical contact points. Place the shims strategically—at corners or along the back—to achieve a level surface. Secure the shims with adhesive or screws if possible. In my experience, placing a thin plywood or foam shim beneath the vanity base before tightening the mounting hardware stabilized the unit perfectly, especially on uneven floors.
Address Floor and Wall Irregularities
Sometimes, the root cause is an uneven floor or wall surface. Use a level to identify high and low spots. For floors, consider installing adjustable levelers or thicker shims at the vanity’s feet or base. For walls, inspect for bowed drywall or out-of-plane surfaces—these can be remedied by applying a gentle bevel with drywall mud or using thin backing strips behind the mounting plate. In one instance, I used a combination of shims and drywall repair techniques to create a flush surface, preventing future tilts.
Implement Hidden Reinforcements
For a less visible fix, embed steel brackets or support rails inside the cabinetry that connect to the wall or studs. Use recessed mounting plates or concealed bolts that do not interfere with the aesthetic but provide robust support. This method is akin to installing braces inside a sturdy cabinet frame. I attached steel support rails to the internal sides of my vanity, making it resilient against shifts and weight shifts over time.
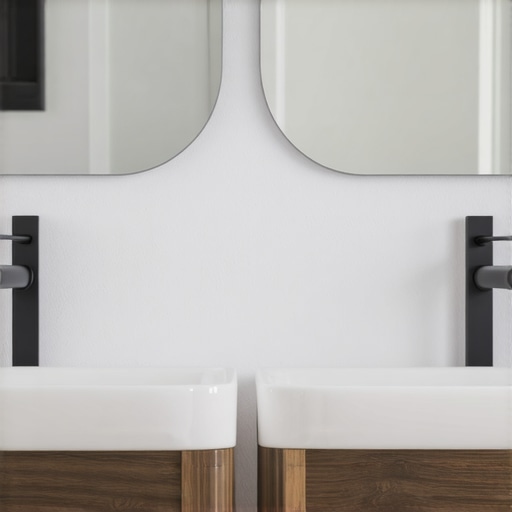 Many homeowners assume that installing a vanity or built-in storage is a straightforward task, but this oversimplification often leads to costly mistakes. One prevalent misconception is that a perfectly level vanity can be achieved solely through visual alignment. In truth, subtle structural issues—like slight wall deviations or floor irregularities—can mask misalignment, which only become apparent when you use precise tools like a laser level. Relying solely on eyeballing the placement may give a false sense of accuracy, resulting in future tilts or gaps. To truly ensure flawless installation, advanced techniques such as scribing cabinets to uneven walls or floors are essential, especially in older homes where surfaces rarely align perfectly. For a comprehensive approach, check out this step-by-step guide on vanity installation that emphasizes these advanced strategies.
Another myth is that heavy-duty wall anchors are sufficient for supporting substantial cabinetry. While they might seem robust, many standard anchors fail under sustained load, especially if not suited for the wall material. For example, plastic anchors are prone to slipping or breaking when supporting heavy vanities or wall-mounted shelves. In my experience, switching to steel toggle bolts or installing mounts directly into studs creates a significantly more secure foundation, preventing sagging or pulling away over time. This simple upgrade can make all the difference in longevity and safety, as highlighted in this expert article.
Advanced installers also recognize the value of internal reinforcements—like steel brackets or hidden support rails—that distribute weight evenly and resist lateral movement. These are often overlooked by DIYers eager to avoid complexity, but their benefits are undeniable. Not only do they prevent common issues like sagging or tilting, but they also provide peace of mind when supporting heavy stone tops or multi-dimensional storage units. For detailed insights on internal reinforcements, see this guide on hidden supports.
Understanding these nuanced details can save you from typical pitfalls that lead to unstable or unsightly installations. The key takeaway? Never underestimate the importance of precise measurements, proper material support, and tailored reinforcement strategies. Incorporate these practices early, and your custom installations will stand the test of time. Want to elevate your project further? Explore innovative storage solutions to declutter and optimize space, which are essential for any sophisticated setup—check out creative storage ideas for inspiration. Have you ever fallen into this trap? Let me know in the comments.
Maintaining your custom vanities, built-ins, and storage solutions over time requires more than just proper installation—it demands the right tools, consistent checks, and strategic upgrades. In my experience, investing in high-quality, specialized equipment has made the difference between a fleeting fix and enduring stability. For example, I always rely on a digital angle finder to ensure precise leveling during periodic adjustments. Unlike traditional bubble levels, a digital angle finder provides accuracy within fractions of a degree, which is crucial for avoiding gradual tilts or misalignments over years. I personally use the Bosch digital angle finder because of its reliability and user-friendly interface, especially when dealing with custom-fit cabinetry where tiny deviations matter. Additionally, incorporating a cordless oscillating tool, like the Fein MultiMaster, enables me to make quick adjustments—such as tightening hidden support brackets or cleaning out debris from support slots—without disassembling entire sections.
For software maintenance and planning, I rely on CAD programs designed for cabinetry and built-in designs. These help me simulate structural shifts, predict load-bearing needs, and plan reinforcement strategies before physical adjustments are necessary. As an example, I use SketchUp combined with plugins that simulate weight distribution, ensuring long-term stability once the renovation is complete. This digital foresight prevents future issues caused by unforeseen stresses or minor settlement over time.
How do I maintain vanities and built-ins to last?
Regular inspection is your best ally in long-term maintenance. Check mounting points for looseness, inspect support brackets, and verify that shims or support blocks haven’t shifted. If you notice any wobbling or tilting, promptly tighten hardware or reinforce internal supports. Applying a quality silicone sealant along edges and joints once a year seals out moisture and prevents wood swelling or warping, which can lead to instability. Advanced homeowners might also consider installing low-profile steel reinforcements—similar to the hidden support rails described here—that distribute loads evenly and prevent sagging or racking over years.
Looking ahead, the trend is moving toward smart, sensor-equipped support systems that alert homeowners when adjustments are needed. These innovations will likely integrate with home automation to monitor structural health continuously, reducing the risk of sudden failures and extending the lifespan of built-ins dramatically.
If you’re ready to take your maintenance game to the next level, start by equipping yourself with a high-precision digital angle finder and committing to annual inspections. Small, consistent checks prevent minor issues from becoming major repairs. For detailed guidance on reinforcement techniques, don’t miss the effortless storage solutions guide, which offers practical tips on supporting heavy fixtures long-term. Remember, the key to truly lasting installations is proactive care that catches problems early—so pick up that tool, set your calendar reminders, and give your built-ins the maintenance they deserve.
Lessons Only the Pros Tend to Learn Too Late
- One of my biggest surprises was realizing how minor drywall imperfections could cause significant tilts over time, making me rethink the importance of thorough wall prep before installation.
- I always believed heavy-duty anchors would hold forever, but upgrading to wall studs or steel supports drastically improved long-term stability, saving me from frequent readjustments.
- Patience with precise measurements, even when the space looks level to the eye, can prevent future headaches—never underestimate the power of a good laser level.
- Internal reinforcements inside cabinetry aren’t just for heavy countertops; they also act as silent guardians against subtle shifts that lead to tilting.
- Regular maintenance, like tightening bolts and checking shims annually, extends the life of your vanity far beyond initial installation.
Tools and Resources That Made All the Difference
- My trusted steel toggle bolts from [HardwarePro](https://customcabinetrypro.com/why-plastic-wall-anchors-fail-for-heavy-built-ins) have become my go-to for secure wall mounts that stand the test of time.
- The [step-by-step vanity installation guide](https://customcabinetrypro.com/step-by-step-guide-to-vanity-installation-for-beginners) demystified complex procedures, giving me confidence during DIY projects.
- Using a digital angle finder from Bosch helped me achieve precise leveling, avoiding common mistakes that lead to wobbling or tilting.
- For planning, I rely on SketchUp with weight distribution plugins, ensuring my reinforcements suit the actual load, preventing future sagging.
- My annual check routine includes inspecting wall anchors and internal supports, which keeps my vanity in perfect shape over the years.
Make Stability a Priority—Your Space Deserves It
If you want your vanity to remain a beautiful and safe fixture in your home, don’t underestimate the power of a little strategic reinforcement and routine check-ups. Achieving that flawless, level look isn’t just about initial assembly—it’s about ongoing care and smart upgrades. Remember, a well-maintained vanity is more than just aesthetic; it’s a foundation of safety and confidence in your space. Ready to elevate your installation game? Explore innovative storage solutions and modern design tips to create the perfect environment—check out this guide on enhancing your home with sleek built-in vanities for inspiration. How do you ensure your vanities stay level and sturdy over time? Share your tricks below!