

I remember the exact moment my dream kitchen started to feel like a lemon. I had just finished a beautiful set of oversized drawers—the kind you see in high-end magazines—designed to hold every heavy pot and pan I owned. I pulled the handle, expecting a silent glide, and instead, I got a bone-jarring thud and a scrape that sounded like sandpaper on hardwood. It was embarrassing. My wife looked at me, I looked at the floor, and the drawer sat there, cockeyed and defeated. If you are currently wrestling with a drawer that requires a gym membership to open, I promise you aren’t alone and, more importantly, it isn’t a death sentence for your cabinetry. We are going to fix that annoying drag today by addressing the structural physics most DIYers (and even some pros) completely ignore.
Your Wide Drawers Are Fighting Against Physics
The truth is, most kitchen layouts today prioritize those massive, 36-inch wide drawer bases because they look incredible. But here is the mistake I made early on: I assumed that if the slide was rated for 100 pounds, it could handle 100 pounds at any width. I was wrong. When a drawer gets wide, the center of the drawer bottom begins to sag under the weight of your cookware, causing the bottom panel to rub against the cabinet stretchers below. It is a common issue when people try innovative storage solutions without considering the structural span. You might have noticed that your drawer slides bind or the face of the drawer looks tilted. This usually isn’t a slide failure; it is a box failure. According to the Woodworkers Institute, material deflection isn’t just about weight—it’s about the span-to-thickness ratio. When that bottom panel bows, it pulls the sides inward, which is how to stop heavy pantry drawers from jumping tracks becomes a daily conversation in your house.
Will a few extra supports actually make a difference?
I know what you’re thinking: I already spent a fortune on these cabinets; shouldn’t they just work? I felt the same way. But even high-end builds can benefit from the heavy duty dowel strategy for wide drawer bases or adding a dedicated center support rail. Have you ever had to lift a drawer slightly just to get it to close? That is the classic sign that your support system is waving the white flag. In my first big kitchen project, I skipped the mid-span reinforcement because I didn’t want to waste time on something no one would see. Within six months, the friction had worn a groove into the cabinet frame. Don’t be like younger me. A simple support fix now saves you from replacing the entire box later. Have you noticed your heaviest drawers starting to sag or catch on the frame lately?
To fix a dragging drawer, you have to think like a bridge engineer. If you have a long span with no support in the middle, it will inevitably bow under pressure. Imagine a suspension bridge without the towers; that is exactly what your wide drawer bottom looks like when it is full of heavy plates. The most effective way to kill that friction is to stop the deflection before it starts. This requires a physical intervention that moves the weight away from the center of the panel and toward the frame.
I once spent three days retrofitting a set of 42-inch drawers for a local bakery owner. She had filled them with heavy bags of flour and industrial-sized rolling pins. The bottoms had bowed so severely they were acting like a brake pad against the cabinet base. I could not just add more grease to the tracks; I had to rebuild the foundation. I took the drawers to the shop, removed the flimsy 1/4-inch panels, and installed a series of longitudinal ribs. It is a similar concept to the heavy duty dowel strategy for wide drawer bases where you create multiple points of contact to distribute the load across the entire span rather than letting it concentrate in the middle.
Upgrade the Bottom Material to Fight Deflection
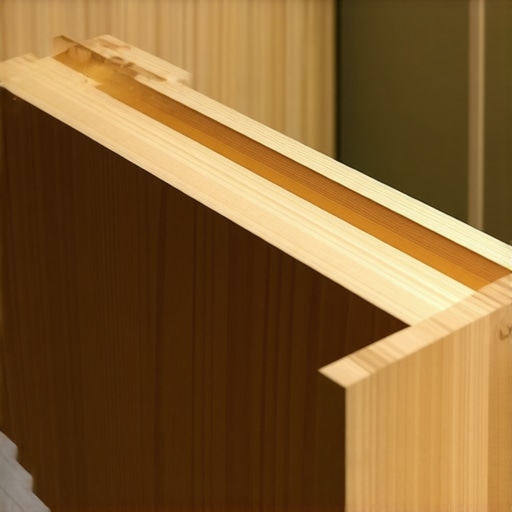
Most stock cabinets use a thin MDF or particle board bottom that is barely 1/4-inch thick. This is fine for silverware, but it is a disaster for wide storage. You should aim for at least 1/2-inch or even 5/8-inch Baltic birch plywood. When you understand why particle board shelves sag and the plywood replacement works, you see that the cross-laminated layers of plywood offer much higher stiffness-to-weight ratios. In that bakery project, switching to a thicker plywood bottom reduced the sag by nearly 80% before I even added the support rails. It turns a floppy panel into a structural component.
Add a Spine to Your Drawer Boxes
If you cannot replace the bottom panel entirely, you can reinforce it from below. I like to install a “spine”—a 1×2 hardwood rail glued and screwed to the underside of the drawer bottom, running from the front face to the back panel. This mimics the internal support move for heavy stone vanities where vertical strength is added to horizontal spans. This spine acts as a structural beam, preventing the “belly” of the drawer from dipping down and catching on the cabinet stretchers. It is an invisible fix that provides immediate relief to your drawer slides.
Reinforce the Box with Mechanical Stiffeners
For drawers that are exceptionally wide or shallow, wood sometimes is not enough to resist the torque of a heavy load. You can use steel angle irons or aluminum C-channels recessed into the bottom of the drawer. This technique is adapted from the steel gusset strategy for extra wide built in desks. By adding a material with a much higher modulus of elasticity, you effectively “freeze” the drawer bottom in a flat position. I have used this trick on sleek built-in vanities where the vertical height was too tight for a wooden rib but the load requirements were high.
Dial in the Alignment with Micro-Adjustments
Even a perfectly rigid drawer box will drag if the slides are out of square. Once you have reinforced the structure, you must verify the parallel alignment of your tracks. If your drawer still feels heavy or hitches at the end of its travel, you might need to stop drawer dragging with this under-mount slide adjustment. Often, the weight of the drawer pulls the back of the slide down slightly over time. A 1/16th-inch shim at the rear of the track can often be the difference between a drawer that feels like it is floating and one that feels like you are dragging a bag of cement across a parking lot.
Here is a hard truth that many cabinet manufacturers won’t tell you: high-end hardware is often used to mask mediocre engineering. I see it all the time. Someone buys a vanity with top-tier soft-close slides, only to find that within a year, the entire unit is leaning. People assume that ‘heavy-duty’ means they can skip the internal bracing, but hardware is only as good as the box it is attached to. In my experience, throwing expensive slides at a weak box is like putting racing tires on a rusted-out sedan. It might look fast in the driveway, but it will fall apart the moment you hit a real road. This is precisely why your soft-close hinges are snapping; they are being forced to compensate for a box that is slowly twisting out of square.
Hardware Isn’t a Substitute for Structural Integrity
The most common mistake I see advanced DIYers make is over-relying on the weight ratings of their drawer slides. Just because a slide is rated for 150 pounds doesn’t mean the side of your cabinet can support that load without bowing. If the cabinet walls are 1/2-inch particle board, the screws holding those slides will eventually chew through the material under a dynamic load. You have to look at the ‘load path’—how the weight moves from the drawer, through the slide, into the cabinet wall, and finally into the floor or wall studs. If there is a weak link anywhere in that chain, the whole system fails. This is a critical part of an expert guide to flawless vanity installation: you aren’t just mounting a box; you are anchoring a structural system.
How Much Leverage Can Your Floating Vanity Actually Handle?
Floating vanities are the ultimate test of structural engineering because they act as a massive lever. Think about it: a 24-inch deep vanity with a heavy stone top is trying its best to pull the screws right out of your wall. Most people focus on the sink weight, but they forget the ‘human factor.’ Someone will eventually lean their full weight on the edge of that vanity while brushing their teeth. According to the Kitchen Cabinet Manufacturers Association (KCMA), structural integrity in these scenarios requires the load to be transferred directly to the building’s framing. This is why I always insist on the steel plate move for drywall mounted floating vanities. Without a metal bridge across multiple studs, you are basically playing a game of ‘will the drywall crumble’ every time you lean in to look in the mirror.
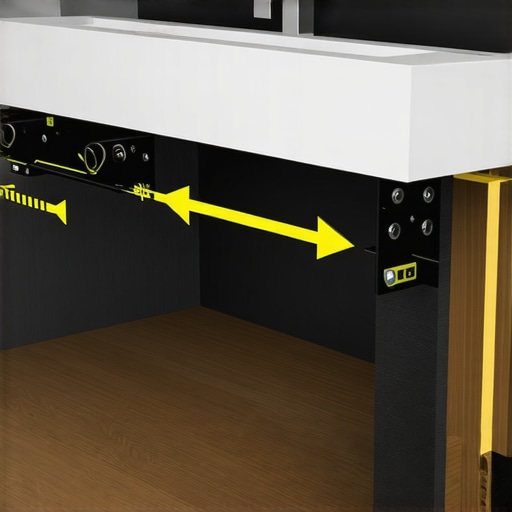
The ‘Oops’ factor often happens when you ignore the vertical sheer force. I once walked into a bathroom where the floating vanity had sagged so much that the plumbing trap had cracked. The homeowner had used standard wood screws into the studs, which is fine for a hanging cabinet but disastrous for a cantilevered vanity holding a marble top. You need more than just screws; you need a hidden support rail for floating master vanities to distribute that downward pressure. If you are retrofitting a space, don’t just hope the studs are in the right place. Open the wall and add blocking. It takes an extra hour, but it saves you a flooded bathroom three years down the line. It is the same logic we use for the internal support move for heavy stone vanities—you build for the worst-case scenario, not the best-case one. Have you ever fallen into this trap where you trusted the hardware more than the structure? Let me know in the comments.
To keep these systems operational for a decade rather than a season, you have to move beyond the initial install and think about the lifecycle of wood and metal. Wood expands, houses settle, and even the best hardware loses its factory lubrication. I have seen countless homeowners invest in expert vanity installation tricks only to ignore the unit until a hinge literally snaps. You need a proactive maintenance schedule that addresses the mechanical stress points before they become structural failures. If you can hear your cabinets working, something is already wrong. Silence is the goal.
How do I keep my heavy drawers and vanities working like new?
Maintenance is not about deep cleaning; it is about mechanical recalibration. Every six months, I recommend a ‘stress test.’ Open your widest drawers and check for any lateral play. If the box wobbles side-to-side, your screws are likely loosening. According to the Blum Technical Product Guide, high-end soft-close mechanisms are tested for 100,000 cycles, but that rating assumes a perfectly square box. The moment your box loses its square, those cycles drop drastically. This is why your soft-close hinges are snapping—they are fighting a geometry battle they can’t win. Take a screwdriver and snug up the mounting plates, then apply a dry Teflon-based lubricant to the tracks. Never use WD-40; it attracts dust and turns into a grinding paste that will destroy your bearings. If you notice a door dipping, do not wait. Implementing a three hinge solution for sagging doors early on can prevent the wood from warping permanently.
The Professional Toolkit for Cabinet Longevity
You cannot maintain precision with a basic tape measure and a prayer. I personally rely on a cross-line laser level for every check-up. A laser does not lie about whether your floor has settled or if your floating vanity is beginning to pull. I also keep a set of digital calipers in my kit to measure the gap between the drawer box and the cabinet side. If that gap changes by even a millimeter, I know I need to stop drawer dragging with an under-mount adjustment before the friction ruins the finish. Having the right tools means you are solving problems with data rather than guesswork. 
Looking Toward the Future of Smart Storage
As we move into 2025, I expect we will see ‘smart’ cabinetry that includes built-in load sensors. Imagine getting a notification on your phone because your pantry shelf is exceeding its weight limit and is at risk of bowing. Until then, we are the sensors. If you have been ignoring a grind or a squeak, go to your kitchen right now and check the tracks. Use the ‘spine’ method I mentioned earlier to reinforce any drawer that feels sluggish. It is the single most effective way to fix loose pull-out pantry tracks for the long haul. Don’t wait for the thud—stabilize your storage today and your future self will thank you for the silence.
The Expensive Myth About Heavy-Duty Hardware
One of the biggest shifts in my perspective happened when I realized that a 100lb load rating on a slide doesn’t mean the drawer can handle 100lb of dynamic force for ten years without help. I used to think buying the most expensive hardware was a shortcut to quality, but that is a myth that often leads to failure. Real durability comes from the box construction. I’ve learned that a well-built drawer with cheap slides will usually outlast a flimsy drawer with premium ones. Also, remember that humidity is the silent enemy of alignment; what works in July might bind in January if you haven’t accounted for wood movement. Always leave that extra hair of clearance when you are applying the structural fix for wobbly entryway lockers to your cabinetry.
My Personal Toolkit for Forever-Level Cabinets
If you want to move from ‘guessing’ to ‘knowing,’ you need a few specific items in your shop. First, a reliable cross-line laser level is non-negotiable for a step-by-step guide to vanity installation for beginners because it reveals floor slopes you can’t see with the naked eye. I also swear by 1/2-inch Baltic Birch for almost every storage project; compared to standard MDF, the rigidity-to-weight ratio is unmatched, which is why the plywood solution is my go-to recommendation for wide spans. Finally, keep a can of dry Teflon spray handy—it provides slick movement without the greasy mess that ruins drawer contents.
Restore the Silence in Your Kitchen
There is a profound sense of satisfaction in a kitchen that operates in total silence. You shouldn’t have to ‘know the trick’ to open your own silverware drawer. By applying these structural reinforcements and focusing on the foundation rather than just the hardware, you are ensuring your storage solutions remain as functional as they are beautiful. Don’t wait until a panel cracks or a track jumps to take action. A single afternoon of shimming and bracing today can prevent a full cabinet replacement five years from now. You have the tools and the knowledge; now go make those drawers glide like butter again.