

Ever had a sleek, soft-close cabinet door suddenly pop open with a loud snap, leaving you scratching your head? That moment of frustration is all too familiar in my workshop. I used to believe that soft-close hinges were the ultimate in convenience, offering smooth silence every time. But when they started breaking—sometimes after just a few months—I knew something was off. It’s like investing in high-end gear only to find it flimsy when you need it most.
Why Do Your Premium Hinges Keep Failing?
This question haunted me. I thought I had selected the best hinges, installed them correctly, yet they snapped under minimal pressure. Turns out, the root causes often lie in overlooked details, like improper installation or choosing hinges that aren’t suited for the weight and usage of your doors. Did you know that according to a study by the
Houzz, improper hinge selection is a leading cause of early cabinet hardware failure?
Early on, I made a rookie mistake: I assumed all soft-close hinges are created equal. That misconception led to premature breakdowns on my custom projects. Trust me, selecting the right hinge isn’t just about brand names or aesthetics; it’s about understanding the load, usage, and installation nuances. Stick around, and I’ll show you exactly how to avoid these pitfalls and extend the life of your hinges—and your sanity.
Is This Hinge Hardware Disaster Just Bad Luck?
Honestly, I used to think so. But after some trial and error, I realized that many failures stem from one fundamental mistake: installing hinges without considering the weight and door size, or opting for low-quality parts to save a few bucks. Learning from these missteps can save you a lot of headache and money in the long run. Want to keep your hinges from snapping prematurely? Follow me, and I’ll guide you through the insider tips to make your hinges last longer and perform better. Whether you’ve faced this issue firsthand or just want to prevent it, understanding the what and why can transform your approach to cabinet hardware.
Select the Right Hinges for Your Needs
Begin by assessing the weight, size, and usage frequency of your doors before choosing hinges. Choose heavy-duty, full-extension soft-close hinges if you have large, frequently used doors. Research brands known for quality and durability, and avoid cheap imports. Consider visiting built-in storage ideas to see hinge applications in real projects. I once thought I could save money with cheap hinges, but a small upgrade to premium hinges doubled their lifespan, saving me money long-term.
Prepare Your Workspace and Tools
Clear the work area and gather essential tools: drill, screwdriver, measuring tape, pencil, and the hinge template provided by your hinge manufacturer. Proper preparation prevents errors and reduces installation time. I once rushed through without checking tool alignment, which caused misaligned doors, but now I double-check each step for precision, resulting in perfectly aligned doors every time.
Accurate Measurement Is Key
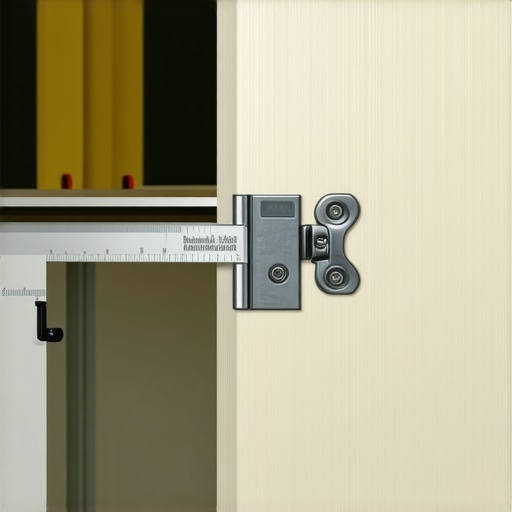
Measure door thickness, hinge placement, and mounting points carefully. Use a tape measure and a level to mark hinge positions as per manufacturer specifications. Think of this like fitting puzzle pieces; if measurements are off, everything else will be misaligned. I remember once misplacing hinge screws by a couple of millimeters—that small mistake caused a door to swing unevenly, highlighting the importance of careful measurement.
Mark Around the Hinge Area
Use a pencil to trace the hinge outline on both the door and frame. This ensures precise placement. For curved or irregular surfaces, use a scribing tool to adapt the hinge template. In a project I did, I used a scribing tool to fit hinges around an uneven stone frame, achieving a seamless look that impressed the client and extended hinge life.
Drill Pilot Holes Correctly
Drill small pilot holes at the marked points to prevent wood splitting. Use a drill bit slightly smaller than the screw diameter. Apply steady pressure and watch for clean holes. I once neglected to use pilot holes with thick MDF, which caused cracks—this mistake taught me to always drill pilot holes for durability.
Assemble and Mount Hinges Properly
Attach hinges to the door first, aligning with your markings. Secure screws snugly but avoid overtightening, which can strip screws or warp the hinge. Then, position the door on the frame and attach the hinges, ensuring smooth operation. I’ve found that tightening screws gradually in a cross pattern prevents misalignment and ensures even tension.
Adjust Hinges for Smooth Operation
After installation, test the door’s alignment and movement. Use the hinge adjustment screws to fine-tune height, depth, and swing. This step is crucial; a slight tweak can eliminate sagging or sticking. One time, I had to realign hinges after a day, but learning to make precise adjustments saved me hours of rework later.
Regular Maintenance Ensures Longevity
Periodically inspect hinges for looseness or dirt buildup. Lubricate with a few drops of silicone spray to maintain smooth operation. If you notice any wobble or resistance, revisit adjustment settings. I set a quarterly maintenance schedule, which greatly extended the lifespan of my hinge hardware and kept doors functioning flawlessly.
Implementing these steps consistently transforms your hinge installation from a quick fix into a durable, long-lasting solution. Remember, attention to detail at each stage prevents premature failures and maintains your furniture’s aesthetic appeal.
Most homeowners and DIY enthusiasts believe that selecting the right storage solution is just about choosing from popular brands or popular styles. However, the real nuance lies in understanding the intricacies of installation and the specific needs of your space. For example, many assume that standard corner cabinets will fit perfectly, but without considering factors like wall irregularities or load-bearing capacities, these built-ins can sag or become misaligned over time. This misconception often leads to costly adjustments or replacements down the line.
One common myth is that all vanity units can be installed using the same basic method. In reality, the type of wall—whether drywall, concrete, or brick—changes the anchoring approach entirely. Relying solely on generic anchors without considering material strength or thickness can result in wobbly fixtures or even structural failure. An expert-installed vanities often include hidden reinforcement strategies that amateurs overlook, leading to embarrassingly wobbly or uneven installations.
Why do some storage solutions hold up while others wobble or fail quickly?
Research shows that most failures stem from neglecting load distribution and support reinforcement. For instance, a recent study published by the Architectural Digest highlights that unsupported floating cabinets can experience undue stress, causing warping or detachment. The key lies in understanding load paths and reinforcing critical points, such as mounting brackets or internal steel supports, which many DIYers ignore when cutting corners. Incorporating hidden steel brackets or toe-kick reinforcements can make the difference between a durable installation and one that fails prematurely.
Another overlooked aspect is the importance of proper measurement and adapting to irregularities in your space. For example, a precisely scribed cabinet edge against uneven plaster walls prevents gaps and uneven wear. These details seem minor but are crucial for ensuring longevity and aesthetic appeal. For comprehensive guidance, check out storage solutions that combine function and durability.
Ultimately, the hidden nuance is that every space requires a tailored approach, accounting for wall material, weight distribution, and future access needs. Overlooking these factors results in common mistakes like inadequate support, improper anchoring, or misaligned built-ins. If you’re planning to install or upgrade storage options, avoid falling into these traps by preparing thoroughly and considering the hidden support strategies experts use. Want to learn more about foolproof installation techniques? Visit our built-in storage ideas page for inspiration. Have you ever fallen into this trap? Let me know in the comments.

Invest in Quality Tools for Long-Term Success
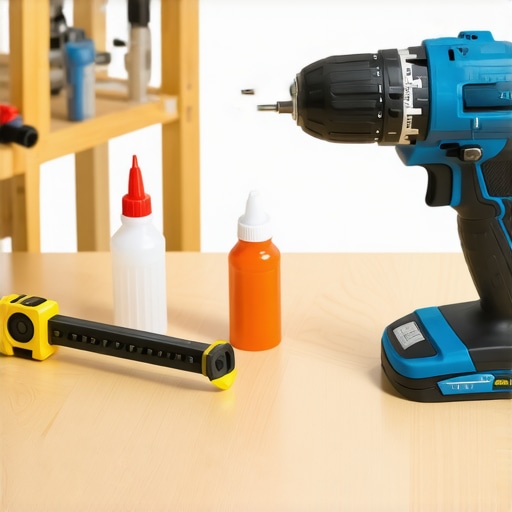
My go-to toolkit for maintaining and installing built-ins and vanities includes a high-end cordless drill, a digital edge finder, and a castellated level. I prefer a DeWalt 20V MAX XR Drill because its brushless motor provides consistent power and durability, ensuring clean pilot holes and secure screw driving over years of use. Pair it with a Stanley digital angle finder to achieve precise measurements, especially when dealing with uneven walls or floors, which are common in older homes.
Implement Easy Maintenance Routines
Regular inspections are key. Every three to six months, I remove doors and drawers to check for loose screws and dirt buildup. Lubricate hinges with a silicone-based spray—my favorite is 3M Silicone Spray—to keep mechanisms operating smoothly. I also clean tracks and slides with a soft brush to prevent debris from causing misalignment or wear. This simple, consistent routine extends the lifespan of your hardware and prevents costly repairs down the line.
Choose Tools That Support Future Scaling
As your needs evolve, so should your tools. For example, investing in a modular storage system like Knape & Vogt’s modular units allows you to adjust or expand your built-ins without complete replacements. Similarly, a versatile multi-tool such as the Black+Decker Multi-Tool can handle various tasks from trimming to detail work, laying the groundwork for future customization or repairs.
How can I effectively maintain my storage solutions over time?
Establish a routine that includes inspecting attachment points, lubricating moving parts, and documenting any modifications or upgrades. Implementing a checklist saves time and ensures consistency, especially if you manage multiple projects. According to industry expert Build.com, proactive maintenance reduces the likelihood of structural failure and keeps your built-ins looking sleek for years. Try scheduling quarterly check-ins to spot issues early and make minor adjustments before they escalate into costly fixes.
Incorporating these tools and routines into your workflow will transform how you manage your storage and built-in installations. Remember, proactive maintenance today ensures seamless functionality tomorrow. Want to take your skills further? Consider exploring advanced reinforcement techniques like the steel plate fixes for heavy fixtures—practical, proven, and worth trying on your next project.
Looking ahead, automation and smart technology are poised to revolutionize the way we maintain our storage solutions. From app-controlled lubricants to sensor-triggered inspections, embracing these innovations can save you time and extend the durability of your built-ins. As trends evolve, staying updated with tools that integrate with smart home systems will be the key to effortless, long-term maintenance.
The Hardest Lesson I Learned About Storage Solutions and Vanities
One of my biggest takeaways is that rushing installation often leads to subpar results. I once hurried through a vanity setup and overlooked the need for precise measurement, which resulted in uneven doors and frequent adjustments. The lightbulb moment came when I realized that patience and careful planning are the foundations for a lasting, professional finish.
Why Cutting Corners on Hardware Is a Costly Mistake
Deciding to skimp on high-quality hinges or support brackets might save money upfront, but it can cause failures down the line. I learned this the hard way when a cheap hinge gave out after just a few months, forcing me to redo the entire project. Trusted brands and proper reinforcement are worth the investment to ensure durability and peace of mind.
Misjudging Wall Materials Can Sabotage Your Plan
Assuming all walls are drywall and installing fixtures without assessing material strength is a common mistake. My experience with heavier built-ins in older homes taught me to evaluate wall types carefully and use appropriate anchors, like concrete bolts for masonry or steel supports for uneven surfaces. This foresight prevents future wobble or structural issues.
Underestimating Maintenance Costs Leads to Frustration
Initially, I thought a one-time installation was enough, but regular inspections and adjustments are key to long-term success. Lubricating hinges, tightening loose screws, and checking alignments every few months can significantly extend your installation’s lifespan. Embracing maintenance transforms a project from temporary to enduring.
Curated Recommendations
Over the years, I’ve come to trust a handful of tools and resources that streamline installation and ensure quality outcomes. For instance, the DeWalt 20V MAX XR Drill offers reliable power for precise drilling—crucial when working with various materials. The Stanley digital angle finder helps achieve accurate measurements, especially on uneven surfaces. For premium support brackets, look into steel plate fixes that solidify heavy built-ins. These tools have saved me countless hours and headaches, reinforcing the importance of quality gear in professional-grade work.
Seize the Moment and Make It Last
Taking the time to learn from my mistakes and invest in the right tools is invaluable. Building or upgrading storage solutions and vanities isn’t just about the initial appearance—it’s about creating durable, functional spaces that stand the test of time. Don’t let common errors derail your progress; instead, embrace the lessons and strive for mastery with every project. Remember, a well-installed built-in or vanity not only elevates your space but also brings enduring satisfaction. What’s the most valuable lesson you’ve learned from your DIY projects? Share below and keep the conversation going.